Monday, December 28, 2009

Recycled Product


My creative juices have been flowing nonstop over the past few days. I have made 8 cards and started working on my newest kits which will be available very soon. These are mini kits-so much fun. Watch for the MyShare Mini Kits coming in January!

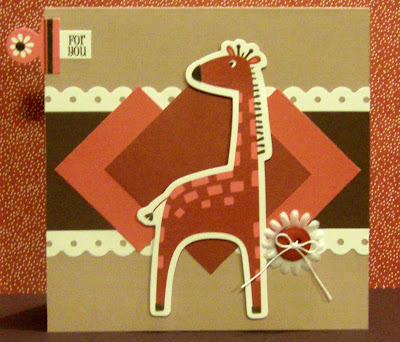
Today's share is made almost entirely from a recycled Basic Grey catalog! I was flipping through it, looking at layouts and cards, when it dawned on me that the samples and images were too pretty to throw in the recycling bin. So, being the cheap...I mean frugal...girl that I am, I grabbed my little scissors and began snipping away. I lifted a card design from Betsy Veldman (you can see Betsy's original card HERE) and began using my little recycled bits. The result: sweet Thank You and Happy Birthday cards feautring Basic Grey's images in sizes that are appropriate for my little cards.

Hope you all had a wonderful Christmas-we certainly did. Now for some much deserved rest!

Monday, December 21, 2009

Santa and Reindeer


These little images by Studio G are just too cute, don't you think? I would LOVE to find this set for myself-these were my mom's. The set also came with a little snowman. What a steal for $1!

As with a lot of my stamped images, I paper-pieced the santa and reindeer. First, however, I stamped both images on the white background, then ran it through my Sizzix Big Kick with a Cuttlebug embossing folder (Swiss Dots.) That way, I didn't have to try to cut out the little antlers and feet. I just colored them in on the white base, then stamped each image on colored cardstock. Since I don't have Copic markers (yet!) I find that I get the cleanest, boldest results from paper-piecing. Stickles add a little sparkle to the images. To finish the card, I stamped "Be Merry" with a Hero Arts stamp, and tied on some ribbon and buttons.

Very simple, but I have to say, this was one of my favorite cards this year.

My first tri-fold card...


and I am so happy with the way it turned out! Anybody who knows me knows that I just adore the little Hero Arts owls, anyway, but I especially love them on this "scenic" card! I saw a similar card created by Kelly Booth posted in the Hero Arts Flickr group. (For some super-cute card ideas, visit Kelly's blog-the link is over on the right.)

Lots of paper-piecing and stickling on this one-two of my favorite stamping techniques. Donna Mikasa (her blog is also linked on the right) has done some cute birthday tri-folds, too. That may be the next one that I try. One thing that I would change next time: I made this card using a 6 x 11" piece of cardstock. Not quite long enough to make the "easel" back to help the card stand up. Next time, I will use a 6 x 12" piece and score at 1", 2", 4", 6", and 9". Does that make sense? If you'd like more detailed instructions, please email me or leave a comment here and I will try to do a better job. ;)

Christmas Gift Card Holders


Here are some gift card holders that I made using Hero Arts stamps. The card design is one that Jennifer McGuire featured last year on her blog. The gift card slides right into the front of the card (you can see mine-it's light blue) into a sleeve. The sleeve is machine-stitched and adhered to the card front. Finally, you add a punched circle to the front of the sleeve and embellish as desired.

I chose to use these adorable little critters from Hero Arts. I love the owl-how cute is he in that little sweater?! I also embossed the white circles with my Cuttlebug Swiss Dots embossing folder, just to make the critters stand out a little bit.

This design is so versatile-you can personalize it for any holiday. Just think of all of the gift cards that you give in a year-birthdays, thank you's (I have some coffee stamps that would be so cute with a Tim Horton's card tucked inside!)

If you haven't checked it out already, you should head over to the Hero Arts blog this week and also check out the Hero Arts Flickr group. They are hosting a two-week contest for cards that hold gifts (including gift cards.) There are some really cute projects there!

Some holiday cards at last!


I have several Christmas cards to share with you! I know I should have posted them sooner, but life has been really crazy here for the past two weeks. My semester is over (hello, Dean's List) and my dad is recovering as much as can be expected from his recent health issues. (More on that later.)

This first card is a fun little card featuring the Penguin Chick stamp from Imaginisce. This was a summer stamp, but I got some more mileage out of it by using it for some whimsical holiday cards. Last Christmas, I received a card from my friend Lana in Hawaii, and it had a hula dancer on it. So, when I got this stamp this spring, I immediately wanted to use it for a Christmas card! So cute, don't you think?

The sentiment is from a set I got at Walmart last year. It went so well with the hula theme.

Thanks for looking, and I will post more later this afternoon!

Friday, December 4, 2009

Holiday Card Trio at Scrapbooking.com

Please check out my latest article at Scrapbooking.com! It features a set of three holiday cards using some of my favorite little Hero Arts critters and snowmen. Click HERE to see the article.
Also, please remember to visit my table at the Bloomfield Elementary Craft Fair tomorrow, which is part of the Holiday Stroll. I have been making TONS of cards, and I have several designs available. I'll still be cranking out cards tonight and finishing up some cute ornaments and tags for the sale. I'm so excited! Hope to see lots of you local girls there. It is at Bloomfield Elementary from 9-2.
Have a great weekend all!

Thursday, December 3, 2009

A link to share with you...

I know I said last week that I would be sharing some holiday cards with you, and I promise that I will very soon. I have been making a TON of holiday cards for the Bloomfield Elementary craft fair this Saturday. I just haven't had a spare minute to photograph and post them! Soon, I promise.
In the meantime, I wanted to share a link with you that not only has lots of great papercrafting ideas, but also a great giveaway this week! Over on the right, you'll see that I have links for some of my favorite papercrafting blogs. Jenn Biederman is a stamper who has some adorable cards online, and I check them out frequently. She has an awesome giveaway in THIS POST. Please check it out!

Monday, November 23, 2009

Bright Pumpkins


One more Thanksgiving card to share today. This one uses bright colors, plus it pairs orange and coral-who would've thought that combination would look good? But the coral matches the stripe in the patterned paper and looks great in real life.

This card is based on CPS Sketch #143. This is a pretty literal interpretation of the sketch, but I dressed it up a little by folding the green paper over the pumpkin image to give it some dimension. The ribbon, button and twine really spice it up.

These pumpkins are from Studio G, and the "Heartfelt Thanks" sentiment is from Hero Arts. All papers are by My Mind's Eye.

Heartfelt Thanks Pumpkins


Here is my second Thanksgiving card of the week. This one is based on this sketch from Get Sketchy. I took quite a few "liberties" with this sketch because I wanted to use a round image and my scalloped circle punch. But I think that it works, don't you?

This is another retired stamp from Stampin' Up (pumpkins) and the sentiment is from Hero Arts. The orange patterned paper is from My Mind's Eye; all other papers are from Heidi Grace.

Thanks for looking!

Bountiful Thanksgiving Card


I have to admit-I've never made Thanksgiving cards before. Finding the time to make them is really tricky, with school, family, COOKING, etc.

My little guy is home sick today (I should point out that my "little guy" is now 1/2" taller than me!) and I only have to bring the pies for Thanksgiving dinner, so I actually had some time to play along with some online challenges and create some Thanksgiving cards. Some of you had asked for some Thanksgiving card ideas, so here are a few. (They will be in separate posts, however, because I'm still learning all the little details about blogging!) :)

This first card is my absolute favorite. I'm going to give it to my mom and dad. It is based on this sketch at the new challenge blog called Everything But the Kitchen Sink. The stamp is from a retired set by Stampin' Up and all of the patterned paper is by Heidi Grace. I cheated-it looks like it is all separate pieces quilted together, but really it is 1"X 4" strips of "strip" paper. I just alternated the patterns and zigzagged between. The stitching took a little while, but I really like the result. If you're in a pinch (or don't have a sewing machine) you could also use rub-on stitches or use a pen and a paper piercer to create faux-stitching.

I have a few more Thanksgiving cards to post, plus I will be sharing some more holiday cards this week.

Thanks for looking!

Sunday, November 22, 2009

Elegant Butterfly Card


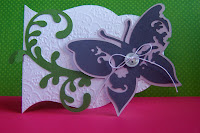
Some of you have already seen this card if you came to my Cricut Card class. This was a fun class where we learned how to make the most of our Cricut cartridges by using die cuts to make shaped cards. Usually I go for cutesy-style cards, but this was one of my favorites from that class.

The card base is a label shape folded in half. I then cut an additional label from smooth white cardstock, cut in half (so that it would cover just the card front) and embossed it with a Cuttlebug folder. I simply adhered it to the front of my card, giving an elegant embossed texture on the outside, but a nice smooth surface on the inside to write a personal note.

Thanks for looking!

Happy Holidays Swivel Card


I think I have enough scraps in my scraproom to last me (and every other papercrafter in Maine) for an entire lifetime. While I love to buy new patterned papers-they're my weakness-I also feel good about using up my scraps sometimes, too. This card was made using all scraps or salvaged items from projects that just didn't work.
This card is based on a sketch by Becky Novacek from the Fiskars website. I changed it a bit, but the general design is the same. Best of all, I used just scraps to make it. The card itself is actually two photo mats that I had leftover from a scrapbook layout. I trimmed them slightly so they were both 4" x 5.5", then rounded the corners. After embellishing the card front, I attached the two cardstock pieces together with a large brad, forming the card. As you can see, it opens by swiveling.
Cardstock by Bazzill (brown) and The Paper Company (white); patterned paper: red and green speckled (unknown-I've had it for about 10 years!), green swirl (American Traditionals), polka dots (Heidi Grace); stamps (Hero Arts); pompom trim (Offray); red stickles, wire, pop dots.
This is also my entry for the Hero Arts "trimmings" challenge on the Hero Arts blog. Be sure to check it out for lots of great ideas for using your "trimmings" (scraps).
Oh, and if you haven't checked it out yet, please go see my article at www.scrapbooking.com. I have a set of three cards for kids featured this month. The article will up until November 30th. Beginning Dec. 1, the site will be featuring a set of three of my holiday cards as well. Very exciting!

Friday, November 20, 2009

Card Patterns Sketch #41


This card is for my friend Michelle and her new daughter, Rylie. I made this using papers and flocked die-cuts from the new Playdate line from SEI. The papers and accents in this set are so cute! The animal prints are perfect for kids, and the line also includes florals, stripes, some geometric patterns and some cute little birdies. I love that some of the papers are pre-flocked, and so are the accents.
Patterned paper, cardstock, die-cuts, button from SEI; silk flower from Imaginisce; rub-on from QuicKutz. Based on CardPatterns Sketch #41.

Tuesday, November 17, 2009

A Simple Thanksgiving Decorating Idea


Hi, All-

I just wanted to share a link with you this morning for a really quick, but very sweet Thanksgiving idea-it would look great on a mantle or a buffet table. Check out THIS cute idea from the SEI blog. (The photo above is from the SEI blog-check out the site for instructions and some cute vintage Christmas ideas, too!)

Looking for a way to do this inexpensively? I found some yummy scentive votives at Reny's for 50 cents each. I believe the scent was Heritage Spice from Village Candle. I picked up a couple but they're gone already. I will definitely be picking up some more!

Friday, November 13, 2009

Another Card with CPS Sketch #141


Here is another card that I made using the same sketch and stamp sets as the Autumn Thank You card. The papers are also from My Mind's Eye. The result was totally different, though, by using different colors and ribbon instead of jute.

I actually sent this card out yesterday as a sympathy card to my cousin's husband and daughter. My cousin passed away last week after a long battle with cancer. Her husband, Jim, and daughter, Dorothy, live in El Paso, Texas. We're keeping them in our thoughts.


An Autumn Thank You


I have had this little leaf stamp for a few weeks now, but just recently had the chance to use it. It is from a fall Studio G set ($1) and I can say that it was a buck well spent. I made a few different cards using it, and here is the first.


This card is based on CPS Sketch # 141. I just love this polka-dot paper from My Mind's Eye. The colors and pattern have a fresh feel and are very versatile. I stamped the little leaf on a distressed white patterned paper, colored them with colored pencils and then stickled them with a coordinating color. The "Thanks" stamp is from Technique Tuesday. I added jute instead of ribbon to keep with the nature theme, and also because this card is going to my brother-in-law who just fixed my laptop for me. (Thanks, Mike-card and cookies coming your way tomorrow!)


Thanks for looking-and stay tuned for more new cards from sketches!

Saturday, October 24, 2009

Halloween treat bag, plus some great deals...


I just love this little fox stamp from Imaginisce. He's actually from the Twitterpated line, but I combined him with some papers and chipboard stickers from the Hallowhimsy line. I couldn't help dressing him up for Halloween!
To make the treat bag, start with a 4"X12" strip of double-sided patterned paper. I used Wicked Whimsy. Score at 4-3/4", 5-3/4", and 10-1/2"; fold. Trim the front flap with decorative scissors (or use a border punch.) Cut a 3"X3" square of harlequin patterned paper (I used Lollipop Lizzy); mat with black cardstock and adhere to front of treat bag. Stamp fox image onto orange orange patterned paper and again on a scrap of the Wicked Whimsy polka-dotted paper. Paper-piece the image and adhere to front of bag. Tie a small piece of white cotton thread around tip of witch's hat sticker; adhere to card front. Add a spider sticker and another scrap of thread for him to hang from. Adhere "sweets" sticker. Finally, punch two holes through all layers of the bag and tie on some lime grosgrain ribbon (mine is from American Crafts.) You can attach a little treat inside with a glue dot-perfect for your extra-special trick-or-treaters!
I also wanted to share some websites which offer "daily deals" on scrapbooking supplies. Check them out!


Monday, October 12, 2009

Some Halloween treats...

that I've come across lately. I have today off from classes (Columbus Day) so hopefully I can squeeze in a little scrappy time before Ryan's football practice.
Check out these links for some cute, not-too-spooky projects:
"Sour Cream" treat holders by Imaginisce
Treat bag toppers by SEI (You can print them if you are a Club SEI member, or be inspired to create your own-I love the one with the leaf-perfect for any fall gathering, not just Halloween)
*NOTE-the treat bag toppers are the second project in this post-just scroll down a bit
Candy corn favor box by Katie Renz in the Splitcoast Stampers Gallery
Haunted House by Kelli Crowe in the 2Peas Gallery (read the directions-she talks about the horrors of dial-up internet-I can vouch for that. :) )---I have seen this chipboard house by Doodlebug done differently, kind of cutesy-this is a cute, kind of quirky, variation.
I'll be back later this week with some of my own creations. I'm off to work on those, plus my submission for the Imaginisce Design Team call. If you've ever taken one of my stamping classes, you already know how much I love their papers and stamps. This is the call I've been waiting for!

Wednesday, October 7, 2009

Halloween Candy Trifold Card


Thought I'd share another Halloween card today. This is based on the trifold, or backfold, design. To make the base of this card, start with a square or rectangular card (any size.) Fold the card front back, down the center, so that the inside of the card shows. It will look a bit like a lop-sided accordian fold. Now you are ready to embellish. I like to use the same paper on both the flap and the inside of the card, add a narrow strip along the fold (this hides any mismatches if you can't match your patterned paper design-like with this text), then embellish with an accent that is adhered to just the front flap.


This candy stamp is from Imaginisce, and the patterned paper is from Heidi Grace.


Also, I have just opened an online store at http://www.shophandmade.com/. The name of the store is ShareCroppers and HERE is the link. You can also search Sherri Thompson and it will find my store. I'm adding cards each day (both new ones and ones you've seen on the blog) so keep checking back regularly for new cards and kits!

Sunday, October 4, 2009

Bewitching Halloween card


This card is very different from most that I make. First of all, I usually choose "open" image stamps-designs that can be colored in with pencils or stamped onto patterned paper. This image was my mom's, and I thought it looked very vintage. I stamped the image on the yellow circle to give the image of a full moon, but thought it still needed something more. I learned how to stamp on twill tape in my Technique Tuesday class at CKC-Manchester and had gotten a package of the twill tape at the vendor faire. Like so many of my purchases, the package was sitting, unopened, on a shelf. I decided to stamp "bewitching" repeatedly on the twill-and I loved the result. Very different from my usual "cutesy" cards, but still a great, simple card.

Saturday, October 3, 2009

Happy World Cardmaking Day!


As promised, here are two of my new Halloween cards. These are minis, made from my 3" scalloped circle punch. This is quite possibly one of my most-used tools. I combined stamps from a couple of different companies. First, I used my little fox from Imaginisce. He is one of my favorites. I love that I can dress him up in costumes by using other stamps with him. It really stretches my stamp dollar. The witch hat (by Studio G) is stamped on patterned paper, then cut out and adhered to the front. I also used Studio G sentiments on each card. The little ghost is from Hero Arts.
Don't forget to stop by the official World Cardmaking Day website-the link is over on the right. Just click on the icon and it will bring you there. There are lots of card ideas and tips, plus a great card contest. What a great activity for this rainy day! Enjoy, and thanks for stopping by!

Friday, October 2, 2009

Some fun project links...

to share today. I haven't had a chance to do any papercrafting myself this week, but I did have a little bit of time in between classes to surf my favorite blogs. I found some adorable projects, and thought I would share some of them with you all.
Enjoy, and I hope to share my new Halloween cards with you next week!

Wednesday, September 30, 2009

Critter contest to share...


over at the Paper Crafts website. As you can probably tell from my cards, I really love little critter stamps. Paper Crafts is having a contest where all of the prizes are critter-themed. What's not to love?


I've shared a picture of the prizes above. HERE is the link to enter (this is a random drawing-so easy!) Good luck!

Tuesday, September 29, 2009

World Cardmaking Day Crop

Please join me on Saturday, October 3 for a fun-filled day of cropping, stamping, cardmaking...whatever you enjoy papercrafting! I will be hosting a crop from 10-4 at the Skowhegan Sno-Hawks Club on Route 2 in Skowhegan.
The cost of the crop is $10 per person (to cover the cost of the building rental) unless you purchased a ShareCroppers kit during the months of August of September-then you crop for FREE!
I will provide drinks and snacks for all, but please bring your own lunch.
The question a lot of you have is: What do I bring? My answer: anything you'd like to work on! You can make cards or layouts, whichever you choose. Definitely bring your basic supplies (paper trimmers, adhesives, etc.) and an assortment of papers and embellishments. My Cricut, Sizzix, punches, stamps and idea books will be available for you to use as well.
I will have a few items from the kits available for purchase, along with some extra goodies, but you are under no obligation to buy anything. The purpose of this crop is to get together with other papercrafters and HAVE FUN! When else do you get a whole day to just scrap and stamp, uninterrupted?
Please RSVP as soon as possible if you'd like to come. You can call me at 474-6682 or email me at sharecropperskits@gmail.com. I need to have a head count by Thursday, Oct.1 to determine if there is enough interest.
Hope to see you all Saturday!

Saturday, September 26, 2009

Another card based on the same sketch...


as yesterday's "Welcome to the World" card. You can see the similar design elements, but with very different papers and embellishments. This card features leftover papers from my wedding album, which was a kit from Club SEI. You can also purchase these papers separately-they are from the Bridgeport line. I used the Upper Crest border punch from Fiskars, along with rub-ons from Basic Grey's Urban Prairie line. The "Thank You" rub-on is by Rusty Pickle. Note the sanded background-I used Black Magic cardstock by Core'dinations. This makes a great card base because the reverse side (along with the core) is that pretty aqua color. Cards with black bases are sometimes difficult to write in (unless you add a lighter colored journaling box inside.) The Black Magic line gives you a pretty and super-easy alternative.


CROP NEWS: I will be having a crop from 10-4 on Saturday, Oct. 3. Anyone and everyone is invited to attend. The crop will be held at the Skowhegan Snowmobile Club on Route 2. The fee for this crop is $10, unless you purchased one of the ShareCroppers kits in August or September. If so, then you crop for FREE! Please let me know by Wednesday, 9/30 if you will be attending. I will provide drinks and snacks-please bring a lunch or you can scoot out for take-out, whichever you prefer.


To respond, please call me at 474-6682 or email me at sharecropperskits@gmail.com.


Have a great weekend!

Thursday, September 24, 2009

Welcome to the World


Here is the baby card that I wanted to share with you all. I had originally submitted this to Papercrafts magazine for a sketch call. Although it wasn't chosen, I still love the color scheme and that cute little elephant. The elephant is actually a sticker that I backed with white cardstock to give it stability, when popped it up with foam tape. I added a little detail by tying some white cotton thread around his tail. This card was made with scraps that I had leftover from a scrapbook kit from Momenta (formerly American Traditionals.) It is from the Born to be Wild line. I love that the colors and designs could go for either a boy or a girl.


I am putting together details for a crop I will be hosting on World Card Making Day (Saturday, Oct. 3.) I will share details about that soon. Remember, if you purchased a ShareCroppers Kit during the months of August or September, you can attend the crop for free! Otherwise, there will be a nominal fee to help cover the cost of renting the space. Watch for more details over the next few days.

Birthday tickets and a cute link...


Here is another card, as promised. (Also a "dud" but I liked it so much that I made a similar one for my husband's birthday last month.) The stamps are by Inkadinkado, and I got them in the dollar bins at Jo's a few months ago. I have also seen them as part of a larger set at the Super Jo's in Bangor. Note the folded down edge of the pocket-just another neat little way to use your border punches or decorative edge scissors-snip the edge and then fold it down. Looks great with double-sided paper. (This double-sided paper is from SEI.)

Also, I wanted to share a link to a cute project by Jennifer McGuire. It's over at 2peas. It's a school-themed treat holder, but could be easily modified to be a Halloween treat holder. I just may have to make some using my new little Halloween stamps from Hero Arts. I will try to share some of the Halloween cards that I made recently with them. So cute!

Thanks for checking out the blog today, and check back tomorrow for a cute baby card based on a Papercrafts sketch call.

Wednesday, September 23, 2009

Just a few cards to share...


I have to be honest-since school started I really haven't been very creative, so I don't have much to share or to blog about! I feel like I'm being stretched in every possible direction. Making cards has taken a "back seat" this fall. There just aren't enough hours in the day between my semester at UMF, my family, my house (seriously neglected!) and all of the other things that seem to make it onto my to-do list.


Over the next few days, though, I hope to share with you some of the cards that I lovingly refer to as my "duds" (the ones that haven't been picked up by publishers.) Despite their "dud" status, I still like them and hope you all do, too.


I also just heard from Jami over at http://www.scrapbooking.com/. I will have a short article and card set featured over there starting on November 1. Be sure to check it out!


This card was one that I submitted to Papercrafts "Stamp It" issue. I just love these magazines-I refer back to them often. This card features a happy little palette of yellow, white and dark brown. The stamps are from Technique Tuesday, and the border punch is by Martha Stewart. Thanks for looking!

Tuesday, September 1, 2009

New ShareCroppers Kit available!


I'm excited to share my latest kit with you, since it features lots of my favorite kinds of projects-CARDS! This kit is jam-packed with gorgeous coordinating patterned paper from My Mind's Eye and includes supplies to make 20 different cards! Yes, you can make 20 complete cards, with envelopes, for $20 plus tax! Don't you just love a good deal?

The photo above shows three of my favorite projects, although your kit will include instructions and photos of all 20 cards.

This kit features lots of tips for working with and mixing patterned papers. Each card features a different technique (such as a new way to use your favorite border punch) or approach for patterned papers and will help you make the most of them. Also included are new card designs and some adorable new patterns for accents. What's great is that after you've made all of these cards, you can carry those techniques over to cards that you design, using the patterned papers that you already have in your stash.

The cards in this kit are great to have on hand in your own card stash, or they would also make a great gift for someone. There are no sentiments on these cards-you can leave them plain for notecards, add your own stamped sentiments or rub-ons, or use my stamps at our first monthly crop to be held later this month!

I will be taking orders for this kit starting today, and will be delivering them on Saturday. To order, simply email me at sharecropperskits@gmail.com or call me at 474-6682. I also have a few of last month's charter kit left, so if you missed out just let me know. Watch on the 15th for September's second kit which includes a recipe box and papers from Cosmo Cricket's Early Bird line!

Monday, August 24, 2009

More publishing news!

I am so excited to share some more publishing news! As I had posted earlier, one of my cards was selected to appear in the January issue of Cards magazine. I just received another email from Susan Opel, an editor at Papercrafts magazine, requesting another of my cards! I will have a baby card appearing in the March/April issue of Papercrafts magazine. SO EXCITING-I can't even put it into words.

More exciting news is that I have a card set that will be appearing on http://www.scrapbooking.com/ in a little while. I don't have a lot of information on this yet, but I will share as soon as I do.

Lots of fun things happening for me right now-I'll keep you all updated as much as possible. It's all a little overwhelming (but exciting!) right now.

Have a great week, and thanks for stopping by!

Thursday, August 20, 2009

Be Mine


I know it seems like it's a little off-season to be making Valentine's Day cards, but I had all of these papers out working on submissions for magazines, which are actually planning their spring issues right now.

I didn't want to miss out on Get Sketchy's first sketch challenge, either. If you haven't checked out their blog, you can see it HERE. When I first looked at the sketch, I didn't really know what to do with the curve down the left side. It was very different from what I would normally do (which is the fun part of challenges like this.) I went with my first thought, which was to create a wavy flap and make the card a tri-fold. This card was the result.

Thanks for looking!

By the way, I still have a few ShareCroppers kits left. You can see the details in the previous post. Thanks!

Monday, August 17, 2009

Welcome to ShareCroppers!


Here is a peek at the first kit I am offering through my new business, ShareCroppers. In this Charter Member Kit, you will receive supplies, step-by-step instructions and patterns for the following projects: 4 cards (each A2 size), 1 gift bag topper, and one 10-page 6X9 flocked chipboard album. The best part is, the cost for this kit is only $20 plus tax!

I wanted to make my kits fun, useful and affordable, and I think this kit meets all of these requirements. This kit is fun because it combines black and white with bright, fun colors. I think we are sometimes a little scared to try black and white as a base for our projects because we don't know what to put with it. These bright colors from American Crafts are perfect.

I find the projects in this kit to be very useful, too-use the cards yourself to build your "on-hand" stash and add sentiments later, or give them as a gift. There are four different card designs. Make all of your cards the using the same design, or make one of each. These kits are flexible!

Finally, this is the most affordable option I've seen for kit clubs. My kits will be available twice per month (new kits premier on the 1st and 15th of each month.) There is no subscription to buy-just get the kits that you want! Another bonus with these kits is that when you buy one or both kits during a month, you get to attend the monthly crop FREE! This allows you to make the projects in the comfort of your own home or if you prefer personal instruction ( or just the social aspect of crops) you can attend the crop where I will walk you through the projects step-by-step.

It really is that easy! To order a Charter Member Kit, simply email me at sharecropperskits@gmail.com or call me at (207) 474-6682. I am offering free local delivery or I can ship it to you. Shipping prices will be the actual shipping costs and will vary with each kit.

Charter Member Kit Contents: 1 Making Memories 6x9 flocked chipboard album, 10-12x12 sheet of cardstock (2 each: black, white, tan, aqua, magenta), 3-8.5x11 sheets of cardstock (black, white, aqua), 4 envelopes, 2-a2 sixe embossed aqua cardstock, 12x12 double-sided American Crafts patterned paper, 3-2x6 American Crafts patterned paper, 2-12" American Crafts patterned paper die-cut borders, 4 die-cut circle tags, 2 scalloped die-cut circle tags, 24 embossed die-cut butterflies (2 designs-aqua, black), 24" black gingham ribbon, 1 yard white string, 12 buttons (4 each: black, white, aqua), 4 glitter brads (white, aqua), 1 metal "Thank You" charm, pattern sheet and full-color instructions.

I'm so excited and simply cannot wait to show you what's in store for September!

Friday, August 14, 2009

I'm SO excited!

I just got the most exciting email I've ever received-I'm going to be published for the first time ever! One of my cards is going to be published in the January 2010 issue of Cards magazine! I can't stop smiling! :D

This is perfect timing, as my daughter Jordan pointed out, since today is my last day working at A Time to Remember. The store has been sold and I have decided not to continue teaching classes there.

More exciting news, though-my classes and kits will still be available through my new business, ShareCroppers. I will be offering kits (complete with all materials and instructions, along with photos of the finished projects here on my blog.) New kits will be available on the 1st and 15th of each month, beginning on Monday with our Charter Member Kit. I will also be hosting a monthly crop at the end of each month where scrappers and cardmakers can get together. (More info on the crops will be available soon. The first crop will be at the end of September.) Please tune in on Monday for full details and to check out the first kit.

So lots of exciting things are happening here today. I'll keep you all posted (as long as my laptop cooperates!)

Sorry for the lack of projects posted here lately-my laptop died, was repaired, then died again this morning. Unfortunately, that's where all of my photos and photo-editing programs are. Hopefully she'll be healthy again soon! :)

Wednesday, August 5, 2009

Paper Bag Mini Album


I created this fun little mini album from paper lunch bags, three sheets of patterned paper, and three sheets of 8.5 X 11" cardstock. Some stickles and Scrapper's Floss added a fun feel and left plenty of room inside for pictures. I love the cardstock tags, too-they slide into the pockets created from the paper bags. You could add additional photos, journaling, or both to the tags, and even slide some summer memorabilia into the pockets, too. (Think business cards, brochures, postcards, maps...)


To create this album, take four brown paper lunch bags and fold them each in half. Now unfold them and stack them, rotating every other. Fold in half again, and use a hole punch (I used a Crop-o-dile) to punch two holes near the fold. Insert binder rings to hold your book together.


Believe it or not, this is all there is to creating this album! Now you can embellish the inside pages. For each inside page, I distressed the edges of a 4 X 4" square of patterned paper. (I really like the Snorkel line from Cosmo Cricket.) I roughed up the edge with an Edge Distresser from Heidi Swapp. Then I simply adhered the patterned paper to each page. I recommend Glue Dots to adhere the papers and embellies to the bags-photo splits did not hold very well. My accents were cut from the Snorkel Elements patterned paper. I added a bit of stickles to each element after adhering to my page.


For the tags, I cut each piece of 8.5 X 11" cardstock into 6 pieces (4.25" square-you can use the scraps for another project.) I folded a piece of patterned paper in half for each pull-tag, adhered it to the cardstock, punched a hole and tied on some Scrapper's Floss.


I've posted just the cover here on the blog, but you can see all of the pages in my album HERE.


Thanks for looking!

Saturday, August 1, 2009

So Much Love


Here is my take on this week's sketch at 2S4Y. Very simple card-pretty close to the original sketch. I made the card business-sized, which is very different from what I usually make. It measured 8.5" X 3.5" finished. I am trying to make a dent in everything in my stash, and these papers, stamps and chipboard are all goodies that I brought home from CKC. Patterned paper from Sassafras Lass, yellow and pink Double Dot cardstock from Bo Bunny, stamps from Technique Tuesday, chipboard heart from Fancy Pants, border punch from Fiskars.

Thanks a bunch for looking!

Friday, July 31, 2009

A Cosmo Cricket Giveaway!


I've told you all how much I love the new Cosmo Cricket stuff at our store-how'd you like a chance (or two, or three) to win some of their newest lines? I stumbled across this new sketch blog called Get Sketchy which is giving away a couple Mini Decks from Cosmo Cricket. The Mini Decks are the same prints as the 12 X 12 lines, but on a smaller scale, making them perfect for cards. Check out their website to enter.

Thursday, July 30, 2009

You're Tweet!


I've been having so much fun with the new Cosmo Cricket lines that we just received at the store. On Monday, I posted an anniversary card that I had made using the Early Bird line. The card I'm sharing this morning is also made from the Early Bird line. I added some felt shapes from American Crafts. The shapes are actually punctuation (*) but I added some hand-stitching and used them as flowers. The little felt tab on the bird tag is just a felt bracket trimmed.

For this card, I used this week's sketch from the Card Patterns blog.

Wednesday, July 29, 2009

A button layout to share...


I was just browsing around in my Flickr photostream and came across this layout that I did a couple of years ago. It just made me smile-for those of you who have been reading my blog, that is my daughter on the left. You know, the one who just went to the prom?! Wow, how time flies. That is my son on the right-he's going to be starting middle school in the fall. Doesn't he look stylin' in those Blue's Clues sneakers?

Anyway, before I get all teary, here is an idea for using button borders on your layouts as well as your cards. As you can see, this variation doesn't require a ton of buttons. You can add doodling in between (the bee's trail in this case.) Also, mix it up a bit by using mostly one color buttons, but include 3 of a contrasting color. Remember your "rule of three's"? The three white buttons help the layout feel balanced.
I also used some tiny buttons to dress up the frog's spots (frog and bees cut from Basic Grey's Color Me Silly paper.)

Thanks for looking!

Trying to make a dent...


in my stash of buttons. I have been using buttons on every project lately, it seems. I have been collecting buttons for years, and like all of my crafting supplies, I accumulate them much faster than I use them. It's also great for the scrapping budget, since buttons are pretty inexpensive. Save even more by buying them in bulk in the sewing section instead of those pre-packaged for scrapbooking. My favorites are the color-coordinated multi packs. You can get a bag of 100+ buttons for less than $2.00 at Walmart.
One way to use several on one project is to make a border with them. On this mini card (4" square), my border covers the seam between my two patterned papers. To mix it up a little, I used a couple of different threading "techniques." Nothing hard, just something to add visual interest.
Bazzill cardstock, American Crafts striped paper, Bo Bunny Double Dot cardstock, Hero Arts stamps.
I "scraplifted" this card idea from Lucy Abrams in the Hero Arts Flickr group. There are some absolutely beautiful cards there. Anyone can post projects to this group, you just have to use at least one Hero Arts stamp on your project. Go check it out for some great cardmaking and scrapbooking ideas! If you'd like to see the cards that I have over there, click HERE.
For some other great button cards, visit last week's round of Gallery Idol on the Papercrafts site. Lots of different ideas there, too. I just love the button-embellished trees, especially this one from Shanna Vineyard. She actually created her tree with buttons-so clever and cute.
Hope I inspired you today to raid your button stash to create a new project. Thanks for looking!

Monday, July 27, 2009

It's my anniversary today...


so I'm sharing a little card I made for my hubby. Before I tell you about the card, let me tell you about the recipient. My husband Donny is seriously the absolute best husband there is. I honestly don't know where I would be without him, and I definitely wouldn't be as happy as I am. We always tell eachother about little coincidences that happen and make us think about eachother. Then we joke about how we were just made for eachother.

Which brings me to the card. When I saw this line of paper come in at the store on Friday, I knew I would be using it for his anniversary card. This line is called Early Bird, and it is from Cosmo Cricket. The embellishment on the front is simply patterned paper, which I trimmed and adhered to my card with foam squares. I added some stitching, inked the edges and tied a little button on the front for dimension. The button is actually a clear button with a circle punched from patterned paper behind it. I also added a little felt "&" from American Crafts, which I machine-stitched it in between the Salt and Pepper.

Thanks for looking!

Oh, and congratulations to all of the winners from the Anniversary Celebration held Saturday at A Time to Remember! Our grand prize winner was Carma Stevens, and class winners were Barb Welch and Donna Patten. Thanks for another great year!

Friday, July 24, 2009

Pop-up Card


I made this pop-up card yesterday with my new Club SEI kit. The papers were just beautiful-nice heavy quality, double sided and glittered! I love that the kit also included the coordinating embellishments. Lots of transparencies, ribbon, silk flowers and adhesive pearls, which I love. This line is called Kalia. I think it's a Club SEI exclusive. You can check out their site HERE.


This card lays flat so that it will fit in a regular envelope. But the great part is that when you slide it open, the sleeve folds into a box shape which allows the card to stand alone. What a great way to showcase your handmade card. Everyone I know saves their handmade cards-wouldn't you love to know they keep them on display, too? You could even make this a photo card by replacing the sentiment die-cut with a small photo. Perfect for grandparents!


Thanks for looking! Remember, if you're in our area on Saturday, please stop in to A Time to Remember! It's our 2nd Anniversary Celebration tomorrow from 10-4. We have some great new stuff that just arrived, and will have some great make-and-takes and prizes. Have a great weekend!

Tuesday, July 21, 2009

Just cardstock...


and a little bit of ribbon on this card, but I think it's one of my favorites. I started with 2 Cricut shapes (the scalloped square from the Celebrations cartridge) and adhered the tops together to form a card. The back shape is scored after the first scallop so that the front of the card stays flat. Then I layered on square die cuts (also from the Celebrations cartridge), one of which was embossed and sanded. The sanding revealed the ivory core (this was Core'dinations cardstock.) The Queen Anne's Lace is from the Home Accents cartridge, and the butterflies were punched using a Martha Stewart punch. I folded one of the butterflies in half to give it a bit of dimension. A bit of ribbon and voila!

Cardstock is one of my favorite papercrafting supplies because it is so cheap and it comes in just about any color imaginable. So if you're looking for a budget-friendly handmade card, look to your cardstock. Even some scraps can turn into an elegant card with a few little details. This is a pretty generic card, too, so it could be personalized with just about any sentiment. I think it would actually be perfect for a sympathy card or a "thinking of you" card.

Thanks for looking!

Monday, July 20, 2009

Cricut Die-Cut Cards


I had a few requests to share a sneak peek of the cards we will be making in tomorrow night's class at A Time to Remember. The purpose of this class is to take your flat die-cuts to the next level. We will be making our own cards from die cuts, and embellishing them by layering, embossing, distressing and adding 3D accents. I love that I can share a peek of the projects. However, I've been having some computer "issues" this week, so I am trying to post from my son's old laptop.

There are still a couple of openings for this class, which will be tomorrow night (the 21st) from 6:30-8:30. Cost is $17. Please bring basic supplies: 12" paper trimmer, scissors and adhesive. I also want to stress that YOU DO NOT NEED A CRICUT TO TAKE THIS CLASS. Everything will be pre-cut for you. If you do have a Cricut, you will be able to replicate these at home. I cut these designs using the Celebrations, Walk in my Garden, Accent Essentials, Home Decor and Going Places cartridges. I will also have extra kits available for purchase the night of class.

To register, simply email us at atimetoremember@rocketmail.com or call 474-2380. The store is closed on Mondays, but you can leave a message and we'll get back to you. Please make sure we have your full name and telephone number.

Enjoy!

Monday, July 13, 2009

"Yummy" prizes from Hero Arts!


Some great giveaways happening over at Hero Arts this week! They are totally revamping their website and are sharing their excitement by doubling their already great prizes. Not only are they giving away twice the number of prizes this week, but the prizes themselves are doubled! How cool would it be to win $100 worth of free stamps from Hero Arts! The best part is that there are so many possibilities with this week's challenge-you just have to be inspired by any one of the hundreds of projects on their website. HERE is the link to today's blog post detailing this week's challenge.
This is just a little scalloped circle card I made using some Hero Arts stamps. I just can't get enough of these-they are so cute and fun to make. One of my favorite ways to embellish them is with stamped images that I have cut out and layered.
Thanks for looking-off to enjoy another sunny day here. :)

Saturday, July 11, 2009

Happy Everything Spinner Card


Whenever I work with sketches, I always rotate them and reverse them in my head before I actually start my project. That's the beauty of using sketches-you can "tweak" them however you'd like!
For this sketch from Card Positioning Systems, I rotated the sketch 180 degrees. I immediately thought the sketch looked like a spinner card, so I pulled out my buzzing bee stamp and funky flowers from Gel-a-Tins.
Quite happy with the fun little card that resulted!
Thanks for looking!

Friday, July 10, 2009

Birdie Birthday

(Sorry...this item has been removed for publication. It'll be back soon!)


This is just a card I wanted to share. It's so fun and cheery-love the whimsical paper from Sassafras Lass. I picked up a Wee Bundle of this paper at CKC Manchester and have been having fun with it.

This card is based on two online challenges. First, it is my take on this week's sketch challenge over at Card Patterns. It is also my entry for the SP Color Combos challenge this week. Samantha's challenge was to make a card using Stampin' Up!'s Bermuda Blue, Soft Suede, and Melon Mambo colors. Since these colors just came out, I don't have them yet, but I had these papers and inks in my stash that worked perfectly.

Thanks for looking!

Thursday, July 9, 2009

Have I mentioned that I love owls?


It's my latest obsession-owl anything. I even ordered checks that have owls on them. They are just the cutest things-makes bill paying more fun, ya know?

Here's my latest project-owl and all. This actually satisfies a couple of challenges and submissions in addition to being just plain cute. First, it is my take on the Be Inpsired #39 challenge over at Cuttlebug Challenge. Yes, it is a real twig-and yes, I might be crazy-but it went so well with the theme.

It is also part of my submission for the design team over at My Sketch World. My first time trying out for a design team-keep your fingers crossed for me. I really love sketches, so this would be perfect for me.

Finally, I decided to submit it to Papercrafts magazine. I loved it that much! And three's a charm, right? Somedays you just come up with something that you just can't stop looking at. This is one of those. I'll keep you posted...

New from Pebbles Inc.


Pebbles, Inc. has been one of my favorite companies for many years. We carry several of their lines at A Time to Remember. This is a layout that I made using one of Pebbles Inc.'s brand new lines, Lil' Miss. I was fortunate enough to receive this entire line as a gift from Pebbles after winning it on their blog.


These pictures are of Jordan on our trip to Walt Disney World. I just loved these ones of her getting stage makeup at MGM Studios. She chose a butterfly design-so pretty. It was amazing to watch these makeup artists from start to finish-so talented.


This layout was made using a sketch from http://www.mysketchworld.blogspot.com/. I rotated the sketch to better suit my photos, and I substituted three photos for the two shown in the original sketch.


Thanks for checking it out! I'll be back later with a sneak peek of my next card class at A Time to Remember, called "Cricut Die-Cut Cards." We will be making six shaped cards, which are some of my favorite kinds of cards-so personalized. Off now to enjoy the weather-NO RAIN! :)

Saturday, July 4, 2009

Stamping on Patterned Paper-CPS Sketch #122


Here is another card entry that I am submitting this week, this time for CPS Sketch Challenge #122. The sketch gave plenty of room for embellishment, so the possibilities were endless. I love paper piecing with stamped images, and this card uses that technique. These Japanese Dolls from Hero Arts are one of my favorite stamp sets, too-perfect for paper piecing.

Thanks for looking! Comments are especially welcome-I need a little sunshine during this rainy weather. :)

Happy Independence Day!


Hope you're all enjoying your holiday weekend-kind of rainy here today, so we skipped the parade. We're hoping for better weather tonight for the fireworks.

This afternoon we are headed to my husband's aunt and uncle's house for their annual Fourth of July BBQ. Good food and the chance to see some family members that we haven't seen for a while.

I am sharing this card which satisfies two online challenges: 2S4Y and the Cuttlebug Challenge. This card is for Sketch #29 on 2S4Y. The Cuttlebug Challenge this week was to use red, white and blue, plus buttons. The bonus challenge was to use the Swiss Dots embossing folder (one of my favorites.)
This is also a great budget card since it is made almost entirely of scraps! The stars were punched from various blue cardstock scraps and embellished with mismatched buttons. I like the different shades of blue-gives the card a little oomph, don't you think?
Thanks for looking!

Friday, July 3, 2009

Card Patterns Sketch #21


I love sketches, both for cards and layouts. I've been scouting out sketches online, and I was surprised to find so many incredible sites out there that not only offer free sketches but also weekly contests and prizes! One of the first sketch challenges I tried is from the Card Patterns blog.

This is the card I made for this week's sketch, Sketch #21. The stamps are by Technique Tuesday, cardstock by Bazzill and Prism, and the patterned paper I bought at the Yardgoods Center in Waterville. I'm not sure of the manufacturer, but the pack was called Garden Variety. Lots of pretty prints and colors, perfect for cardmaking. I also used my scalloped circle punch to create the ticket-style corners on my stamped image.

Thanks for looking, and don't forget to check out the Card Patterns blog for some great sketches!