Monday, September 1, 2014

Counterfeit Kit Challenge-September Reveal!

I'm super excited to share with you that after Guest Designing last month for the Counterfeit Kit Challenge, I have joined as a permanent member of the Master Forgers!  I have loved this challenge since its start, and Bethany is the most wonderful (and convincing!) DT leader. 

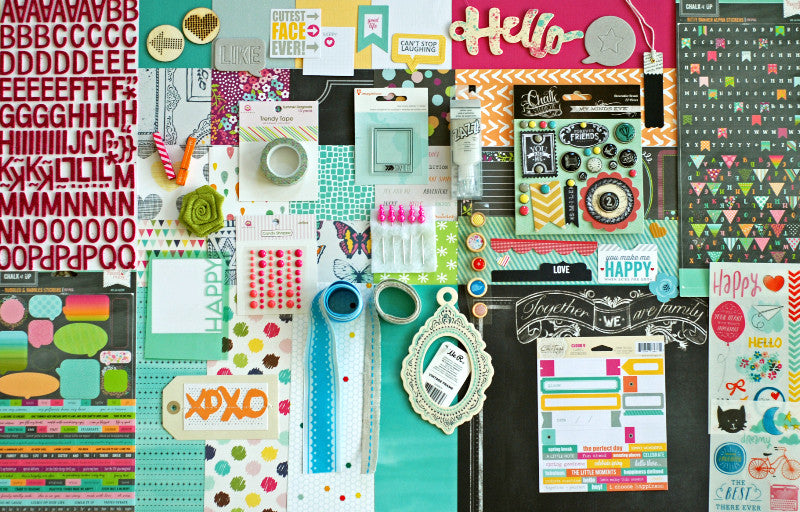
We have an absolutely gorgeous inspiration kit, this month, too!  It is the Island Paradise Kit from Scrapbook Circle.


I also took inspiration from the kit's Tiki Torch and Bungalow add-ons:


Lots of gorgeous jewel tones, journaling cards, cork, "smile", "hello", "happy day", foxes, anchors, bokeh, veneer, labels, arrows, photo frames...the list of yummy scrapbook goodness goes on and on.  I think this is one of my favorite inspiration kits ever.  EVER.

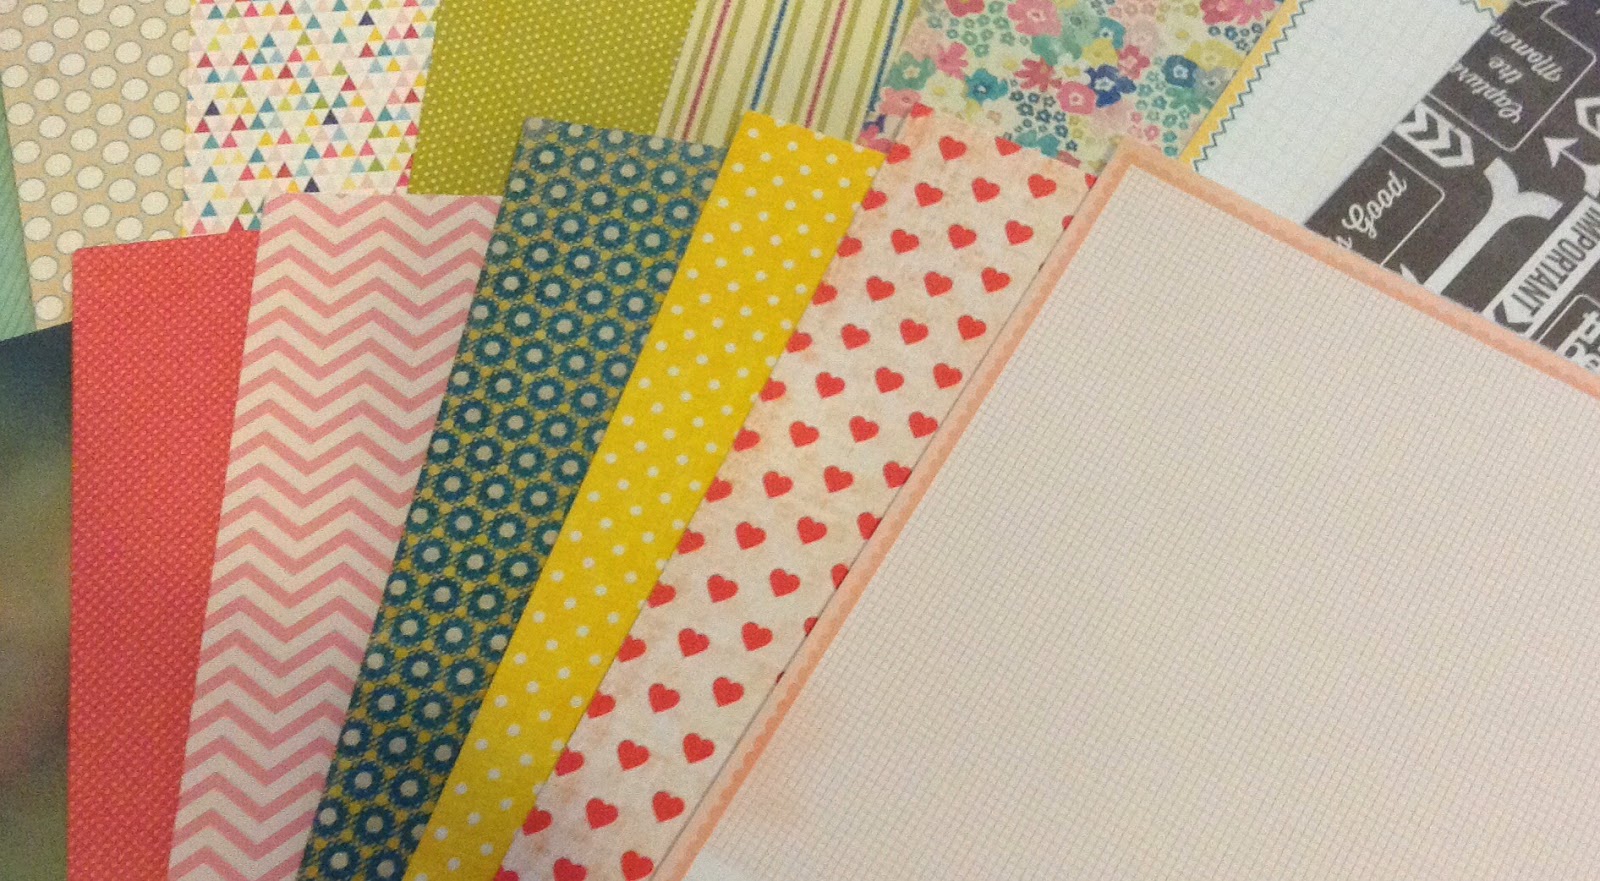
I started with my patterned papers, and I ended up with pretty close matches to almost all of the originals:


I couldn't find any fox paper in my stash, so I substituted the birds.  For other papers, I might not have had the same colors, but I had similar patterns.  I added them, keeping with the jewel-toned theme.

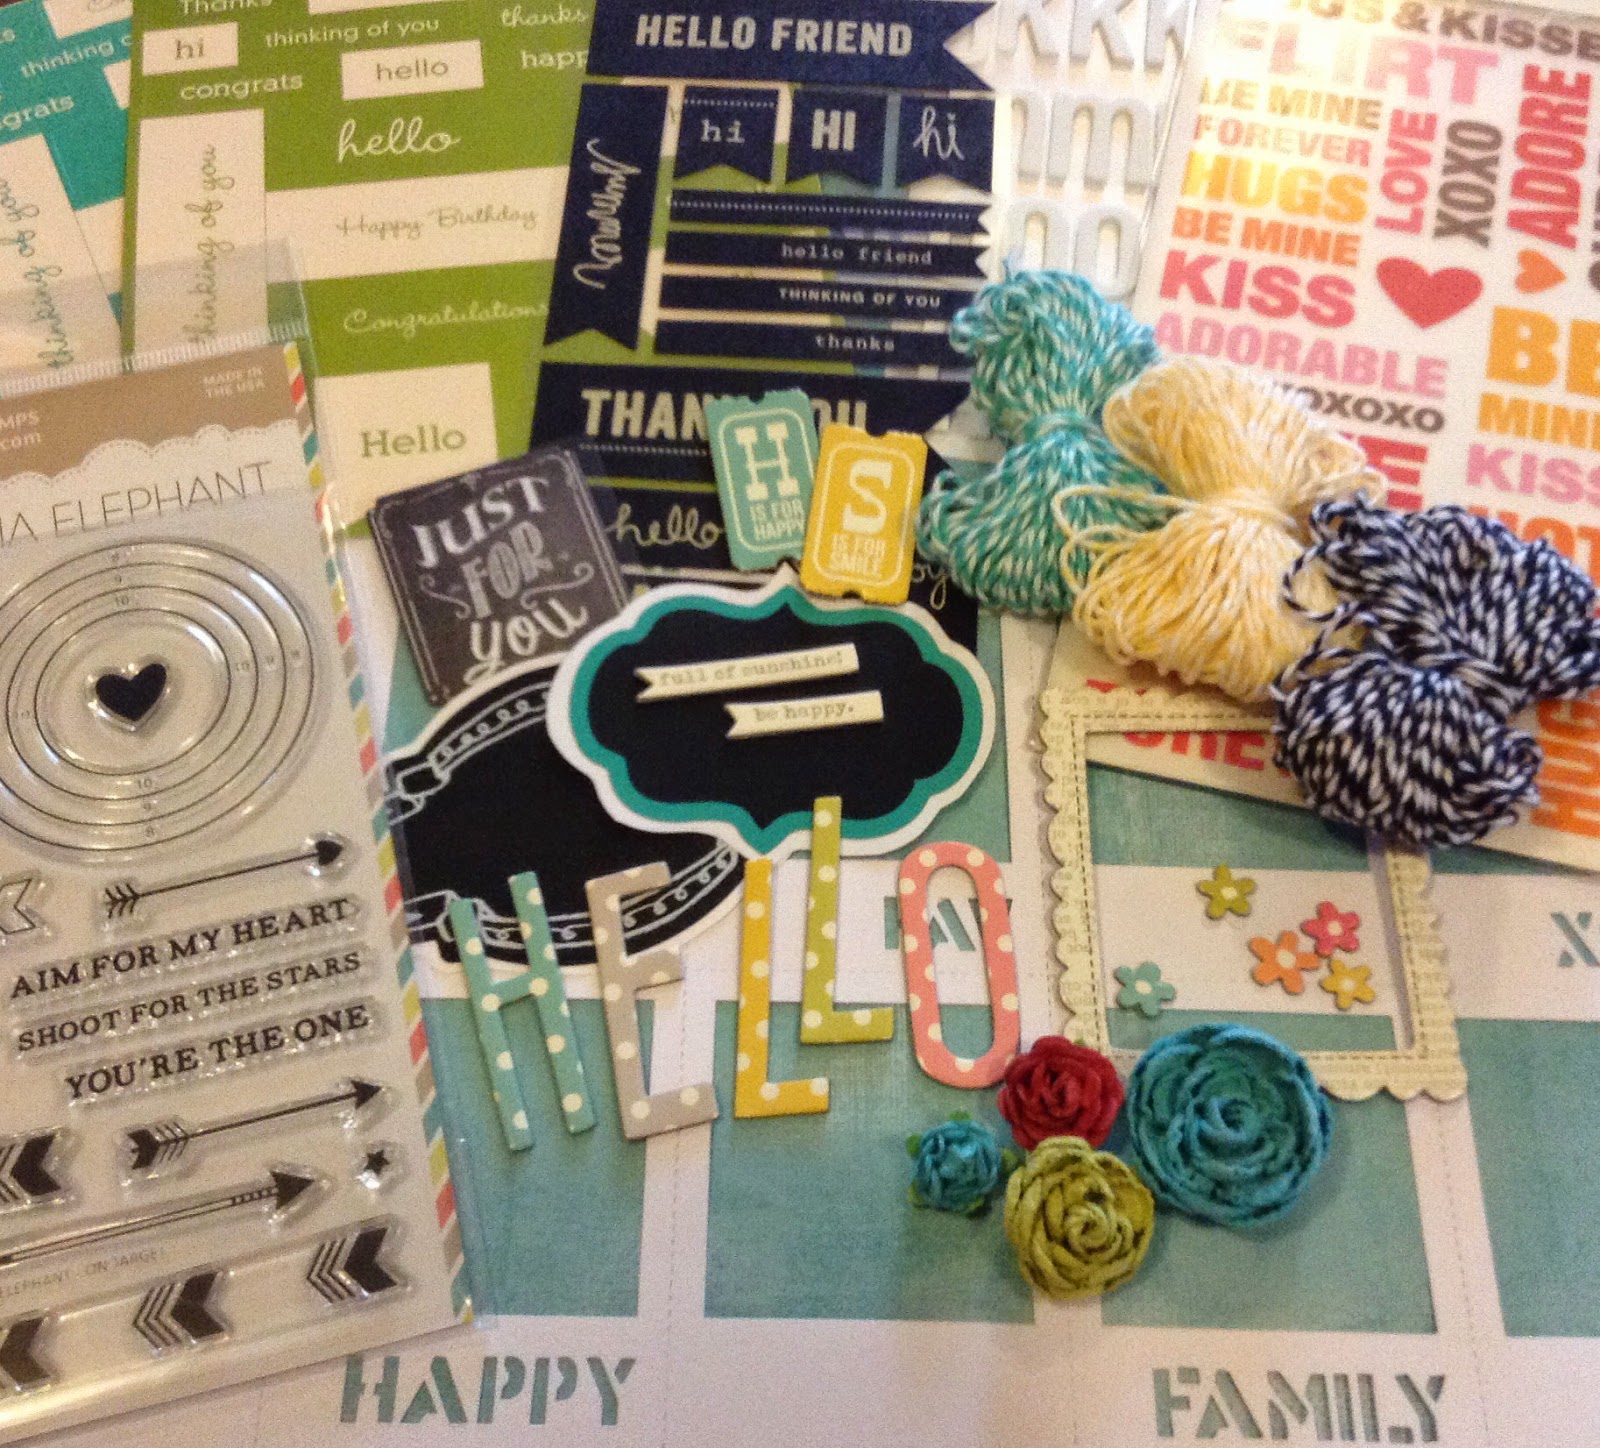
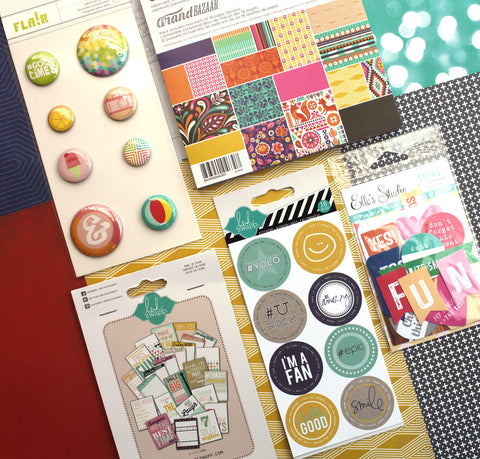
Lots of cork stickers (which I will personalize with stamps), journaling cards and snippets, as well as some glitter phrase stickers, provide the base for my embellies this month.


I couldn't possibly create a kit without stamps! I know I will pull from my stamp collection to embellish the cork stickers, but I'm not sure how yet, LOL.  I'm including these stamps/sets in my kit, as well:


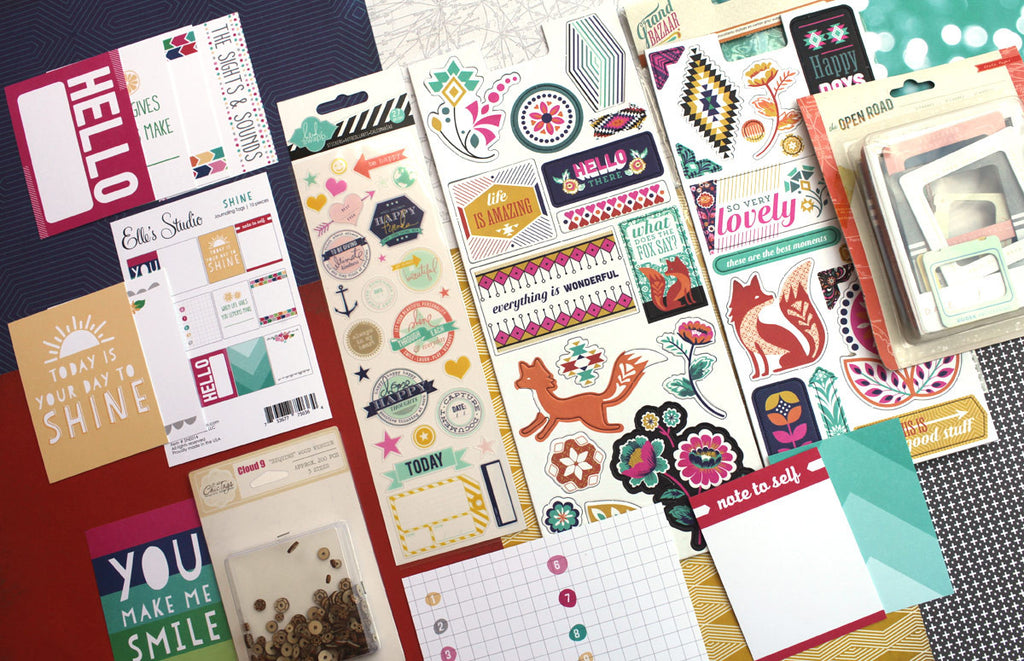
There are several things that I'm anxious to counterfeit this month:

these Basic Grey Grand Bazaar chipboard alphas... 

these AMAZING wood sequins...


this fun, trendy paper...


and finally, these fun clips:


A busy month, no? :)

Time to hop along to the next stop!  Thanks so much for popping by!


Sunday, August 24, 2014

Gold and Floral Mom Card


Yesterday, I saw the latest Fusion Card challenge, which is a fun challenge that offers both an inspiration photo and a sketch. You may choose to use the photo, the sketch, or both. I tried to use both, along with my August Counterfeit Kit. It just wasn't happening, and I got frustrated. I looked at the inspiration photo again with fresh eyes this morning, and came up with this gold and floral beauty for my mom.  Much more my style than the flat disaster I came up with yesterday! LOL

Everything was from my August kit except for that gorgeous taffeta flower, which was handmade by my sweet friend Bethany from the CKCB.  I really wanted a focal point flower for this card and my kit had none.  When I saw this lovely gold one in my stash, I knew it would be perfect. I added some gold paint splatters to tie everything together. Quite happy with the results!  This is my 5th card from this month's kit.  I've only done one layout, however, and have so much left in my kit.  Off to the coast today, so I will have some new summer photos to scrap soon!

Here is the inspiration photo and sketch from the current Fusion Challenge:


Thanks for popping by today!  Enjoy your weekend!

Friday, August 22, 2014

Hello Tag Card


I have one more card to share with you today. This one is also made from my August Counterfeit Kit (with the exception of the "hello" stamp.)

I was inspired by the colors and the "hello" sentiment over on the Tag, You're It challenge blog:


I really liked this color combo: white, green, light coral and medium coral. I added black, too, and used the medium coral as my dominant color. I played with my new Stampin' Up inks for the first time, which was fun!  I used Crisp Cantaloupe, Calypso Coral, and Wild Wasabi on this card.  I used these three colors to create the triangle background on my tag.  The triangles are actually sun rays from Paper Smooches' "Sunny Side Up" stamp set. 

The cloud and kite stamps are also from Paper Smooches, so I am entering this is this week's "Anything Goes" challenge over on the Paper Smooches Sparks blog. See The hello sentiment is from Lawn Fawn. I thought I had a great selection of Paper Smooches stamps, but in my 9 sets, I didn't have a single "hello" stamp. I'll have to remedy that. ;)

Thanks for visiting my blog. I'm off to school now to finish getting my classroom ready. Can't believe school starts in just 5 days!  Exciting and a bit overwhelming when I look at my "to do" list! :)

Cheer ^Up^


I love the Paper Smooches "Anything  Goes" challenges!  They give me a reason to look through all of the fun inspiration on my Pinterest boards. :)

I loved the cute clouds on this card by Elena: http://justmeprints.blogspot.com/2014/03/bling-it.html.

Elena used ink and glitter on die-cut clouds, but I wanted to use up some paper bits from my August  Counterfeit Kit. I started with a small piece of white scrap cardstock.  I then cut random widths of triangles from patterned paper, gluing them in a sunburst design to my scrap of white cardstock with a glue stick.  Next, I stamped a Paper Smooches cloud on my new starburst paper and cut it out. A similar look that I'm very happy with!

I added this cute cloud to a pink Maggie Holmes tag die-cut, stamped a sentiment, and added some smaller clouds stamped on wood grain paper. A sentiment, punched border threaded with twine, and tag loop at the top made for a clean and simple card with a fun twist. 

I'm linking this up to both the Paper Smooches "Anything Goes" Challenge and the August Mr. Linky on the CKCB. Thanks for popping by today!


Thursday, August 21, 2014

CKCB August Challenge #2


Our second challenge this month over on the CKCB is a sketch challenge.  We worked with this adorable sketch from Roree Rumph for October Afternoon:


I decided to make a card, and I stayed pretty true to the sketch. The three panels across the front reminded me of tags, so I chose three printed tags from the Maggie Holmes journaling card paper in my kit. To mix things up a little, I punched my heart accent out of the tag panel rather than attach a separate heart embellie.  I then popped the tag panel up with pop dots and tied some Lawn Fawn yarn around the whole panel.  

I omitted two of the three "strips" on the bottom of the sketch, and instead used a strip of "hello" patterned paper as my sentiment. I made the chevron accents by trimming a 1/2" strip of paper (another journaling card from Maggie Holmes) and used just the pointy part of my heart punch. Super easy!  I also use this technique for trimming the ends of banners. You could also use a triangle or square punch. 

Thanks for popping by today!  We'd love to see your take on this sketch, either as a card or a layout!  Don't forget to link your project to the August Mr. Linky on the CKCB. :)


Monday, August 4, 2014

Counterfeit Kit Challenge: One Layer Card


I think that when Bethany assigned this challenge to me, she *may* have cackled an evil laugh and rubbed her hands together. LOL. JUST KIDDING-she is very sweet but LOVES to dish out the challenges. ;)

I love dimensional embellies. The more, the better, in most cases! So a one layer card was a HUGE challenge for me!  I knew that my usual buttons, twine, brads, and many layers of patterned paper were out of the question, so I started thinking about the other ways I like to embellish my cards.

I started with a double-sided patterned paper as my card base.  I used the "selvage" edge of the paper for a ready made border, and embellished that with some stamped hearts. I also die-cut a circle from the card front, allowing the other pattern to show through. This provided the perfect frame for my phone stamp.  I scored around the edges of the card, which also helped to ground the sentiment and trio of stamped hearts.  Finally, a smattering of Stickles added a touch of bling without the bulk.

Thanks so much for popping by today!  Please be sure to check out the other DT members' one layer cards and leave them some love!  Don't forget-we want to see your take on this challenge. Don't forget to link your creations to the August Mr. Linky over on the Counterfeit Kit Challenge Blog!

Friday, August 1, 2014

Guest Designing for Counterfeit Kit Challenge!


I admit it: the Counterfeit Kit Challenge is my ALL-TIME FAVORITE challenge blog. They're not trying to sell product, not trying to get you to subscribe to anything...it's just a group of FUN, AMAZING SCRAPPERS who love to share their creativity and inspire others.

So, I'm over-the-moon excited to share that I am guest designing for them for the month of August!

The entire design team is ready today to share their versions of our August inspiration kit, Penny Arcade by Studio Calico.  Today's blog hop starts on the CKCB blog, so make sure that you start there so you don't miss out on any of the fun!

I loved the Penny Arcade kit, but didn't have any of the original elements this month. So, I decided to make a list of what I noticed (along with my favorite elements) in this kit and its add-ons. I came up with clouds, cameras, feathers, carnival fonts, metallics, postage stamps, maps, doilies, wood grain, and weather. I then shopped in my stash and came up with these fun supplies:


Here is today's hop order. Please stop by and see the fabulously creative kits these designers have made. Don't forget to leave them some love! :)
Guest Designer:  Sherri:  http://sherrithompson.blogspot.com
Stephanie: http://skylinepaperie.blogspot.ca/2014/08/august-counterfeit-kit-wishful-thinking.html


Thursday, July 31, 2014

Counterfeit Kit Challenge: Triangles!


Used lots of my favorite papers from my July Counterfeit Kit, "Fresh Start", for this layout!  The challenge was to use triangles on your project. I saw a great cut file featuring triangles in this pattern, so I decided to recreate it using just my paper trimmer and patterned paper!

After arranging and adhering the triangles, I randomly stamped arrows to draw the eye to the right of the layout. I also created my own embellies by trimming a camera from my kraft cardstock and coloring it with Copics. I also used a chalkboard sticker and Polaroid die cut to make my accent.  Agnes provided me with this "Adorable Photo Op"!

Monday, July 14, 2014

You're Cool

Card sketches have been my go-to tool as I try to get back into this whole "creativity" thing. Have you ever thought of sketches as a tool?  They really are. They work as a template, and are a great way to jump-start your creations when blank cardstock seems overwhelming.  

I started with this cute sketch from Cardabilities:


Since the challenge had already passed, I didn't worry about adhering to the sketch.  I just needed a starting place, and for me, that starting place included the layered, square card base and banner shape across the center of the card.  I replaced the leaf diecuts with a tag, used a brad instead of a button, and upcycled a red plastic tag barb to attach my sentiment.  

All supplies for this card (except the barb, which was lying on the counter lol) were from my July Counterfeit Kit, Fresh Start.  

Thanks for popping by today!  Hope to see you playing along with the Counterfeit Kit Challenge, too. It's never too late-jump in when you can!


Tuesday, July 8, 2014

Retro Sketches Challenge

I love sketches, especially when I'm either in a "rut" and need inspiration, or (like today) I'm not feeling super-confident in my cardmaking abilities. LOL

Retro Sketches never fails to have fun, creative sketches posted, along with some fabulous inspiration cards. Although I don't play along with this challenge as often as I should, I have many of the sketches pinned and use them regularly.

This weeks sketch has fun hexagons that I just couldn't resist:

I wanted to use my July Counterfeit Kit, but I didn't have any hexagon embellies or even a hexagon punch. So, I trimmed a hexagon from a different patterned paper to use as my template, traced it into some pretty papers from my kit, and hand-cut the hexes for my card. I adhered the speech bubble print with foam squares to make it pop just a bit. 


So, I'm slowly getting back into the swing of things. With nothing on my schedule for the day, I plan on busting out the ink pads and playing with my stamps for the first time in...well, too long. :)

Fusion Challenge {Red, White & Blue}

I feel like the new kid on the first day of school. I haven't participated in a challenge or posted a project for months. I'm a little nervous. ;)

Starting out nice and slow, using a fun sketch from the current Fusion Challenge.  Although the challenge is called {Red, White & Blue}, I chose to use just the sketch as my inspiration, along with supplies from my July Counterfeit Kit, Fresh Start. 

Here is the inspiration:

And here is my little project:


I cheated a bit with the sketch, using patterned paper from my kit that already had the "V" printed on it. Creative trimming. ;)  The little "happy" frame is my newest discovery from Jillibean Soup. Super cute!  A random twirling of baker's twine under the matching flower was just what this little card needed. A fun way to get my feet wet again in the papercrafting pool!

Counterfeit Kit for July

Can you believe it-an actual blog post after 11 months!  Life has been super crazy.  Lots of changes.  Some good, some not-so-good...but all of those changes have led to one of my very favorite things in the whole world: a fresh start. :)

That's what I've decided to call my Counterfeit Kit for July: Fresh Start. I feel like my style has changed so much in just the past year, so I can't wait to see what will come out of this kit!  New cards, of course, but also layouts!  Yes, I have been taking actual photos that I can't wait to scrap!  Who knew I would ever feel that MY life was worth documenting?  Yep. It's a fresh start. 

The kit we are counterfeiting this month is the Balboa kit from Noel Mignon.   Here is the inspiration kit in all it's loveliness:

Balboa Kit

I just adore the colors and fun elements of this kit. I followed it very closely when I created my own kit, starting with my patterned papers because I had some of the exact ones from the inspiration kit.  I haven't included any cardstock in my kit, as I have recently moved and all of my "colors" are still packed away somewhere. LOL. But I do have my basic kraft and white cardstock handy in my drawer to pull as needed.  Here's my Fresh Start kit:


I'm still looking for my tiny alphas, brads, and veneer frames. I know they're packed in a box here somewhere! LOL. When I come across them, I will add those to my kit, too.

Thanks for looking at my take on this month's kit. I've already made 2 cards using it. I'll be back later to share those. Happy Tuesday! :)