Showing posts with label sewing. Show all posts

Saturday, April 21, 2012

Lovin' Hexagons!

One of the April challenges from the MME blog was to use hexagons prominently on a project.  I have been saving just bits and pieces from this older MME collection called "Love Me Do" just because I loved the colors and prints so much.  Punched hexagons were the perfect way to use up these scraps to make a cute card!

I added a stamped sentiment from Hero Arts, a couple of heart die-cuts from the same MME collection, and a bit of stitching to frame my background.  I think it came out quite cute. :)

Thanks for stopping by, and if you come back later I will have a few more cards from my April Counterfeit Kit to share!

Wednesday, September 7, 2011

Stitched Paper Tutorial and a GIVEAWAY!

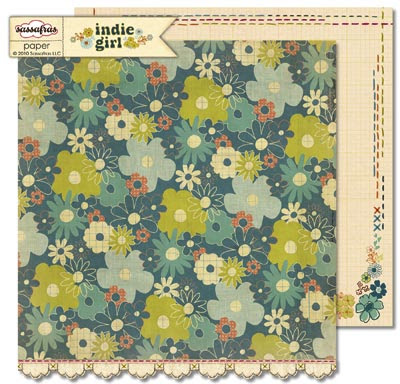
One of my favorite papers in this month's inspiration kit for the Counterfeit Kit Challenge was this paper from Sassafras Lass' "Indie Girl" collection. I have never been a fan of border prints, but I love the faux stitching on the reverse side of this paper! I love dimension on my projects, though, and I thought that actual hand-stitching would add just the right amount of detail to one of my kit papers.

First I marked where I wanted my stitching to go. I made a straight line with a pencil 1/2" from the bottom of my patterned paper. I also made two rows of dots, 1/4" apart, over my straight line. The straight line marked where I wanted my row of straight stitches, while the rows of dots marked where I wanted my cross-stitches to go. After marking my design with a pencil, I used my paper piercer to pierce holes for stitching.
I then used an emerald green embroidery floss to hand-stitch my design. (Please excuse the wonky colors in these photos-it has been rainy and overcast all day, and I just can't get good photos!)

Here is my finished 12x12" paper. I repeated the design at the top so that the stitches will really frame my project. I am going to be using this paper later in the month for one of our challenge projects. Hmm...I wonder what that challenge could be? You'll have to check back to find out!

This post is a fun one for me-it's my 300th blog post! I've shared a lot of projects over the past 2 years and met so many sweet papercrafters as a result of blogging. To celebrate, I'm going to give away a little blog candy: a Gurnsey Gingham background stamp from my Ippity shop on Etsy! Just leave a comment on this blog post by 11:59 PM EST on Sunday, and I will draw a random winner on Monday morning-it's that easy!

Wednesday, July 27, 2011

Christmas (in July) Layout

***Please note that this is my 2nd post for today. Please scroll down for the Master Forgers' Blog Hop post. Thank you! ***


I really wanted to use my 4th of July add-on kit from this month's Counterfeit Kit Challenge, but I didn't have any pictures from this past 4th of July. I did, however, have these photos of a trip that my son, Ryan, and I took way back in December of 2007. We went to Washington, D.C. as part of the Wreaths Across America convoy. On this trip, Ryan placed a Christmas wreath on a grave at Arlington, and he also visited the grave of a soldier he had learned about in his Enrichment Resources class. We also got to meet the soldier's wife and daughter. It was by far the most meaningful trip that either one of has ever taken.

Everything on this layout is from either my July main kit or the 4th of July add-on. I stamped the banners at the top using a photo corner stamp from {ippity}. I also used a Unity Christmas bough stamp to stamp the red strip at the bottom with watermark ink. I am entering this layout in the "My Unity Place" Banners challenge.

Master Forgers' Blog Hop

Welcome to our blog hop for the month of July! If you didn't start at the beginning of the hop, please head over to the Counterfeit Kit Challenge Blog so that you don't miss ANY of the fabulous projects that we have to share with you today!
Our challenge for this hop was to create a flower for our project. I made my flower by punching 6 circles from patterned paper. I folded each of the circles into a petal shape, then adhered them to a circular base. The center of my flower is a 1" circle punched from yellow paper, edges snipped and crumpled slightly. To finish my flower, I then used a 1/2" x 6" strip of coral patterned paper, fringed one edge, then coiled it and "puffed out" the snipped edge. The result is a fun pom-pom center for my flower.
The rest of my card is very simple, with layers of punched borders and a sentiment cut from patterned paper and handstitched to add a bit of interest. I also used my very last piece of coral seam binding (sniff, sniff!) I LOVE this color-thank you so much, Meridy, for sending it to me! It was the perfect pop of color for this card!
Your next stop on today's hop is Kim. I KNOW she has an amazing project to share with you. Thanks for hopping along with us today!

Sunday, July 24, 2011

Counterfeit Kit Challenge #3 and a Giveaway!


Challenge #3 for this month from the Counterfeit Kit Challenge is a fun one, with lots of room to make it your own. The "Gallery Standout Challenge" is to look through your favorite online gallery (such as 2Peas, Scrapbook.com, Splitcoast Stampers-ANY gallery of your choice) and find a project that inspires you. Then create your own project based on the one you love!
For my card above, I chose THIS card by Davinie Fiero, which I found on 2Peas. I switched things up just a little bit, using a little hand-cut house that I crimped and inked in place of the stamped house, but basically I lifted all of the design elements from Davinie's card. I hope that you will all play along with this challenge-don't forget to link up HERE!
Now for the giveaway! This month, we chose to counterfeit a kit from Polkadot Whimsy. One of the add-ons was the adorable Liberty Sparks kit. Guess what? Sweet Michelle Hill, the owner of Polkadot Whimsy, has sponsored a giveaway-you could win the ORIGINAL Liberty Sparks Kit! How awesome is that? Just check out THIS POST on the Counterfeit Kit Challenge blog to enter. Thanks, Michelle!


(Original Liberty Sparks Add-On Kit)

Monday, July 18, 2011

Priceless

I love this card-I got a chance to try lots of fun little techniques! I made this card for a friend, using my July Counterfeit Kit and one of {ippity}'s newest stamp sets, Flowers + Friends + Priceless. I also made another one of Vicky's adorable little envelopes-I adjusted the scale to make it smaller to fit on the front of my card. I also included a little "something special" inside the envelope-a tiny tag with a cute little message.
This was also my first time embellishing crepe paper for a project. I trimmed the bottom edge with pinking shears, then used {ippity}'s Dots for Sure stamp to stamp teal polka dots. I then machine-stitched it to the front of my card. So easy, and I love the result! I will definitely use this technique on other projects.


I am entering this card in the current All Things Unity challenge-Wrap it Up. I used three kinds of twine and also used them three different ways. First, I tied on some buttons. Second, I used it as a clasp for my mini envie. Finally, I tried a new technique: I swirled it around on a round glue dot to create the center for my large yellow flower. I then surrounded the twine with a row of tiny gems.

Thanks for stopping by today-hope to have some more fun projects for you later this week!

Sunday, July 17, 2011

Chicago Style Deep Dish

I have been scrapbooking this weekend-not just cardmaking, but REALLY scrapbooking! This is a one-page layout that I made using my July Counterfeit Kit. If you haven't checked out the Counterfeit Kit Challenge, you need to hop on over there-right now! :) We have some amazing tutorials and inpsiration projects posted already this month, with more to come!
For this layout, I tried my hand at paper pleating. There are tutorials listed on the blog, but I tried my own version and machine-stitched across the top. This is a super simple layout, so

there's really not much else to say about it. One thing I would add is that I re-colored my chipboard letters and the "loopy" border sticker at the top using my old chalks. It really helped me to make the most of my kit contents, plus use up a little bit of my chalk! I also stamped a little "mmm..." near my title using a stamp from my donut stamp set that I included in my kit. Thanks for checking it out!

Friday, July 1, 2011

June Kit Layouts

Our first challenge this month was to find inspiration in an ad. This was a tough one for me-until I saw this Keds ad in a magazine:
I loved the clean design of the layout and knew that it would work well with the photo that I wanted to scrap. I substituted some of my favorite papers and a journaling box for the extra photos in the ad. The background is embossed cardstock from Core'dinations. I lightly sanded it to show the texture. This photo is of my dad and some of his brothers and sisters (taken around 1937). My dad is the little blonde on the right, next to the pink flower. :)

Challenge #2 for the blog hop was to make an "I" page. I immediately though of my Pinterest boards, which I labeled like Apple products (like the iPod and iPhone.) My boards include iBake, iSew, iScrap, etc. I also lifted this design from a layout that I have "pinned" on my iScrap board. Notice the subtle background stamping on the gray background? I did that with my homemade chicken wire stamp! The metal clips were leftover from my May kit.

My last layout was for Challenge #3, "Get in Shape". The challenge was to use a shape as a design element on your page. I had included this large chipboard heart in my kit and knew that it would be perfect for this challenge. I inked it with Creamy Brown chalk ink and then stamped a small branch with heart-shaped leaves all over with brown ink. I also realized that I used all patterned paper for this layout-the only cardstock is my background, but you can't see it because it is covered with patterned paper strips! I can't remember ever making a project using only patterned paper. I really like the look-it reminds me of an old quilt. :) These photos are of me and my parents last summer.

Thanks so much for stopping by today. Today is my last "free" day before a very busy holiday weekend. I hope to get lots of scrapping done!

Friday, April 15, 2011

Counterfeit Kit Challenge-Memorabilia

I am so excited to share my very first chipboard mini album with you! I had so much fun making this-I can't wait to add my photos and memorabilia! I can't yet because I made this album to document my upcoming weekend at CKC-Manchester with my scrappy friend, Lesa!

The page above has a fun pocket on the right-hand side. Recognize it? I "stole" a leftover pocket from my March kit! Then I dressed it up a bit with alpha stickers, a border sticker and some gems. This pocket will hold my class stubs from Friday and any other items that I want. The pocket is 5" wide.
This page also includes a fun pocket to hold memorabilia, probably the stubs from my Copic classes. Can you spot it? It's my mini transparency! I need to tell you how I made this transparency on a budget! I recently transferred all of my Imaginisce Snag 'Em stamps to a Cropper Hopper folder. Each stamp had 2 square transparencies in the package-one printed with the design and one that was "plain". Being the frugal scrapper that I am, I had to save those plain ones! They were the perfect size for the heart stamp that I used for this kit. I stamped the image with black StazOn ink, then colored the back side with Bic Mark-It markers. Then I trimmed around the top of the heart to add a fun edge and stitched it to my paper. Cute little free pocket!

And did you see the zipper flower! It was SO easy! I made it using Becky Olsen's tutorial, but I used Glue Dots instead of the double-sided tape that she recommends. Worked great!

Thanks for stopping by to check out my mini! Don't forget to visit the Counterfeit Kit Challenge blog for the other designers' takes on this challenge!

Wednesday, March 23, 2011

Counterfeit Kit Challenge-Frames


I have admitted many times that I have a seemingly endless supply of chipboard. It was one of those supplies that I bought a TON of when it first became popular, but didn't use very often. I just WANTED it. Now I am trying to use it more often-tyring to make a dent in that stash!

For our "Frames" mini challenge, I turned to my stash of chipboard. Many of you may consider this to be cheating, since the chipboard is not technically part of my kit. I keep my chipboard in the original 12x12 packaging, so it would be difficult to fit in with my kit. Also, I figure ANYTHING that will help me to use up my stash should be legal, lol! So I keep my chipboard sheets hanging in my scraproom closet, readily accessible.

Although I loved this scalloped chipboard frame, it was a little overwhelming for my 8.5x11" layout, especially since I wanted to include at least two photos. So, (gasp!) I CUT one side off of that pretty chipboard frame. Of course, I couldn't bear to throw it away-I tucked it into my kit to use on another project later this month. :)

This was a naked chipboard frame, so I first painted it with acrylic paint, then used Versamark ink and iridescent embossing powder to give it some shine and sparkle. I finished my frame by adhering a little aqua gem in the hole of each scallop.

How will you include a frame on your project? I can't wait to see your takes on this challenge!

Saturday, March 19, 2011

Just Wanted to Say "Hi"...


Just a quick share today of a card that I made this week using my March Counterfeit Kit, a cute digi stamp from Tiddly Inks, and a fun sketch from Twisted Sketches. I have had this little hedgehog saved in my digi stamp folder for a while now. Isn't he the cutest? A friend of mine recently lost someone very near and dear to her, and since she loves hedgehogs, I thought I would drop her this little note.

These aren't colors that I would have ever though to put together without the help of my Counterfeit Kit, but I love the finished card! I especially love the punched borders. These are two that I punched when Lesa, Cindy and I had our Punch & Lunch last month. I love having these borders all punched and ready to go! I added a tiny row of machine stitching across the flower border, then topped each flower with aqua gems. I think it adds a sweet, girly touch to this card. I hope it makes my sweet friend smile. :)

If you haven't checked out the Counterfeit Kit Challenge Blog lately, you need to head on over! Right now, we have an Etsy-inspired challenge going on, plus all of the new DT members are being introduced over the next few days. Stop in and say "hi"!

Tuesday, March 8, 2011

"Get the Look"-Cosmo Cricket's Cocktail

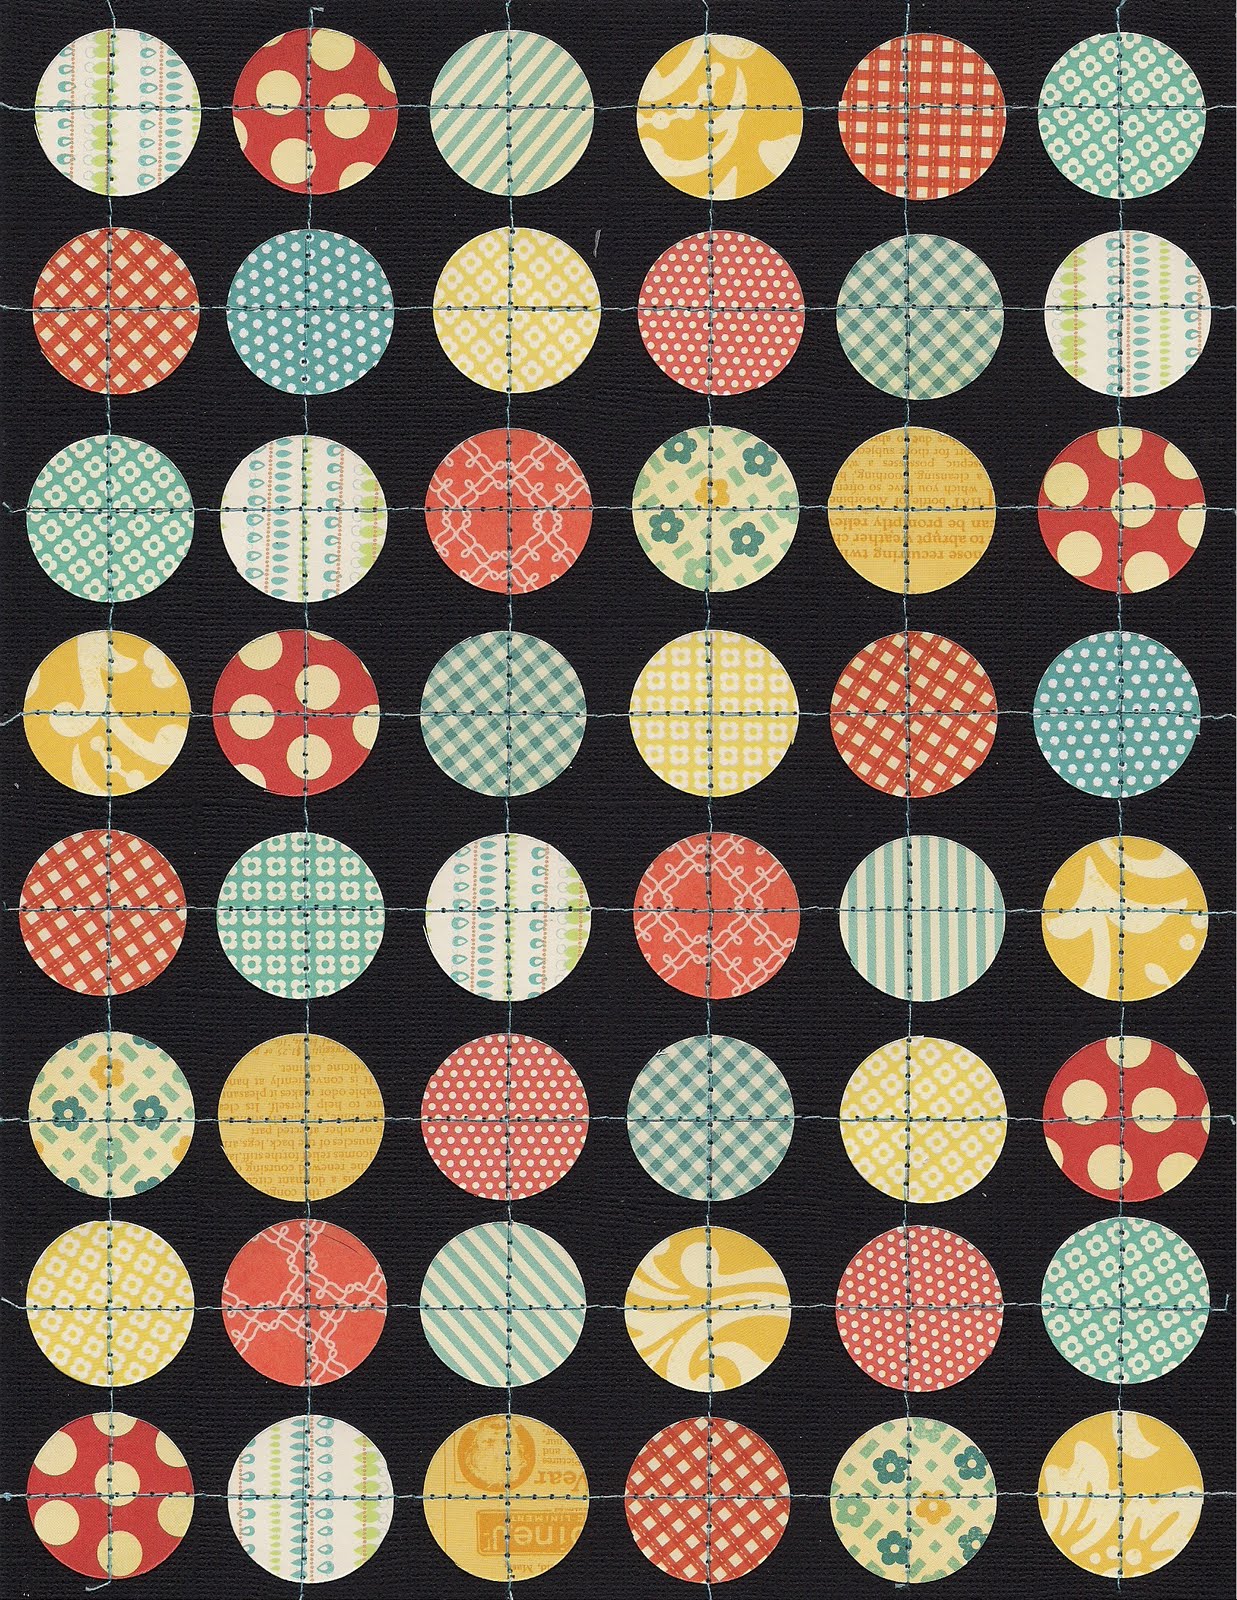
My first example of how to "get the look" of Cocktail, one of Cosmo Cricket's fun new Social Club papers, is very similar to what Bethany shows you in her tutorial HERE on the Counterfeit Kit blog. I simply machine-stitched over each row of circles, using a contrasting thread. Fun look, don't you think? Try this with other shaped punches, too-think butterflies, hearts, flowers...


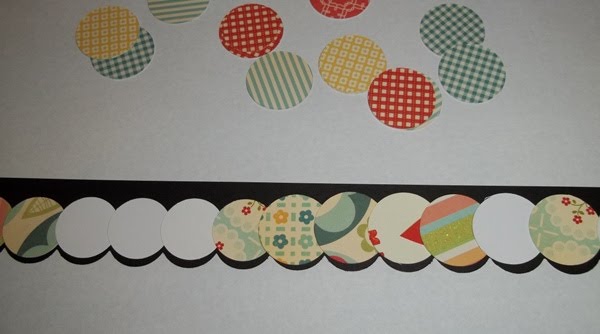
The next way to "get the look", but on a smaller scale, is to punch a solid cardstock border using a large scalloped border punch (mine is from EK Success.) I also punched lots of 1" circles from scraps.

Next, flip your cardstock border over and apply adhesive adross the entire border. I put my border on scrap paper and just ran a tape runner over the entire strip, right over the punched holes. You can see the shine of the adhesive in the photo.
Now you're just going to layer the circles over the back of the border. I overlapped each circle so you can only see one pattern through each punched hole.


Here is the finished border:


I love those pops of color! And because this was made from the materials from my kit, I'm going to use this border on a project this month, too! Thanks for stopping by!


Saturday, February 26, 2011

A Fun Birthday Card


I can share this one with you now that the recipient FINALLY got it in the mail! I am really good about MAKING cards, but not-so-good about actually MAILING the cards. Many of you know this about me. ;) I should probably just stamp every birthday card I make with a belated birthday sentiment, just to be on the safe side.
This card uses Lawn Fawn's "Bake Me a Cake" stamp set and fun new papers from Momenta. Lots of paper piecing here, which is one of my favorite techniques ever. I think it comes from my love of patterned paper (and the hoarding of said paper!)
Thanks for stopping by!

Sunday, January 2, 2011

Thank You and Birthday cards


First up is a different type of card than what I usually do. All black and white! This one is based on last Thursday's challenge at 365 cards. The challenge was to use a silhouette on your card, and the twist was that you could only use black and white. This was a hard one! I stamped one of my Mimi images (from DeNami Design) and just colored everything in with a black marker. I was quite pleased with the results! I then reached into my scraps and found a piece of black and white patterned paper from American Crafts. The sentiment is from Lawn Fawn. I stamped it with Versamark ink and then embossed it with white embossing powder. I thought it needed some "oomph", so I gave the girls a little bit of bling with Icicle Stickles.


I just love this next card, Peachy Birthday. This card was also made for the 365 card challenge blog. Last Wednesday's challenge was to "Keep It Simple" by only using one image, one sentiment, and one embellie. Another twist was that you could only use 1/3 of the card surface. Again, quite a struggle for me since I love embellies! I love the patterned paper cake layers, though-I think they are an embellishment in themselves. All of these papers are from an old DCWV stack-Nana's Nursery. The cake stamps are from Lawn fawn, and the sentiment is from imaginisce. The colors were inspired by Mona Pendleton's new challenge blog: CR84FN.


Finally, I have a birthday card for my Hero Arts friend, Marilyn. I missed her birthday the other day, but I still wanted to send her a pretty card. Plus, I owe her one! Marilyn sent me an adorable card last summer, so it's my turn. :) This card is based on Sketch #2 of sketch week by Lucy Abrams. I used another stamp (the dressform) from Lawn Fawn, and the same Imaginisce sentiment. I also embellished the tag a little bit with a Martha Stewart border punch. Making a dent in my stash, too-the red polka dot paper is AT LEAST 10 years old! It came in a Bitty Paper stack from Provo Craft which I got when I first started scrapbooking way back when. I loved the color and the print, though, so it never made it's way into the circular file. I love the combo of red and teal. They look great with the kraft and white, don't you think?


Saturday, January 1, 2011

My Scrappy New Year's Goals

I have set a big goal for myself this year. Several scrappy friends have been talking about doing the popular Project 365 albums, where they take a picture each day and scrapbook it. At the end of 2011, they will have 365 photos. I'm not much of a scrapbooker, but I am a die-hard cardmaker. I also like to hoarde scrapping supplies. :) I am combining these two "talents" to create my own spin on Project 365. I am going to post a new project each day (usually a card, but sometimes a layout, tag, gift bag, etc.) My goal: to have completed 365 projects by the end of 2011. The twist: I am not allowing myself to buy ANY new scrappy supplies (other than adhesive) until I meet my goal. That's right-no new stamps, papers, punches, or ribbon. These are all major weaknesses for me! I am, however, continuing to design for Momenta (a VERY generous company that sends me monthly goody boxes) and I am also going to be entering many, many challenges in hopes of winning some new supplies. (Winning is very different from buying, lol!

(This card is out for PUBLICATION!)

I am sharing a few cards with you today. The first two are for this past week's 365 Cards Challenge. This is a new challenge site for me, but it will hopefully keep me both motivated and inspired this year. Monday's challenge was to pick 3 patterns from a list of choices. I chose houndtooth, paisley, and plaid. Since I am trying to use up my scraps, I punched hearts from each of these patterns (and I threw in a polka dot just because I liked it!) Then I stitched the hearts to my card front, scored the edges, and added a stamped sentiment and three tiny gems. Not a bit of adhesive on this card! This card is also based on Day 1 of Lucy's Sketch Challenge.

Tuesday's challenge was "Let's Make Some Noise!" The task: add something that makes noise to your card. I thought about this one for a long time. As I was looking through my stamp sets, I saw the VW bug stamp and the "Just Married" license plate. I thought it would be cute to tie some "cans" to the back of the car. I searched through my embellies, looking for silver beads for the "cans". What I found instead were these two album extenders which came in a package of page protectors. They jingle when you tip the card, making just a bit of noise. I thought it was a pretty creative idea. :)


The third and final card of the day is for my friend and fellow Momenta designer, Kelly Cranfill. She recently had a little girl, Braelyn Joy. Congratulations, Kelly! This card uses a premade card base and chipboard stickers from Momenta. I tried a new technique that I just saw in the new Scrapbooks Etc. magazine. I put masking tape on the back of plain white muslin, then embossed it with a Cuttlebug folder. It really works! It was the perfect touch for my card. This is also my entry for the Cardabilities Sketch Challenge #18.


Thanks for stopping by today! Please come back again tomorrow for some cute and easy "Thank You" cards and the rest of my 365 Cards Challenge entries. As always, I would love to have you leave me a comment-they keep me smiling and motivated!


Friday, September 10, 2010

Get Sketchy #55


I love our sponsor this week: The Greeting Farm! I have been wanting to try images from The Greeting Farm for the longest time, and I finally got my chance this week. Isn't this little girl just the cutest? I was a little nervous, though, because I've always seen cardmakers color the images with Copics. I have a few Copics (thanks to a sweet and generous friend) but haven't mastered the art of blending them yet. I decided to paper-piece the image. I added some patterned paper from Momenta and Love, Elsie, and a mix of paper flowers and pearls.
Will you join us this week for your chance to win some adorable images from The Greeting Farm? Check out all of the details over on the Get Sketchy blog and make sure you leave some love for all of the DT members-their projects this week are amazing! Everyone truly outdid themselves. Love these girls!

Friday, April 2, 2010

Vintage Easter Bunny


I just finished a last minute Easter card based on this week's sketch at Card Patterns. I picked up this adorable bunny stamp a few weeks ago at A.C. Moore for just a buck, but have been a little hesitant to use it because it's not my usual "cutesy" style. I paired it with some Anna Griffin polka-dot paper, antique lace, Imaginisce flowers and SEI pearls. How's that for a hodge-podge of materials? :) I love that I made a teeny tiny dent in my stash. I may have to make some more of these before Sunday (minus the handstitching around the edge. Too time-consuming for multiple cards!) Speaking of the stitching, I added that so that it would fit with another web challenge-this on for Embellish magazine. Their challenge was to use kraft, light pink and light aqua, plus incorporate some sort of stitching.

I want to wish you all a very Happy Easter. Hope the bunny hops by to visit you!

Friday, January 22, 2010

An elegant birthday card


I made this birthday card for my mother-in-law. At first, I didn't think this was my usual style. After all, it doesn't feature any cute little critters! But looking at each of the details, I can definitely see where it's got my own little touches.

For example, it features a mix of patterned papers. If you're not confident about mixing patterns, go with coordinating papers from the same manufacturer/line. That's what I did here. I've used three different patterned papers, all from Cosmo Cricket. They work well together because one has a bold print (the cream floral on the bottom) while the other two have more subtle, tone-on-tone prints. These subtle patterns work as solids, but with a little "oomph." Love the "oomph".

Next, it features some 3D elements. The chipboard label is from Technique Tuesday, and it makes a great accent when inked and stamped. The gray border is also 3D, as it is pleated and stand just slightly above the rest of the card. Very easy to make-just start with a 12" long piece of patterned paper, then score and fold at regular intervals for a polished, formal look. Or, for a fun look, fold at random intervals.

Finally, it has ribbon, sewing and stickles, three things that I find I use constantly on my projects. The ribbon is stitched along the front of the card using little loops of orange thread, which worked well with the coral patterned paper. Kind of spiced it up a bit, I think, but in an elegant way. I left the ribbon extending beyond the edge of the card. I've been doing that a lot lately-adds a little personality. And of course I added stickles! My collection of colors keeps growing. They're the perfect touch for cards-they add sparkle and personality without bulk.

Hope you enjoyed this card. I've got lots more to share soon!

Monday, December 21, 2009

Santa and Reindeer


These little images by Studio G are just too cute, don't you think? I would LOVE to find this set for myself-these were my mom's. The set also came with a little snowman. What a steal for $1!

As with a lot of my stamped images, I paper-pieced the santa and reindeer. First, however, I stamped both images on the white background, then ran it through my Sizzix Big Kick with a Cuttlebug embossing folder (Swiss Dots.) That way, I didn't have to try to cut out the little antlers and feet. I just colored them in on the white base, then stamped each image on colored cardstock. Since I don't have Copic markers (yet!) I find that I get the cleanest, boldest results from paper-piecing. Stickles add a little sparkle to the images. To finish the card, I stamped "Be Merry" with a Hero Arts stamp, and tied on some ribbon and buttons.

Very simple, but I have to say, this was one of my favorite cards this year.

Christmas Gift Card Holders


Here are some gift card holders that I made using Hero Arts stamps. The card design is one that Jennifer McGuire featured last year on her blog. The gift card slides right into the front of the card (you can see mine-it's light blue) into a sleeve. The sleeve is machine-stitched and adhered to the card front. Finally, you add a punched circle to the front of the sleeve and embellish as desired.

I chose to use these adorable little critters from Hero Arts. I love the owl-how cute is he in that little sweater?! I also embossed the white circles with my Cuttlebug Swiss Dots embossing folder, just to make the critters stand out a little bit.

This design is so versatile-you can personalize it for any holiday. Just think of all of the gift cards that you give in a year-birthdays, thank you's (I have some coffee stamps that would be so cute with a Tim Horton's card tucked inside!)

If you haven't checked it out already, you should head over to the Hero Arts blog this week and also check out the Hero Arts Flickr group. They are hosting a two-week contest for cards that hold gifts (including gift cards.) There are some really cute projects there!