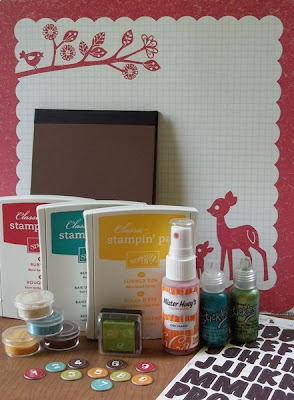
Showing posts with label chipboard. Show all posts

Sunday, July 17, 2011

Chicago Style Deep Dish

I have been scrapbooking this weekend-not just cardmaking, but REALLY scrapbooking! This is a one-page layout that I made using my July Counterfeit Kit. If you haven't checked out the Counterfeit Kit Challenge, you need to hop on over there-right now! :) We have some amazing tutorials and inpsiration projects posted already this month, with more to come!
For this layout, I tried my hand at paper pleating. There are tutorials listed on the blog, but I tried my own version and machine-stitched across the top. This is a super simple layout, so

there's really not much else to say about it. One thing I would add is that I re-colored my chipboard letters and the "loopy" border sticker at the top using my old chalks. It really helped me to make the most of my kit contents, plus use up a little bit of my chalk! I also stamped a little "mmm..." near my title using a stamp from my donut stamp set that I included in my kit. Thanks for checking it out!

Friday, July 15, 2011

Patriotic Thank You

Today I get to share with you my creation for the Counterfeit Kit Challenge's first challenge for July. It is all about embossing-you can dry emboss or heat emboss. I chose to dry emboss, but with a twist. I wanted to emboss a coordinating border for my card. Since I wanted to make my card using leftovers from my 4th of July Add-On, I thought stars would be a fun accent. My only problem: I don't have a star embossing folder. So, I decided to make my own embossing plate.
First, I found a thin piece of chipboard (this piece came in a package of Stampin' Up patterned paper.) I trimmed the chipboard to be slightly larger than my card front. Then I used a star punch to punch 6 stars from the leftover chipboard. I arranged 3 of the stars on my chipboard base, then adhered them down. Because the chipboard was so thin, I stacked another star on top of each on the base and adhered them so that I could get a deeper impression.
Then it was time to emboss. It took a little trial-and-error to come up with the right "sandwich" for my embossing plate, but here is what worked for the thickness of chipboard that I used. You may need to adjust your "sandwich" if your chipboard or cardstock is heavier than mine. I started with Tab 1, one clear cutting pad,and the homemade embossing plate. (Make sure the star punches are facing UP.)

Next, I stacked my kraft cardstock on top of the embossing plate, making sure that the edges were placed slightly inside the edge of the embossing plate.

The next layer is the black silicone pad that I use with my Sizzix embossing plates.

The final layer is the hard black plastic pad, also used with the Sizzix embossing plates.

Carefully run all layers through your die cut machine. Here is what the finished cardstock will look like:

To highlight the embossing, I rubbed a Creamy Brown chalk ink pad over the tops of the stars and also around all of the edges of the kraft cardstock. I attached the embossed panel to the front of my card base, then embellished the card with rub-on letters and a handmade bunting embellie.

I love the Americana look, and the tri-color bunting looks slightly vintage. I can't wait to try this embellie using softer colored papers from my main kit. Thanks for stopping by!

Friday, July 1, 2011

June Kit Layouts

Our first challenge this month was to find inspiration in an ad. This was a tough one for me-until I saw this Keds ad in a magazine:
I loved the clean design of the layout and knew that it would work well with the photo that I wanted to scrap. I substituted some of my favorite papers and a journaling box for the extra photos in the ad. The background is embossed cardstock from Core'dinations. I lightly sanded it to show the texture. This photo is of my dad and some of his brothers and sisters (taken around 1937). My dad is the little blonde on the right, next to the pink flower. :)

Challenge #2 for the blog hop was to make an "I" page. I immediately though of my Pinterest boards, which I labeled like Apple products (like the iPod and iPhone.) My boards include iBake, iSew, iScrap, etc. I also lifted this design from a layout that I have "pinned" on my iScrap board. Notice the subtle background stamping on the gray background? I did that with my homemade chicken wire stamp! The metal clips were leftover from my May kit.

My last layout was for Challenge #3, "Get in Shape". The challenge was to use a shape as a design element on your page. I had included this large chipboard heart in my kit and knew that it would be perfect for this challenge. I inked it with Creamy Brown chalk ink and then stamped a small branch with heart-shaped leaves all over with brown ink. I also realized that I used all patterned paper for this layout-the only cardstock is my background, but you can't see it because it is covered with patterned paper strips! I can't remember ever making a project using only patterned paper. I really like the look-it reminds me of an old quilt. :) These photos are of me and my parents last summer.

Thanks so much for stopping by today. Today is my last "free" day before a very busy holiday weekend. I hope to get lots of scrapping done!

Monday, June 6, 2011

June Counterfeit Kit

Can you believe that it is June already? Or that the Counterfeit Kit Challenge is 6 months old? This month, we are counterfeiting our 6th kit! It's a beautiful kit from a a brand-new kit club called Burlap & Buttercups. You can see the inspiration kit and add-on HERE.


Although this kit is very pretty, I knew that I would have to make some changes when I copied it. First of all, my style is much more cutesy and whimsical, so most of my supplies fall into those styles as well-not much cutesy or whimsical about the inspiration kit. Secondly, I wanted to make a kit that I would actually use a lot this month. Even if I could replicate the style of this kit, I'm not sure if I would use it as much as if I "tweaked" it a bit. Here is a breakdown of my kit:
I almost always start with my patterned papers. This month, I didn't have many papers that matched up well with the inspiration kit. I chose one paper from the inspiration kit to counterfeit (the doily print) and then built my kit around that paper. I chose the circle print that you see in the lower right corner of the photo above. It is a new print from Simple Stories, and I just love it. I knew that it would be the perfect paper to inspire my kit. My other papers were also loosely inspired by the inspiration kit, keeping in mind my own style and coordinating with my doily paper.The inspiration kit didn't include a ton of embellishments, so I added some extras. :) Instead of the Maya Road square chipboard frames, I included three scalloped circle chipboard frames and centers from Technique Tuesday. While I had the packages of chipboard out, I saw this large scalloped heart frame, also from Technique Tuesday. Although there was nothing like this in the inspiration kit, I loved it and knew that it would look great with my kit. It's also one of those embellies that I've been "saving" for the perfect project. I'm trying to get rid of that mentality! It is my goal to use that pretty frame this month!
Instead of the icon/phrase stickers in the inspiration kit, I pulled several vintage style die cuts from K&Co. (a gift from Meridy!) Many of them are travel-themed, and I am taking a road trip with my family this month. I think these will work perfectly in a mini album.


This add-on kit is inspired by the Burlap & Butterflies add-on. I didn't counterfeit many of the stickers-again, I wanted to make sure that I would use what I made. Instead, I saw one of the stickers had individual circles with letters in them. I found some chipboard circle stickers with numbers on them in colors that coordinated with my kit. I added them, and I already have a project in mind to finally use them! I also pulled coordinating inks, stickles, and flocking.
I am also making two additional add-ons this month, which I will share with you tomorrow. One is inspired by Studio Calico's June Star Dust add-on. The other is for the Counterfeit Kit Challenge's summer add-on. I will be counterfeiting a summer line from one of my favorite companies, Echo Park. Please check back-I will have some fun tutorials!

Friday, May 27, 2011

May Counterfeit Blog Hop


Welcome to your next stop on the Counterfeit Kit Challenge Blog Hop! If you didn't start at the very beginning, you will want to start HERE.

Our blog hop challenge was to be inspired by a project from a manufacturer's blog. This wasn't hard-although narrowing it down to just one inspiration project was a bit tricky! I immediately went to the Pink Paislee blog where I found THIS adorable layout by Caroline Ikeji. I have always loved Caroline's layouts-especially the way she mixes patterns and clusters embellishments. I tried the cluster technique on this layout. I think I have a new favorite technique!

I'm so glad you stopped by today. Your next stop on today's hop is the fabulous Kim's blog!

Thursday, May 26, 2011

Us.

***This is my second post for today. Please scroll down for my Momenta Faux Bingo Markers Project.***


When I look at this layout, it's hard to believe that I actually made it. First, it's a layout. And it's completed. Go me, lol! Second, it's a 12 x 12 layout. Usually I scrap 8.5 x 11, but the past few that I have done have been 12 x 12. I like it. :) Finally, I used eyelets. Amazing! I don't remember the last time I used an eyelet!

So, I finished a cute layout using one of my all-time favorite photos of Donny and the kids. I actually finished 2 layouts today, but you'll have to come back tomorrow for the second one. It's for the Counterfeit Kit Challenge Master Forgers' Blog Hop tomorrow! You won't want to miss it!

Buddy Card with Faux Bingo Marker


Hello! I am super-excited to share that I am blogging over on the Momenta blog today! Over there I am sharing how I made my faux wooden bingo markers that I included in my May Counterfeit Kit. I used one of the star ones as an embellishment on this card. I love all of the textures and layers and happy colors here. :)


All of the supplies that I used on this card are from my May kit. I also used the fabric-covered brads that I made for this month's kit. Aren't they super-fun? If you're not familiar with the Counterfeit Kit Challenge, you are missing out! Go check out all of the fun at http://www.counterfeitkitchallenge.blogspot.com/. Don't forget to check out the Momenta blog for the tutorial, too!

Friday, April 22, 2011

Counterfeit Kit Mini Challenge #3: Inspired by Food

Our mini challenge was to create a project inspired by our favorite foods. My favorite food is ice cream-hands down! I knew that I wanted to scrap these photos from our trip to the Ben & Jerry's factory last fall. As I looked through my kit, I noticed my cloud papers and chipboard shapes, the scalloped borders, and the blues and greens. My mind instantly thought of the B&J's containers. I thought it would be fun to recreate the background from the packaging. Although it's not exact, it's definitely inspired by the packaging. I am so proud of myself for getting these photos scrapped and on a 2-page spread, to boot! :)
We would love to see your take on this challenge! You can see the original post HERE on the Counterfeit Kit blog.

Friday, April 15, 2011

Counterfeit Kit Challenge-Memorabilia

I am so excited to share my very first chipboard mini album with you! I had so much fun making this-I can't wait to add my photos and memorabilia! I can't yet because I made this album to document my upcoming weekend at CKC-Manchester with my scrappy friend, Lesa!

The page above has a fun pocket on the right-hand side. Recognize it? I "stole" a leftover pocket from my March kit! Then I dressed it up a bit with alpha stickers, a border sticker and some gems. This pocket will hold my class stubs from Friday and any other items that I want. The pocket is 5" wide.
This page also includes a fun pocket to hold memorabilia, probably the stubs from my Copic classes. Can you spot it? It's my mini transparency! I need to tell you how I made this transparency on a budget! I recently transferred all of my Imaginisce Snag 'Em stamps to a Cropper Hopper folder. Each stamp had 2 square transparencies in the package-one printed with the design and one that was "plain". Being the frugal scrapper that I am, I had to save those plain ones! They were the perfect size for the heart stamp that I used for this kit. I stamped the image with black StazOn ink, then colored the back side with Bic Mark-It markers. Then I trimmed around the top of the heart to add a fun edge and stitched it to my paper. Cute little free pocket!

And did you see the zipper flower! It was SO easy! I made it using Becky Olsen's tutorial, but I used Glue Dots instead of the double-sided tape that she recommends. Worked great!

Thanks for stopping by to check out my mini! Don't forget to visit the Counterfeit Kit Challenge blog for the other designers' takes on this challenge!

Wednesday, March 23, 2011

Counterfeit Kit Challenge-Frames


I have admitted many times that I have a seemingly endless supply of chipboard. It was one of those supplies that I bought a TON of when it first became popular, but didn't use very often. I just WANTED it. Now I am trying to use it more often-tyring to make a dent in that stash!

For our "Frames" mini challenge, I turned to my stash of chipboard. Many of you may consider this to be cheating, since the chipboard is not technically part of my kit. I keep my chipboard in the original 12x12 packaging, so it would be difficult to fit in with my kit. Also, I figure ANYTHING that will help me to use up my stash should be legal, lol! So I keep my chipboard sheets hanging in my scraproom closet, readily accessible.

Although I loved this scalloped chipboard frame, it was a little overwhelming for my 8.5x11" layout, especially since I wanted to include at least two photos. So, (gasp!) I CUT one side off of that pretty chipboard frame. Of course, I couldn't bear to throw it away-I tucked it into my kit to use on another project later this month. :)

This was a naked chipboard frame, so I first painted it with acrylic paint, then used Versamark ink and iridescent embossing powder to give it some shine and sparkle. I finished my frame by adhering a little aqua gem in the hole of each scallop.

How will you include a frame on your project? I can't wait to see your takes on this challenge!

Friday, March 11, 2011

My Counterfeit Sunny Clearing Kit

I love this little kit. The colors, the patterns...and how easy it was for my to pull together. :)
All of the papers are from Cosmo Cricket's Material Girl 6x6 paper pad. I also pulled a few Cosmo Cricket Elements from another line, some cute little chipboard flower buttons from Dollar Tree, and a set of Studio G number/alpha border stamps. I decided that instead of the large scalloped calendar from the inspiration kit, I would use my Hero Arts doily stamp. I really love this stamp, and I think it works well with the rest of the kit. I stamped it on Crushed curry cardstock with Versamark ink, then heat embossed it with white embossing powder.
My sweet mom crocheted me some tiny doilies, too, but I didn't have them when I took this photo. I also made a couple of embellished paper clips using buttons and oversized epoxy brads. You will see them both on a project or two very soon. :)
Don't forget to stop by the Counterfeit Kit challenge blog to see Meridy's kit and Bethany's kit, along with some fun links to freebies for your own kits.

Sunday, March 6, 2011

March Counterfeit Kit Challenge

I'm so excited to be the Guest Designer this month at the Counterfeit Kit Challenge Blog! This month's inspiration kits are from Studio Calico. That's right-I said kits, with an "s"! Not only are Meridy, Bethany and I counterfeiting the main kit, but we also are each making the FOUR add-on kits! Lots of scrappy goodness, I tell you!
Today, we are each sharing our main kits on the Counterfeit Kit Challenge blog, and I am sharing mine here with you. Here is the main inspiration kit from Studio Calico:


And here is my kit:

With this kit, I was able to match almost all of the papers very closely. The only exception was the Woodland paper (top, second from the left.) I chose a repeating aqua pattern from Basic Grey. The colors in this pattern worked well with the other papers in my kit. My cardstocks are Lagoon, Watermelon, Crushed Curry, Kraft, White, Ivory and Black. I have also included a couple of small scraps of green that matched one of my add-on kits perfectly.

When it came to the embellishments, however, I had to make some substitutions. I started with the bee stamp. I don't have a bee stamp, but I saw this pretty butterfly stamp that a friend recently gave me. I added that to my kit, and that inspired me to add the chipboard butterflies. My label stickers are from Martha Stewart, and the colors go well with my papers. Finally, instead of the larger letter stickers and title die-cut, I included a rub-on alphabet and a package of Basic Grey rub-ons. The rub-ons have lots of icons (including some bees) and sentiments which would work well for either cards or layouts.

I will also add buttons as I make my projects. I discovered in January with my first kit that it is much more practical for me to keep my buttons in their original jars and just take what I want as I go.

Thank so much for stopping by today! I can't wait to show you my add-on kits, plus I am itching to start making some projects to share! Don't forget to take photos of your kits and share them on the blog or on the Counterfeit Kit Facebook Page-we'd love to see how you're inspired by the kits!


Monday, February 28, 2011

Counterfeit Kit Blog Hop

Welcome to your next stop on February's Counterfeit Kit Blog Hop! You should have arrived here from Melissa's fabulous blog. If not, make sure that you start the hop right at the Counterfeit Kit Challenge blog so you don't miss any of the amazing projects!


This month's inspiration kit was from Scraps of Darkness. You can see photos of the inspiration kit HERE, and you can also check out my blog post HERE that shows the contents of (and the logic behind) my counterfeit kit. Here are a couple of projects that I've made with my kit.

Here is the sketch from Scraps of Darkness:

And here is my layout:


It's hard to see in the photo, but I finally used my Perfect Pearls mists! I sprayed the background and the brown chipboard flourish with Interference Red mist. So pretty when the light hits it!

I also made a couple of cards (of course!) The first uses supplies from my kit plus a cute little button card stamp from Unity Stamp Co. I'm embarrassed to say that I've had this stamp for a few months and didn't know what it was, lol. I just saw a new set from PTI that had a similar stamp and realized what it was! Now it is one of my favorites. :)

The next card was actually the first project that I made using my kit, back at the beginning of the month. The card base is made from the postage stamp die cuts (from the Create a Critter Cricut cartridge). The flower and sentiment stamps are from Ippity. If you would like these stamp sets, I happen to know a *fabulous* Ippity chick. ;) Plus, I think I finally achieved the vintage look with these two cards!
I am so very glad that you had a chance to hop along with us today. I'd love it if you left me a comment, too! Your next stop on the hop is the amazingly talented Marianne!

Wednesday, February 16, 2011

My Counterfeit Kit for February

I have to admit that this month's Counterfeit Kit Challenge was a huge challenge for me. While I loved the color swatches that Bethany and Meridy posted before the kit reveal, I was very intimidated when I saw the actual inspiration kit. It was totally not my style-not the colors, the patterns, embellies, anything. But I really wanted to play along, so I thought a lot about how I could use the inspiration kit.
I decided to make a list of kit contents, but in a very general way. First, I started with the papers. Rather than try to match the papers in the inspiration kit exactly (which would have been impossible from my stash), I wrote down what the inspiration kit contained: a distressed solid, a flourish/heart pattern, a polka dot, a basic geometric pattern, and three all-over patterns. Now this was a list I could work with! I started with the flourish/heart pattern. I looked through my patterned paper and found this beautiful heart flourish paper from the Bittersweet collection from Basic Grey. This is the paper that I built my entire kit around. I had the matching stripe, so that took care of my basic geometric. I was then able to pull other papers that coordinated. I added a distressed pink solid from Basic Grey (a different line, but still matched), a kraft/cream polka dot, and three all-over patterns: the heart woodgrain (Imaginisce), cream flower (My Mind's Eye) and little fruits (an old Basic Grey line-Recess.) I added one other patterned paper-the numbers-which remind me of the bingo card in the inspiration kit. I didn't end up using the bingo cards from my January kit, so I substituted patterned paper. I think that I am more likely to use this paper than the actual bingo cards.

For embellishments, I found some great printable postcards, tags, and vintage images on Flickr. I also fell in love with the printable doily tags, which I believe were linked on Write. Click. Scrapbook. I also threw in some journaling boxes which were leftover from an SEI album kit.
I found that I didn't include enough letter stickers in my January kit, so I really loaded this kit up with some fun stickers and rub-ons. More mini alphas from Making Memories, a sheet of Basic Grey stickers that have sat untouched in my stash for 3 years (since my very first CKC class!), two different sets of rub-ons from Imaginisce and Cosmo Cricket (thank you, Eryn Hagen!), some pearl flourishes and Momenta Bubbles & Bling. The Bubbles & Bling will work great in place of the mirrored embellies in the inspiration kit, which really weren't my style.

For 3D embellies, I included some chipboard pieces from Colorbok (flourishes) and Fancy Pants, large postage stamp die-cuts which I plan to use for a card base, tiny pearl ribbon slides, and assorted trims. I am anxious to make some of the faux Prima flowers, but I will do that as I make my projects. I also plan on using buttons on my projects, but I found it was just as easy to add the buttons to my kit as I go along. My buttons are all sorted by colors in individual jars, so I can easily just pick what I want. :)

Finally, I added two sets of seriously neglected clear stamps. The smaller set is The Language of Love by Technique Tuesday. The flourishes are from Gel-a-Tins. These stamp sets will work really well with my papers, and I hope that by including them in my kit I will remember to use them!

Thanks for stopping by today. I know this was a long post. Hopefully I have inspired you to think outside of the box a little bit when it comes to finding inspiration in other kits or projects. Can't wait to start creating with my Counterfeit Kit!

Monday, February 14, 2011

Happy Valentine's Day!


Today's share is one of my "rejects", lol! It is perfect for Valentine's Day. Around the outside of the spinner, I have stamped "I think you are..." and then the spinner has four different images and cute little words to end the sentence. I just thought this stamp set was the cutest when I saw it at Michael's a couple of weeks ago. I exercised great willpower when I left it sitting there in the $ bin! My sweet daughter had seen me looking at it in the store, however, and surprised me with it after we got home. How sweet is she? I have to finish up a couple other Valentine cards today, so I will hopefully get a chance to share those later.

Stamps are from Studio G and patterned papers are from the Love Me Do collection from My Mind's Eye. Thanks for stopping by!

Friday, February 11, 2011

Counterfeit Kit Challenge Cards

I've been MIA for a couple of weeks here in blogland, but I do have a couple of shares today using my January Counterfeit Kit. If you're new to the Counterfeit Kit challenge, you can check it out HERE. It's a great idea-you "copy" the items from monthly kits using items from your own scrapbooking stash! There are also some amazing tutorials for making your own embellishments. THIS post has links to some amazing faux Prima flowers. I can't wait to try them!First of all, this is what my January kit had in it, using only items from my stash and elements that I was able to download for free online. (This is also perfect for me, as I am still on my spending freeze until I get my 365 projects done!)
I have only made two cards so far using my kit. I've been so busy with DT work and magazine submissions that I haven't had a chance to play with it much! I loved the way these two projects came out, however. I don't think that I would have ever thought to pair up some of these embellishments without having them right in this kit. Because I still have tons of supplies left in my kit, I am not going to "dismantle" it yet. I have everything (except my stamps and ink) in a separate paper holder so that I can just grab my kit and get to work.

This first card was for the Card-Bling-Fashion mini challenge on the Counterfeit Kit Blog. I found a picture of a retro red-and-white polka dot sundress online and used it as my inspiration. While making this card, I decided to add a package of white chipboard letters to my kit. I realized that the alpha stickers that I had included were not enough and that I wanted to be able to mix and match alphas on my projects. I also used a chipboard tag that was not in my original kit. I am trying to use up some big packages of chipboard shapes from my stash. These packages are really large and will literally not fit in my kit, so I keep them near my scrap table. Hopefully I can start to make a dent in my chipboard stash!
The second card that I made was for the Sketch Mini Challenge. I took the layout sketch and changed it up a bit to work for a card. Everything on the card was from my kit, and I used the added chipboard letters for this card-but with a twist. The white letters didn't show up on the white journaling block. I knew that I would need to alter them somehow. I looked through my supplies and saw that I had some dark brown flocking from Studio G. I played around for a bit and found that if I flipped over the HI, it looked the same. So, I kept it flipped over and covered the sticky side of the letters with the flocking. Voila-perfectly flocked letters without having to mess with adhesive! Obviously this wouldn't work for all letters, but it will work for some and also most shapes.

I'm excited to start building my kit for February. I'm a bit behind, but hopefully will get to it this morning. This one's going to be a real challenge for me because the elements in the kit are totally not my style so who knows what I will end up with, lol! Maybe I will find things in my stash I didn't even know I had! :)

Friday, January 28, 2011

Krafty Hello


I made this card for several challenges. The colors were inspired by the photo above, from the CR84FN Color challenge #12. Soft and pretty, and very feminine, don't you think? These would make great colors for an Easter card, too.

I used the Card Patterns Sketch #99 for this. I loved this sketch-it's a great design that I know I will use again and again. I think it's the scalloped border-one of my favorite things to include on a card. You could easily change this up by using a different border punch in place of the scallop. My scalloped border is actually a premade chipboard border from Technique Tuesday. As I try to use up some of my stash, I am finding lots of goodies that I had forgotten about! The chipboard circle, scalloped circle, and flower stamp are also from Technique Tuesday.
I'm lovin' my kraft cardstock lately, and this is my entry for the Kraft Journal's Anything Goes challenge this week. finally, it is also my entry for the new Altered Alice challenge blog to create a hello or goodbye card.

Thanks for stopping by!

Saturday, January 15, 2011

Happy Couple Card and Glitter Giveaway


You all know I like to add a touch of bling to my projects. Just a touch. ;) Sometimes it's gems, sometimes it's pearls, sometimes it's glitter. Wanna get some FREE glitter? Meyer Imports is having a giveaway on their blog. You can check it out HERE. Tell 'em I sent you!

For this card, I used a submission sketch from PaperCrafts magazine. I made the card, but I didn't submit it. I don't know why I didn't, I was just having a "not very confident" kind of day on the day of the deadline. :( Now I kick myself for not submitting all of the cards I had made for the call. The good news is that I will be sharing them with all of you sooner!

First I cut a panel of white cardstock, then covered it with rectangles that I trimmed from patterned papers. I used monochromatics, but I think that I will try this card again with brighter scraps. It makes for a fun background! Then I just popped this panel up using foam squares. And look-no stamping! I used a puffy sentiment and chipboard wedding ring stickers. I added a touch of bling to the diamond using Rock Candy Distress Stickles. I love that the photo caught the sparkle of the diamond!

I have been working hard on tons of new cards for Momenta's booth at CHA. You're going to love the new products-they are SO CUTE! That's all I can say for now. Sworn to secrecy. :)

Saturday, January 1, 2011

My Scrappy New Year's Goals

I have set a big goal for myself this year. Several scrappy friends have been talking about doing the popular Project 365 albums, where they take a picture each day and scrapbook it. At the end of 2011, they will have 365 photos. I'm not much of a scrapbooker, but I am a die-hard cardmaker. I also like to hoarde scrapping supplies. :) I am combining these two "talents" to create my own spin on Project 365. I am going to post a new project each day (usually a card, but sometimes a layout, tag, gift bag, etc.) My goal: to have completed 365 projects by the end of 2011. The twist: I am not allowing myself to buy ANY new scrappy supplies (other than adhesive) until I meet my goal. That's right-no new stamps, papers, punches, or ribbon. These are all major weaknesses for me! I am, however, continuing to design for Momenta (a VERY generous company that sends me monthly goody boxes) and I am also going to be entering many, many challenges in hopes of winning some new supplies. (Winning is very different from buying, lol!

(This card is out for PUBLICATION!)

I am sharing a few cards with you today. The first two are for this past week's 365 Cards Challenge. This is a new challenge site for me, but it will hopefully keep me both motivated and inspired this year. Monday's challenge was to pick 3 patterns from a list of choices. I chose houndtooth, paisley, and plaid. Since I am trying to use up my scraps, I punched hearts from each of these patterns (and I threw in a polka dot just because I liked it!) Then I stitched the hearts to my card front, scored the edges, and added a stamped sentiment and three tiny gems. Not a bit of adhesive on this card! This card is also based on Day 1 of Lucy's Sketch Challenge.

Tuesday's challenge was "Let's Make Some Noise!" The task: add something that makes noise to your card. I thought about this one for a long time. As I was looking through my stamp sets, I saw the VW bug stamp and the "Just Married" license plate. I thought it would be cute to tie some "cans" to the back of the car. I searched through my embellies, looking for silver beads for the "cans". What I found instead were these two album extenders which came in a package of page protectors. They jingle when you tip the card, making just a bit of noise. I thought it was a pretty creative idea. :)


The third and final card of the day is for my friend and fellow Momenta designer, Kelly Cranfill. She recently had a little girl, Braelyn Joy. Congratulations, Kelly! This card uses a premade card base and chipboard stickers from Momenta. I tried a new technique that I just saw in the new Scrapbooks Etc. magazine. I put masking tape on the back of plain white muslin, then embossed it with a Cuttlebug folder. It really works! It was the perfect touch for my card. This is also my entry for the Cardabilities Sketch Challenge #18.


Thanks for stopping by today! Please come back again tomorrow for some cute and easy "Thank You" cards and the rest of my 365 Cards Challenge entries. As always, I would love to have you leave me a comment-they keep me smiling and motivated!


Sunday, December 19, 2010

More Winterberry Christmas Cards


I am in love with the Winterberry Line from Momenta! I am having so much fun using these chipboard stickers-and honestly, I am not a sticker girl. I do love chipboard, however, and these chipboard stickers are so cute you can whip up a cute card in minutes! These are a few more that I have made just this morning-I told you they were quick and easy!