Showing posts with label budget. Show all posts

Sunday, March 4, 2012

Happy Birthday Wishes

Just a quick share today using some patterned paper strips that I had leftover from a class. I also used this week's sketch from Chick Challenges {with ippity}. You can now use both {ippity} AND Unity stamps for the challenge, so I paired an {ippity} frame and "happy birthday" sentiment with a "wishes" stamp from Unity. They fit together perfectly! I love combining my sets like that-love getting more mileage from the stamps that I already have!


I have also been making a ton of new cards using the new {ippity} stamps that are coming out on thursday.  they are SO cute!  I can't wait to share them with you!  Here is a sneak of one of my projects using one of the new sets:


Thanks so much for visiting my blog today!  Be sure to come back on Thursday to see all of my cards for the new release!  

Friday, July 15, 2011

Patriotic Thank You

Today I get to share with you my creation for the Counterfeit Kit Challenge's first challenge for July. It is all about embossing-you can dry emboss or heat emboss. I chose to dry emboss, but with a twist. I wanted to emboss a coordinating border for my card. Since I wanted to make my card using leftovers from my 4th of July Add-On, I thought stars would be a fun accent. My only problem: I don't have a star embossing folder. So, I decided to make my own embossing plate.
First, I found a thin piece of chipboard (this piece came in a package of Stampin' Up patterned paper.) I trimmed the chipboard to be slightly larger than my card front. Then I used a star punch to punch 6 stars from the leftover chipboard. I arranged 3 of the stars on my chipboard base, then adhered them down. Because the chipboard was so thin, I stacked another star on top of each on the base and adhered them so that I could get a deeper impression.
Then it was time to emboss. It took a little trial-and-error to come up with the right "sandwich" for my embossing plate, but here is what worked for the thickness of chipboard that I used. You may need to adjust your "sandwich" if your chipboard or cardstock is heavier than mine. I started with Tab 1, one clear cutting pad,and the homemade embossing plate. (Make sure the star punches are facing UP.)

Next, I stacked my kraft cardstock on top of the embossing plate, making sure that the edges were placed slightly inside the edge of the embossing plate.

The next layer is the black silicone pad that I use with my Sizzix embossing plates.

The final layer is the hard black plastic pad, also used with the Sizzix embossing plates.

Carefully run all layers through your die cut machine. Here is what the finished cardstock will look like:

To highlight the embossing, I rubbed a Creamy Brown chalk ink pad over the tops of the stars and also around all of the edges of the kraft cardstock. I attached the embossed panel to the front of my card base, then embellished the card with rub-on letters and a handmade bunting embellie.

I love the Americana look, and the tri-color bunting looks slightly vintage. I can't wait to try this embellie using softer colored papers from my main kit. Thanks for stopping by!

Monday, June 6, 2011

June Counterfeit Add-on Kits

I admit that I got a bit carried away this month while I was creating my add-ons for the Counterfeit Kit Challenge. I created a small add-on kit based on the add-on from Burlap & Buttercups, which I shared yesterday with my main kit. When I was looking through some of the other kit clubs, however, I found that I really loved the Studio Calico Star Dust Add-on. After I assembled my main kit, I realized that I could counterfeit the Star Dust Add-on and have it coordinate with my main kit. So this month I have a mix of two kit clubs. Here is my counterfeit Star Dust Add-On:Everything was pulled from my stash or handmade. I really wanted to include a chicken wire background stamp, but didn't have any stamps in my stash that would work. My solution: an onion bag (thanks, Lesa!) I created a frame from a scrap of chipboard, then adhered a piece of the onion bag over the center of the frame. To use this, I applied ink to one side, placed it ink-side-down on my paper, then rolled a brayer over the top. It worked great! Can't wait to try this on a project!


Here are my counterfeit tin pins. I had one package of buttons to cover leftover from last month's kit, so I decided to cover them with paper to make my version of the tin pins. I used a cloth to slightly dampen my paper, then covered the buttons. I then applied a layer of Glossy Accents, and they look very similar to October Afternoon's tin pins!
These are the tapes that I made in place of the Smash Tape. I used some old first aid tape, and stamped the checked background with teal and red ink. I then used some different stamps from my stash to add words, phrases, and numbers. I'm not quite sure what I will use these for yet, but they were fun to make! Note to self: need more first aid tape. :)

Finally, I counterfeited the Kitch brads from the inspiration kit. I simply cut or punched circles from patterned paper scraps and placed them inside the rim of these buttons. I then covered the paper with Glossy Accents. Super easy, and no one will ever know that they are buttons, not brads, once they are on my projects!

I also made a Summer Add-On so that I can play along with Kim's Summer challenge later this month. I have had my eye on Echo Park's Splash collection for a while, but I simply couldn't justify buying it when I still have lots of last summer's paper in my stash! So I decided to counterfeit the Splash collection (instead of a kit) as my Summer Add-On. I had so much fun making the journaling blocks and the ticket embellies. You can see the "real" Splash collection from Echo Park HERE. Here is my counterfeit Splash kit:
I'm excited to use my kits to make some projects! If you haven't played along with the Counterfeit Kit Challenge, you are missing out! Check it out HERE. I know you'll be inspired!

Tuesday, May 10, 2011

Ocean Gift Bag Topper

Welcome back! I'm excited to share a photot tutorial for this sweet gift bag topper with you today. It is also the featured project on the Momenta blog today. If you haven't checked out the new blog yet, you should head over! (After you're done here, of course!)
1. Trim embossed cardstock to fit the width of the gift bag. (My gift bag measured 7.75" wide, so I trimmed my cardstock to 7.75" x 12". Make two score lines across width of cardstock to fold over the top of the gift bag.


2. Trace edge of die-cut cardstock along short sides of embossed cardstock. (You can use any die cut paper because you are just using it as a template. You can also leave the edge of the bag straight if you prefer or are short on time.)


3. Trim along traced lines.


4. Mark handle placement on back side of cardstock.

5. Use paper trimmer to cut "slices" from the cardstock to slide over the handles. My "slices" were about 1/4" wide.


6. This is what it should look like. Notice that I cut the "slices" from the top of the gift bag topper, not the sides. This will allow the topper to sit flat on top of the gift bag.


6. Sand cardstock. (This is a great way to show the contrasting core of your cardstock. Pre-embossed cardstock, such as Momenta's Hidden Hues, works great for this project!)


7. Fit topper over gift bag handles and embellish as desired. I used cardstock scraps and my Create a Critter cartridge (Cricut) to create a little ocean scene. This is such a fun project, and such a great idea for your scrap budget! Not only can you embellish using scraps and leftovers from other projects, but also the plain gift bags are 2/$1.00 at Dollar Tree! You can get my favorite, kraft, or fun colors like the teal one used in this project.

Thanks for stopping by today!


Friday, April 15, 2011

Counterfeit Kit Challenge-Memorabilia

I am so excited to share my very first chipboard mini album with you! I had so much fun making this-I can't wait to add my photos and memorabilia! I can't yet because I made this album to document my upcoming weekend at CKC-Manchester with my scrappy friend, Lesa!

The page above has a fun pocket on the right-hand side. Recognize it? I "stole" a leftover pocket from my March kit! Then I dressed it up a bit with alpha stickers, a border sticker and some gems. This pocket will hold my class stubs from Friday and any other items that I want. The pocket is 5" wide.
This page also includes a fun pocket to hold memorabilia, probably the stubs from my Copic classes. Can you spot it? It's my mini transparency! I need to tell you how I made this transparency on a budget! I recently transferred all of my Imaginisce Snag 'Em stamps to a Cropper Hopper folder. Each stamp had 2 square transparencies in the package-one printed with the design and one that was "plain". Being the frugal scrapper that I am, I had to save those plain ones! They were the perfect size for the heart stamp that I used for this kit. I stamped the image with black StazOn ink, then colored the back side with Bic Mark-It markers. Then I trimmed around the top of the heart to add a fun edge and stitched it to my paper. Cute little free pocket!

And did you see the zipper flower! It was SO easy! I made it using Becky Olsen's tutorial, but I used Glue Dots instead of the double-sided tape that she recommends. Worked great!

Thanks for stopping by to check out my mini! Don't forget to visit the Counterfeit Kit Challenge blog for the other designers' takes on this challenge!

Monday, March 14, 2011

Mini Challenge: Etsy Inspiration


This week's Counterfeit Kit Challenge is to be inspired by a project from Etsy. HERE is the project that I chose. I have always loved the look of printer's trays, but finished ones tend to be a bit pricey. I knew I could make my own for a fraction of the price. To save even more money, I found a small shadowbox at Goodwill to alter. The price was definitely right: 45 cents!


Here is a before photo:

Pretty outdated and dusty, huh?
Here's what it looks like now:
Here are the details:
Top left: I cut this butterfly from my lace paper, but the color just didn't "pop" like I wanted it too. So, I covered the butterfly with Versamark ink and heat embossed it twice with silver embossing powder. Two bling brads form the body.
Top right: I stamped the sewing machine on a piece of clear packaging (from the Bella Blvd. fabric flowers.) I then paper pieced just the body of the machine and added an epoxy brad and some stickle-y thread. For the "fabric", I cut a little slit in the transparency and threaded a scrap of rickrack through.
Middle left: Just a rub-on and gems on a Spellbinders die-cut.
Middle right: I cut a Spellbinders die-cut in half, then distressed the edge so it looks like a tiny notebook edge. Studio G stamp and butterfly punches, plus a little doily that I created with an EK Success border punch.
Bottom left: My favorite! I stamped the dressform on the same clear packaging from the flowers and paper pieced the dress. The text flowers are just two punched flowers, adhered together with a foam square and topped with a button and gems. The little metal flowers are my soda can flowers. :)
Bottom right: I trimmed a corner off the stamped doily from my kit, then topped it with a butterfly rub-on on white cardstock. I popped the butterfly up with foam squares. I love this punched flower, too. I layered three Martha Stewart flower punches, attached an epoxy brad, then "squished" the petals up to give it some dimension. The tiny stamp is from an old (uninked!) Studio G set.
Thanks so much for stopping in today! I hope you can join us for this challenge this week! Check out the details at the Counterfeit Challenge blog!

Thursday, March 10, 2011

My Counterfeit Mossy Knoll Kit

This is the most masculine portion of my March kit-lots of geometrics and neutral colors. For papers, I started with the stripe in the bottom right corner because I felt that would be the most challenging to match in my stash. Once I found this stripe from My Mind's Eye, I was able to build my papers around it. I'm not sure if I would use the papers from just this kit, but I think they will make interesting additions to projects made from my other kits.
A fun addition to this kit was the package of metal flower brads. I LOVED these and couldn't wait to make something similar! I was able to make my own for literally pennies, which made me very happy. Scroll down to my next post for the tutorial for my flowers, plus see a sneak peek of a project that I made using them!

Wednesday, March 9, 2011

Metal Flower Tutorial

Today I'm going to share with you how I made the metal flower embellishments in my Counterfeit Mossy Knoll Add-On Kit. They are really easy to make and you can make a couple of dozen from one recycled soda can. That's great for my scrap budget!

First, gather your materials: a clean, empty soda can, utility scissors, a small flower punch, small gems or bling brads, and a paper piercer (if you're using brads.)


Carefully cut off the top and bottom of the soda can. Cut a slit up the entire side of the can. Be very careful, as the sides of the can are very sharp!


Smooth out the sheet of metal enough to slide it into the punch.


Punch flowers from metal sheet.


For each flower, bend each petal up slightly. The center of the flower should sit flat on your work surface, and each of the petals should stand up just a bit.


Now curl each of the petals by gently pulling on them. Shape as desired-the metal is very pliable.


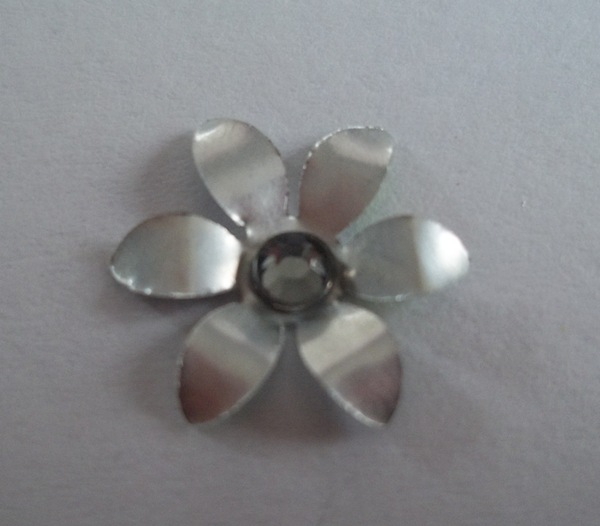
Add a small gem or bling brad to the center of each flower (use your paper piercer to poke a hole if using a brad.) I used a smoky gray gem to the center of each-I thought it looked great against the metal.

Here's a sneak of a project that I made using these flowers:

This is my project for our first mini challenge-make sure to check back on the 13th for all of the details and to see my project in full!


Tuesday, March 8, 2011

My Counterfeit Babbling Brook Kit

Here is aphoto of my kit:


Lots of handmade goodies there! I used punches and my sewing machine for one (see the next post for a tutorial), a text stamp for another, and lots of Cricut fonts for the last! Here is the full image of my font paper:


I also used my Cricut to make the small scalloped circle. I made it much smaller than the inspiration kit's because I have the smaller Cricut. That's OK with me, though, because I already have a layout in mind for this one!
I used an EK Success border punch to make my aqua flower border. Doesn't it look just like the trim in the inspiration kit? I also cut up one of my die-cut ledger papers for my faux envelopes. Can't wait to try these on a project!
Thanks so much for stopping by today!


"Get the Look"-Cosmo Cricket's Cocktail

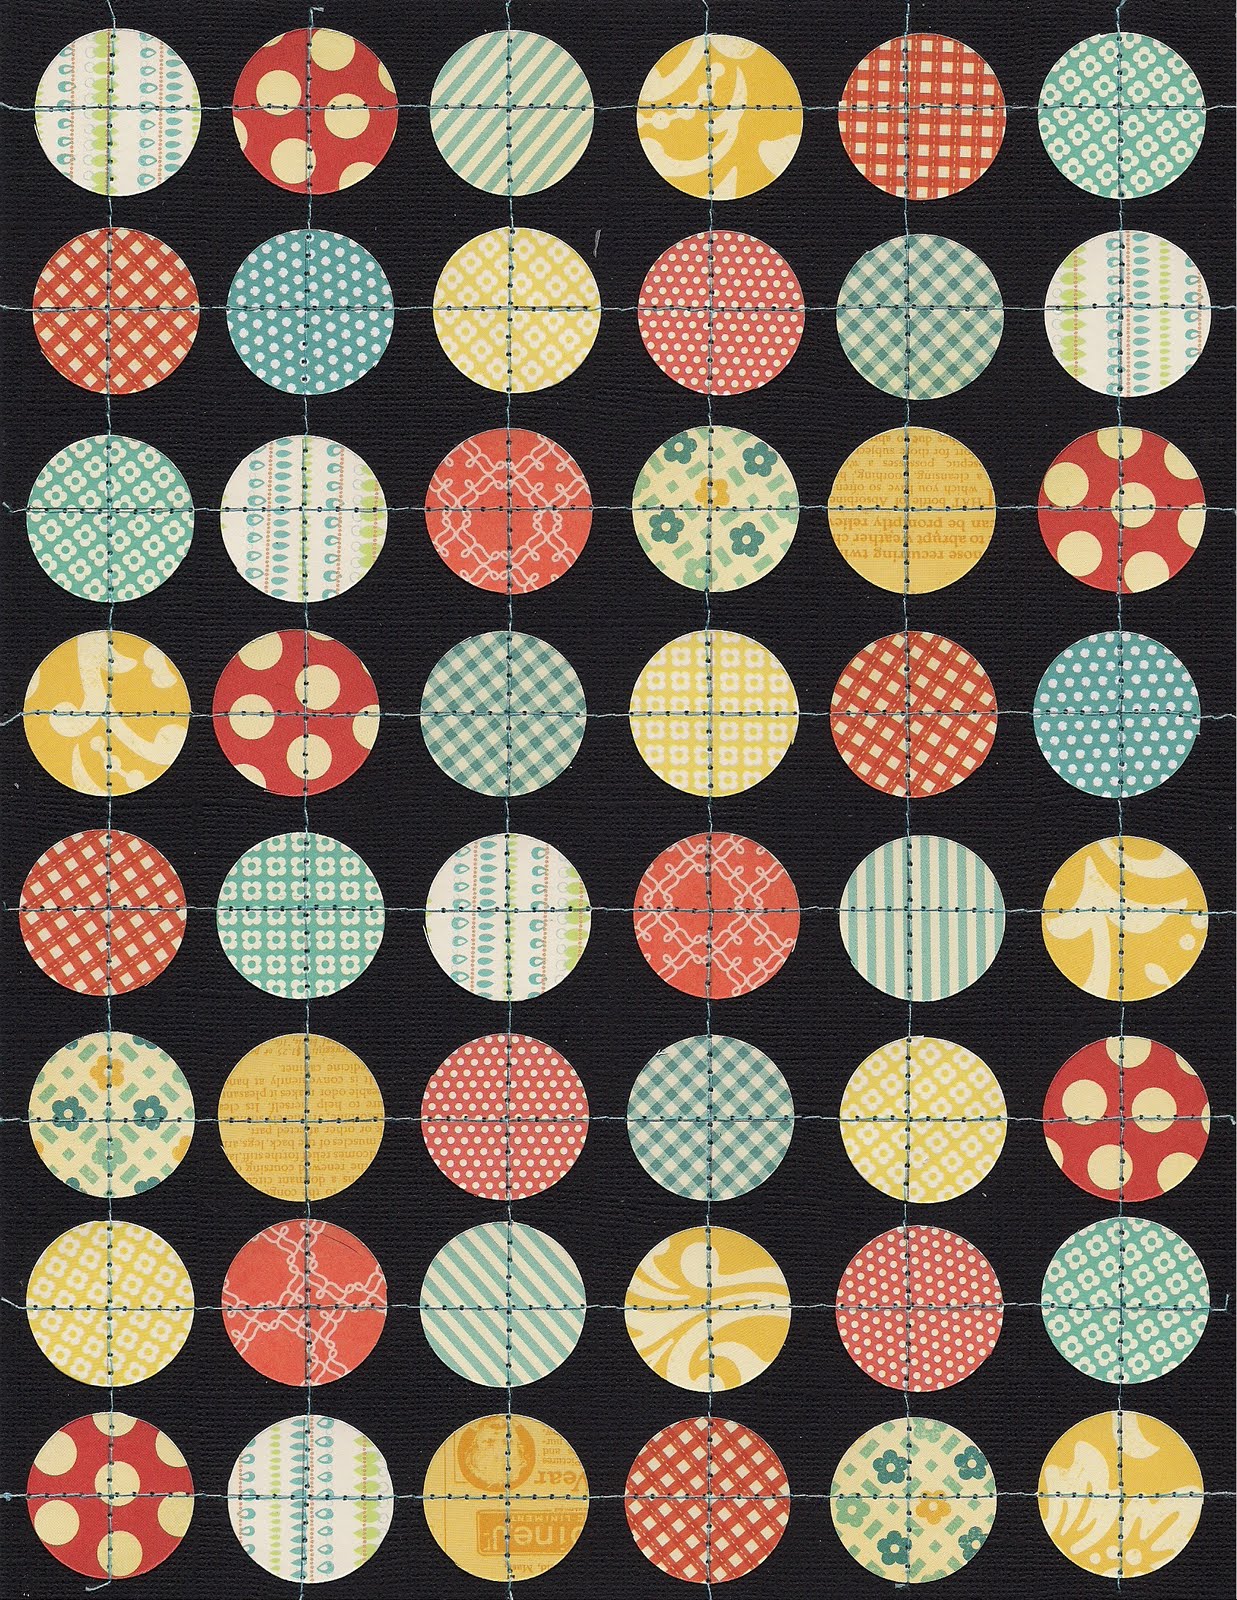
My first example of how to "get the look" of Cocktail, one of Cosmo Cricket's fun new Social Club papers, is very similar to what Bethany shows you in her tutorial HERE on the Counterfeit Kit blog. I simply machine-stitched over each row of circles, using a contrasting thread. Fun look, don't you think? Try this with other shaped punches, too-think butterflies, hearts, flowers...


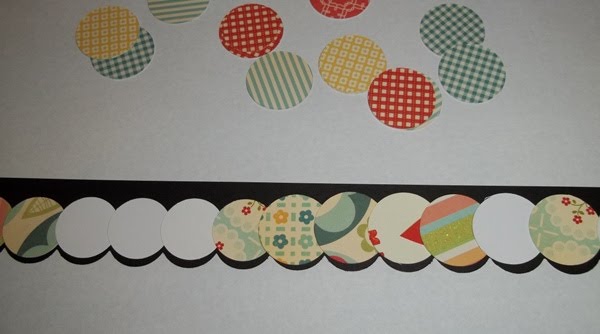
The next way to "get the look", but on a smaller scale, is to punch a solid cardstock border using a large scalloped border punch (mine is from EK Success.) I also punched lots of 1" circles from scraps.

Next, flip your cardstock border over and apply adhesive adross the entire border. I put my border on scrap paper and just ran a tape runner over the entire strip, right over the punched holes. You can see the shine of the adhesive in the photo.
Now you're just going to layer the circles over the back of the border. I overlapped each circle so you can only see one pattern through each punched hole.


Here is the finished border:


I love those pops of color! And because this was made from the materials from my kit, I'm going to use this border on a project this month, too! Thanks for stopping by!


Friday, January 7, 2011

Mini Valentines


I made lots of cards today, including this set of mini Valentines. Each of these cards is 4"x4", so I was able to get four cards from a 12"x12" sheet of cardstock. Each of the images is stamped and paper-pieced using scraps, so these Valentines are perfect for stretching your scrapping budget! Each of the images is highlighted somewhere with Glossy Accents to give it a little bit of shine.

I pulled out my Marvy scalloped heart punch, too. I don't use this very often, but it was perfect for these CAS cards. It provided a nice base for my paper-pieced images. The stamps are all from Unity's "Mix-Up of Cuteness". So cute!

This set of cards is my entry for the Paper Play Challenge-Clean and Simple.