Showing posts with label border punch. Show all posts

Monday, October 1, 2012

Naughty or Nice?

I know that there are still a couple of months until Christmas, but crafters tend to think about holidays well in advance. If you're like me and stamp all of your holiday cards, chances are it takes you several months just to build up your stash!
Today I'm sharing a Christmas card that I created for the I Heart {ippity} blog.  It comes with a built-in gift card holder on the front:
I used the adorable new holiday set from {ippity} called "Naughty. Nice. Not Sure." Seriously, how CUTE is this little Santa? I colored Santa with Copics, and paper-pieced the list with some vintage text paper from My Mind's Eye. A punched border along the top of the kraft bag adds a fun touch and lets the gift card peek out.
This design would also work great for lottery scratch tickets! The guys (and kids!) in our family LOVE scratch tickets in their stockings-what a fun way to dress them up, holiday-style!
Thanks for stopping by today!

Monday, January 2, 2012

Growing in Unity!

I am so excited to be the featured stamper this week for Growing in Unity! Here is a sneak peek of my project:
Please head over to this post my {ippity} blog to see the full project and for your chance to win some {ippity} and Unity stamps!

Wednesday, July 27, 2011

Master Forgers' Blog Hop

Welcome to our blog hop for the month of July! If you didn't start at the beginning of the hop, please head over to the Counterfeit Kit Challenge Blog so that you don't miss ANY of the fabulous projects that we have to share with you today!
Our challenge for this hop was to create a flower for our project. I made my flower by punching 6 circles from patterned paper. I folded each of the circles into a petal shape, then adhered them to a circular base. The center of my flower is a 1" circle punched from yellow paper, edges snipped and crumpled slightly. To finish my flower, I then used a 1/2" x 6" strip of coral patterned paper, fringed one edge, then coiled it and "puffed out" the snipped edge. The result is a fun pom-pom center for my flower.
The rest of my card is very simple, with layers of punched borders and a sentiment cut from patterned paper and handstitched to add a bit of interest. I also used my very last piece of coral seam binding (sniff, sniff!) I LOVE this color-thank you so much, Meridy, for sending it to me! It was the perfect pop of color for this card!
Your next stop on today's hop is Kim. I KNOW she has an amazing project to share with you. Thanks for hopping along with us today!

Sunday, July 24, 2011

Counterfeit Kit Challenge #3 and a Giveaway!


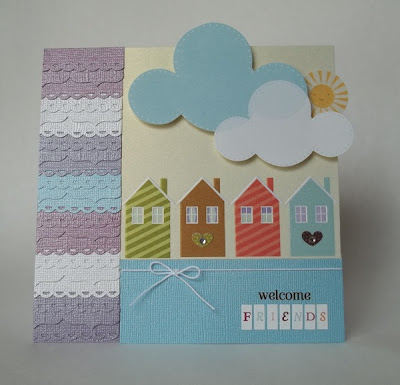
Challenge #3 for this month from the Counterfeit Kit Challenge is a fun one, with lots of room to make it your own. The "Gallery Standout Challenge" is to look through your favorite online gallery (such as 2Peas, Scrapbook.com, Splitcoast Stampers-ANY gallery of your choice) and find a project that inspires you. Then create your own project based on the one you love!
For my card above, I chose THIS card by Davinie Fiero, which I found on 2Peas. I switched things up just a little bit, using a little hand-cut house that I crimped and inked in place of the stamped house, but basically I lifted all of the design elements from Davinie's card. I hope that you will all play along with this challenge-don't forget to link up HERE!
Now for the giveaway! This month, we chose to counterfeit a kit from Polkadot Whimsy. One of the add-ons was the adorable Liberty Sparks kit. Guess what? Sweet Michelle Hill, the owner of Polkadot Whimsy, has sponsored a giveaway-you could win the ORIGINAL Liberty Sparks Kit! How awesome is that? Just check out THIS POST on the Counterfeit Kit Challenge blog to enter. Thanks, Michelle!


(Original Liberty Sparks Add-On Kit)

Sunday, July 17, 2011

Mother's Day Picnic

My last share for today is a 2-page layout that I made using my July Counterfeit Kit and the latest sketch (Two-Page Sketch #17) from Allison Davis at Sketch Support. As much as I love the look of large die-cut papers, I am VERY intimidated by them! So this was a huge step for me to use this paper. (I can't tell you how nervous I was to cut it right down the middle of that beautiful paper!) I changed the photo sizes on the left hand page slightly to work with my photos, but other than that, I stayed pretty true to the sketch. The butterfly garland was very fun to make, too. I got this idea from Pinterest, and it made a great substitution for the stars in the original sketch. Thanks for checking out the projects that I made over my scrappy weekend. I hope to be back tomorrow with another project or two!

Monday, July 11, 2011

Get Well Soon

Here's a sweet little card that I shared during my last ShareCroppers class. The heart stamp and sentiment are both from {ippity}'s "How YOU Doin' " stamp set. These pretty little patterned papers are from SEI's Happy Day collection.

Love these stamps! Visit my Etsy shop to see all of the sets I have available for purchase. I'd love to be your {ippity} chick!
To see other great cards made with {ippity} stamps, visit this week's Linky Party. Thanks for stopping by!

Tuesday, July 5, 2011

Just Because

A quick share today. :) This is one of the cards that I demonstrated at my last workshop. It uses the "How YOU Doin' " stamp set from {ippity} and papers from SEI. This set is super-cute and includes lots of great card sentiments and small icons. PERFECT for a beginner stamper or just to round out your own stamp collection. Email your order to me and get 10% off and FREE shipping! Also, today is release day for 2 new {ippity} stamp sets:

Thankful for You-ONLY $5.40!


AND


SHINE, SHINE, SHINE-$16.20


These prices are the absolute lowest that {ippity} will allow us to sell at, so there is no need to shop around! Plus, you get FREE SHIPPING! To order, email me at sharecropperskits@gmail.com. I accept PayPal, so ordering is easy!

Monday, June 6, 2011

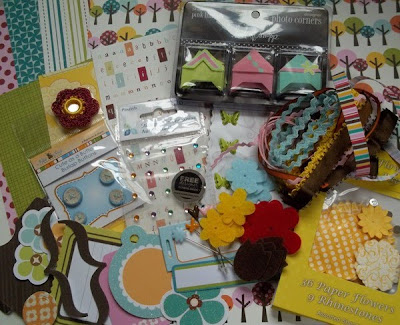
June Counterfeit Add-on Kits

I admit that I got a bit carried away this month while I was creating my add-ons for the Counterfeit Kit Challenge. I created a small add-on kit based on the add-on from Burlap & Buttercups, which I shared yesterday with my main kit. When I was looking through some of the other kit clubs, however, I found that I really loved the Studio Calico Star Dust Add-on. After I assembled my main kit, I realized that I could counterfeit the Star Dust Add-on and have it coordinate with my main kit. So this month I have a mix of two kit clubs. Here is my counterfeit Star Dust Add-On:Everything was pulled from my stash or handmade. I really wanted to include a chicken wire background stamp, but didn't have any stamps in my stash that would work. My solution: an onion bag (thanks, Lesa!) I created a frame from a scrap of chipboard, then adhered a piece of the onion bag over the center of the frame. To use this, I applied ink to one side, placed it ink-side-down on my paper, then rolled a brayer over the top. It worked great! Can't wait to try this on a project!


Here are my counterfeit tin pins. I had one package of buttons to cover leftover from last month's kit, so I decided to cover them with paper to make my version of the tin pins. I used a cloth to slightly dampen my paper, then covered the buttons. I then applied a layer of Glossy Accents, and they look very similar to October Afternoon's tin pins!
These are the tapes that I made in place of the Smash Tape. I used some old first aid tape, and stamped the checked background with teal and red ink. I then used some different stamps from my stash to add words, phrases, and numbers. I'm not quite sure what I will use these for yet, but they were fun to make! Note to self: need more first aid tape. :)

Finally, I counterfeited the Kitch brads from the inspiration kit. I simply cut or punched circles from patterned paper scraps and placed them inside the rim of these buttons. I then covered the paper with Glossy Accents. Super easy, and no one will ever know that they are buttons, not brads, once they are on my projects!

I also made a Summer Add-On so that I can play along with Kim's Summer challenge later this month. I have had my eye on Echo Park's Splash collection for a while, but I simply couldn't justify buying it when I still have lots of last summer's paper in my stash! So I decided to counterfeit the Splash collection (instead of a kit) as my Summer Add-On. I had so much fun making the journaling blocks and the ticket embellies. You can see the "real" Splash collection from Echo Park HERE. Here is my counterfeit Splash kit:
I'm excited to use my kits to make some projects! If you haven't played along with the Counterfeit Kit Challenge, you are missing out! Check it out HERE. I know you'll be inspired!

Friday, May 27, 2011

May Counterfeit Blog Hop


Welcome to your next stop on the Counterfeit Kit Challenge Blog Hop! If you didn't start at the very beginning, you will want to start HERE.

Our blog hop challenge was to be inspired by a project from a manufacturer's blog. This wasn't hard-although narrowing it down to just one inspiration project was a bit tricky! I immediately went to the Pink Paislee blog where I found THIS adorable layout by Caroline Ikeji. I have always loved Caroline's layouts-especially the way she mixes patterns and clusters embellishments. I tried the cluster technique on this layout. I think I have a new favorite technique!

I'm so glad you stopped by today. Your next stop on today's hop is the fabulous Kim's blog!

Thursday, May 26, 2011

Us.

***This is my second post for today. Please scroll down for my Momenta Faux Bingo Markers Project.***


When I look at this layout, it's hard to believe that I actually made it. First, it's a layout. And it's completed. Go me, lol! Second, it's a 12 x 12 layout. Usually I scrap 8.5 x 11, but the past few that I have done have been 12 x 12. I like it. :) Finally, I used eyelets. Amazing! I don't remember the last time I used an eyelet!

So, I finished a cute layout using one of my all-time favorite photos of Donny and the kids. I actually finished 2 layouts today, but you'll have to come back tomorrow for the second one. It's for the Counterfeit Kit Challenge Master Forgers' Blog Hop tomorrow! You won't want to miss it!

Sunday, May 22, 2011

Mini Challenge #3

Mini Challenge #3 for the Counterfeit Kit Challenge is to choose an embellishment from your kit-and create your project around it! This was an easy one for me because that is usually how I start my cards! Ironically, my favorite embellishments from this month's kit were the ones that I made myself. I will have to remind myself of this the next time that I am scrap shopping, lol!
My little girl embellishment was made using scraps of cardstock and patterned paper and a cute stamp set from Hero Arts. The card came together really quickly using this embellishment-just a punched grass border and letter stickers for a sentiment. Super easy!
Thanks for stopping by today, and I hope that you have a chance to play along with us for the mini challenge!

Saturday, May 21, 2011

Counterfeit Kit Mini Challenge #1


Sorry this is late posting to my blog! I had two blog posts ready to go for last Friday, but then Blogger went down and I lost them both. Grr! This is the first chance that I've had to re-do them. There is still plenty of time to play along, though-hope you can join us!


Our first mini challenge for May over at the Counterfeit Kit Challenge is to use THIS sketch from Sketch Support. I made a quick card using an adorable lemonade sticker from May kit and a super-cute sentiment stamp from Technique Tuesday.


Thanks so much for stopping by today. Don't forget to check out all of the adorable cards from the Master Forgers. Enjoy your weekend!

Friday, May 6, 2011

The Greeting Farm Presents...A New Lily Pad Challenge!

It's Friday, so that means the Lily Pad Dream Team has a new batch of cards to inspire you, plus a new challenge and a new sponsor! Our challenge this week is another gorgeous color combination from Kathy-a collection of soft, muted colors that would be perfect for a Mother's Day card or any spring project.
Not only do we have a great color combo for you, but our sponsor this week is none other than The Greeting Farm! I have been in love with TGF's adorable images since I first saw them about a year ago. The sweet characters fit in perfectly with my cutesy card style! My card this week features a sweet digi stamp-it's called "Kissy Kissy".

It's true that these images are perfect for coloring. I am just learning how to use Copics, however, so my colors (and skill) are quite limited! My image is entirely paper-pieced, using scraps of cardstock and some Distress Ink. A touch of Crystal Stickles "eyeshadow" finishes off the image.
I hope you will all join us this week for our Color Throwdown! You can see all of the details, as well as the rest of the Dream Team's gorgeous cards, HERE.

Wednesday, April 27, 2011

Counterfeit Kit Challenge Blog Hop

Welcome to your next stop on the Master Forgers' Blog Hop for the month of April! If you didn't start at the beginning, you will want to head over to the Counterfeit Kit Challenge blog so you start from the very beginning. You won't want to miss any of the beautiful projects created by (and inspired by) our amazing DT!


Our challenge this month was to surf the DT's personal blogs for inspiration. It was so hard to choose just one designer to scraplift! Finally, I chose a layout that I felt worked really well with my photo and the supplies remaining in my kit. I just loved this layout by Lisa:

Here is my layout:

I also have a fun giveaway for one lucky commenter! Master Forger Kim and I have made mini add-on kits inspired by this month's Counterfeit Kit Challenge-and we're giving them away! All you need to do is leave a comment here on my blog and you will automatically be entered. I will announce the random winner on Sunday night. Here's the mini kit up for grabs:


Your next stop on our fabulous blog hop is Kim's amazing blog, Love-Joy-Scrap. Thank you so much for visiting with me today!

Friday, April 15, 2011

Counterfeit Kit Challenge-Memorabilia

I am so excited to share my very first chipboard mini album with you! I had so much fun making this-I can't wait to add my photos and memorabilia! I can't yet because I made this album to document my upcoming weekend at CKC-Manchester with my scrappy friend, Lesa!

The page above has a fun pocket on the right-hand side. Recognize it? I "stole" a leftover pocket from my March kit! Then I dressed it up a bit with alpha stickers, a border sticker and some gems. This pocket will hold my class stubs from Friday and any other items that I want. The pocket is 5" wide.
This page also includes a fun pocket to hold memorabilia, probably the stubs from my Copic classes. Can you spot it? It's my mini transparency! I need to tell you how I made this transparency on a budget! I recently transferred all of my Imaginisce Snag 'Em stamps to a Cropper Hopper folder. Each stamp had 2 square transparencies in the package-one printed with the design and one that was "plain". Being the frugal scrapper that I am, I had to save those plain ones! They were the perfect size for the heart stamp that I used for this kit. I stamped the image with black StazOn ink, then colored the back side with Bic Mark-It markers. Then I trimmed around the top of the heart to add a fun edge and stitched it to my paper. Cute little free pocket!

And did you see the zipper flower! It was SO easy! I made it using Becky Olsen's tutorial, but I used Glue Dots instead of the double-sided tape that she recommends. Worked great!

Thanks for stopping by to check out my mini! Don't forget to visit the Counterfeit Kit Challenge blog for the other designers' takes on this challenge!

Tuesday, March 29, 2011

Lily Pad Cards Blog Hop


Good morning, Hoppers! Welcome to your first stop on Day 2 of the Lily Pad Cards Blog Hop! Today's cardmakers are literally going to make you ribbit out loud! Each day, the hop will span 7 different blogs, then culminate on Friday, April 1, with the grand opening of Lily Pad Cards. Lily Pad Cards is a new challenge blog that will feature interviews, articles, videos, challenges, great prizes, and more!

Although Lily Pad doesn't officially bloom until April 1, 2011, you'll be able to see a new sneak peek every day until then. And you'll definitely want to drop by because there are three prize packages with a total retail value of over $800 (WOW!)-including $100 worth of gift certificates to a very popular online store! Go HERE for specific prize details and contest rules.

The theme of our hop is "welcome"-not only are we welcoming Lily Pad Cards to the neighborhood, but we're also welcoming all of you to come in and join in on the fun.


Thanks for being neighborly and hopping by my pad today! Your next stop on the hop is the incredibly talented Jill Foster: http://www.stampinginspiredby.blogspot.com/. If you hit a bad link, you can always hop back to the Lily Pad and click on the next link in the hop. We'd also appreciate it if you would report any bad links to webmaster@inlinkz.com.

Happy hopping!

Wednesday, March 23, 2011

Counterfeit Kit Challenge-Frames


I have admitted many times that I have a seemingly endless supply of chipboard. It was one of those supplies that I bought a TON of when it first became popular, but didn't use very often. I just WANTED it. Now I am trying to use it more often-tyring to make a dent in that stash!

For our "Frames" mini challenge, I turned to my stash of chipboard. Many of you may consider this to be cheating, since the chipboard is not technically part of my kit. I keep my chipboard in the original 12x12 packaging, so it would be difficult to fit in with my kit. Also, I figure ANYTHING that will help me to use up my stash should be legal, lol! So I keep my chipboard sheets hanging in my scraproom closet, readily accessible.

Although I loved this scalloped chipboard frame, it was a little overwhelming for my 8.5x11" layout, especially since I wanted to include at least two photos. So, (gasp!) I CUT one side off of that pretty chipboard frame. Of course, I couldn't bear to throw it away-I tucked it into my kit to use on another project later this month. :)

This was a naked chipboard frame, so I first painted it with acrylic paint, then used Versamark ink and iridescent embossing powder to give it some shine and sparkle. I finished my frame by adhering a little aqua gem in the hole of each scallop.

How will you include a frame on your project? I can't wait to see your takes on this challenge!

Saturday, March 19, 2011

Just Wanted to Say "Hi"...


Just a quick share today of a card that I made this week using my March Counterfeit Kit, a cute digi stamp from Tiddly Inks, and a fun sketch from Twisted Sketches. I have had this little hedgehog saved in my digi stamp folder for a while now. Isn't he the cutest? A friend of mine recently lost someone very near and dear to her, and since she loves hedgehogs, I thought I would drop her this little note.

These aren't colors that I would have ever though to put together without the help of my Counterfeit Kit, but I love the finished card! I especially love the punched borders. These are two that I punched when Lesa, Cindy and I had our Punch & Lunch last month. I love having these borders all punched and ready to go! I added a tiny row of machine stitching across the flower border, then topped each flower with aqua gems. I think it adds a sweet, girly touch to this card. I hope it makes my sweet friend smile. :)

If you haven't checked out the Counterfeit Kit Challenge Blog lately, you need to head on over! Right now, we have an Etsy-inspired challenge going on, plus all of the new DT members are being introduced over the next few days. Stop in and say "hi"!

Monday, March 14, 2011

Mini Challenge: Etsy Inspiration


This week's Counterfeit Kit Challenge is to be inspired by a project from Etsy. HERE is the project that I chose. I have always loved the look of printer's trays, but finished ones tend to be a bit pricey. I knew I could make my own for a fraction of the price. To save even more money, I found a small shadowbox at Goodwill to alter. The price was definitely right: 45 cents!


Here is a before photo:

Pretty outdated and dusty, huh?
Here's what it looks like now:
Here are the details:
Top left: I cut this butterfly from my lace paper, but the color just didn't "pop" like I wanted it too. So, I covered the butterfly with Versamark ink and heat embossed it twice with silver embossing powder. Two bling brads form the body.
Top right: I stamped the sewing machine on a piece of clear packaging (from the Bella Blvd. fabric flowers.) I then paper pieced just the body of the machine and added an epoxy brad and some stickle-y thread. For the "fabric", I cut a little slit in the transparency and threaded a scrap of rickrack through.
Middle left: Just a rub-on and gems on a Spellbinders die-cut.
Middle right: I cut a Spellbinders die-cut in half, then distressed the edge so it looks like a tiny notebook edge. Studio G stamp and butterfly punches, plus a little doily that I created with an EK Success border punch.
Bottom left: My favorite! I stamped the dressform on the same clear packaging from the flowers and paper pieced the dress. The text flowers are just two punched flowers, adhered together with a foam square and topped with a button and gems. The little metal flowers are my soda can flowers. :)
Bottom right: I trimmed a corner off the stamped doily from my kit, then topped it with a butterfly rub-on on white cardstock. I popped the butterfly up with foam squares. I love this punched flower, too. I layered three Martha Stewart flower punches, attached an epoxy brad, then "squished" the petals up to give it some dimension. The tiny stamp is from an old (uninked!) Studio G set.
Thanks so much for stopping in today! I hope you can join us for this challenge this week! Check out the details at the Counterfeit Challenge blog!

Tuesday, March 8, 2011

My Counterfeit Babbling Brook Kit

Here is aphoto of my kit:


Lots of handmade goodies there! I used punches and my sewing machine for one (see the next post for a tutorial), a text stamp for another, and lots of Cricut fonts for the last! Here is the full image of my font paper:


I also used my Cricut to make the small scalloped circle. I made it much smaller than the inspiration kit's because I have the smaller Cricut. That's OK with me, though, because I already have a layout in mind for this one!
I used an EK Success border punch to make my aqua flower border. Doesn't it look just like the trim in the inspiration kit? I also cut up one of my die-cut ledger papers for my faux envelopes. Can't wait to try these on a project!
Thanks so much for stopping by today!