Showing posts with label Momenta. Show all posts

Saturday, October 1, 2011

Welcome to World Card Making Day!

To celebrate World Card Making Day, we are hosting a blog hop with our amazing design team in hopes of inspiring your creativity with our fabulous projects! To participate, all you have to do is comment on each of the 14 blogs on the hop (a complete list of the blogs can be found on the Momenta blog.) The deadline for commenting is 11:59 EST , Sunday, October 2nd. Five winners will be chosen by Random.org on Monday, October 3rd and will be announced on the Momenta blog. Each winner will receive one of our 5 boxed card kits:

Each card kit contains 12 cards and envelopes, assorted stickers, cardstock borders, and gems!

We are even tossing in a BONUS ENTRY! Simply head over to our Facebook page after the hop "Like" us (if you haven't already!) and tell us that you hopped along with us!

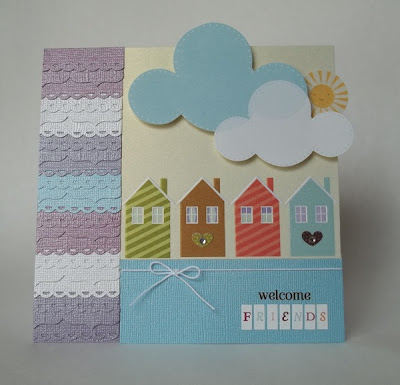
For my projects, I decided to use one of my favorite Momenta products, the Butterfly Garden Pyramid Pad. I created a little tote and a set of 4 super-easy notecards that would make a perfect little gift!


Your next stop on the hop: the Momenta blog! Leave a comment there to let us know that you completed the hop!

Tuesday, September 27, 2011

September Blog Hop

Welcome to your next stop on the Master Forgers' Blog Hop! If you didn't start at the Counterfeit Kit Challenge Blog, please click HERE so that you don't miss any of the fabulous projects along the way!
For our hop, our challenge was to try a new technique. I decided to use my patterned paper as inspiration and create an embellishment to match using my stamps. I combined a bird and leaf stamp from Ippity's "Sing a New Song" set to make my bird embellie. See the feathered tail? It's really leaves from the branch stamp! I also pieced the flower layers to match the flowers in the paper.
So, I'm not sure if this falls into the traditional category of "techniques", but it is a fun way to stretch your stamp collection! I actually used 5 different stamp sets on my card. The flower is from "Now & Always", the label is from "Season of Joy", the sentiment is from "Flowers+Friends=Priceless", the photo corners are from "Fall for You", and the bird and branch are from "Sing a New Song."
These sets are all available HERE in my Etsy shop-and remember, I'm giving one away as a prize at the CKCB! Just comment on tomorrow's blog hop and you will be entered!
Your next stop on our hop is the blog of the fabulous Kim!

Thursday, September 15, 2011

Counterfeit Kit Challenge-Stamp Your Own Patterned Paper

The Counterfeit Kit Challenge (which I am sponsoring this month) issues 3 mini challenges each month to help you use up the supplies in your monthly kit. The first mini challenge for September is to create your own patterned paper using stamps. I usually use my Ippity stamps to make focal point embellishments for cards, so creating background paper was a great way to get me thinking outside of my comfort zone. I decided that I wanted to give myself an additional challenge to create a layout instead of a card.
There are quite a few stamped elements on this layout. Can you see them all? First, I created my background paper using a piece of ivory cardstock and Tattered Rose Distress Ink. I first stamped the cardstock with the Dots for Sure background stamp. I used my Stamp-a-ma-jig to line up the dots. I then wanted to give it a bit of a vintage look, so I then stamped the paper again (randomly) with the postmark stamp from Cherish Your Dreams.

Now on to the embellishments. I used up all of the flower embellies that I made in THIS tutorial. The flower, leaf, and butterfly stamps are all from Ippity's Now & Always stamp set. I also stamped the journaling spot where my title is with one of the frames from the Season of Joy set. I just love that frame! I distressed the edges of the frame with Tattered Rose Distress Ink to tie it in with my background paper.

I hope that you are playing along with us at the Counterfeit Kit Challenge this month. It's not too late to start playing! Remember, you could win your choice of Ippity stamps if you join in! Check out the details at the Counterfeit Kit Challenge Blog, along with all of the wonderful stamping projects from the Master Forgers. I know you will be inspired!

Wednesday, September 14, 2011

Momenta Blog

I am blogging again over at Momenta today-go check it out! I have a budget-friendly, time-saving project for you! :)

Saturday, September 10, 2011

Basket of Blooms Card

I'm blogging over on the Momenta blog today! Check it out HERE!

Wednesday, September 7, 2011

Stitched Paper Tutorial and a GIVEAWAY!

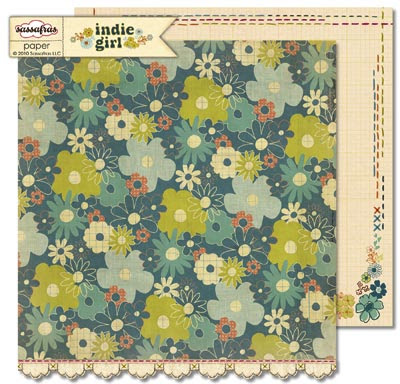
One of my favorite papers in this month's inspiration kit for the Counterfeit Kit Challenge was this paper from Sassafras Lass' "Indie Girl" collection. I have never been a fan of border prints, but I love the faux stitching on the reverse side of this paper! I love dimension on my projects, though, and I thought that actual hand-stitching would add just the right amount of detail to one of my kit papers.

First I marked where I wanted my stitching to go. I made a straight line with a pencil 1/2" from the bottom of my patterned paper. I also made two rows of dots, 1/4" apart, over my straight line. The straight line marked where I wanted my row of straight stitches, while the rows of dots marked where I wanted my cross-stitches to go. After marking my design with a pencil, I used my paper piercer to pierce holes for stitching.
I then used an emerald green embroidery floss to hand-stitch my design. (Please excuse the wonky colors in these photos-it has been rainy and overcast all day, and I just can't get good photos!)

Here is my finished 12x12" paper. I repeated the design at the top so that the stitches will really frame my project. I am going to be using this paper later in the month for one of our challenge projects. Hmm...I wonder what that challenge could be? You'll have to check back to find out!

This post is a fun one for me-it's my 300th blog post! I've shared a lot of projects over the past 2 years and met so many sweet papercrafters as a result of blogging. To celebrate, I'm going to give away a little blog candy: a Gurnsey Gingham background stamp from my Ippity shop on Etsy! Just leave a comment on this blog post by 11:59 PM EST on Sunday, and I will draw a random winner on Monday morning-it's that easy!

Tuesday, September 6, 2011

Layered Stamped Flower Tutorial

Good morning! Today I am going to show you how I made the layered, stamped flower embellies in my September Counterfeit kit. These two stamps are some of my very favorite Ippity stamps-they are from the Now & Always set (get yours HERE.)


First, gather all of your supplies: 3x3 squares of patterned paper and a 2x3 scrap of green cardstock, stamps, acrylic blocks, and black dye ink. You may also want to add pearls or gems to the finished flower. (I used 3 different patterned papers, but I have also made this flower using the same patterned paper for all three layers and it was absolutely beautiful!)


Stamp the flower on each of the patterned papers. Stamp 2 leaves on the green cardstock.


Trim the flowers and the leaves as shown. This flower stamp is perfect for layering-simply cut around the smallest flower petals for the first layer, etc.


Gently curl the flower petals with your fingers, rolling them back slightly. (This step is optional, but I like the way it gives the flowers a bit of dimension.)


Adhere the layers together by using a glue dot or glue stick just in the center of each layer. (Don't put adhesive on the petals.) Finish your flower by adding a gem or pearl to the center. Here, I've done one of each so you can see how the type and size of the gem can change the look of the flower.
You don't have to use all three layers to make your flowers, either. Here, I've made a flower using just the two smaller layers, and also a single flower using just the smallest layer. This is a great technique is you want to create a cluster of flower embellies for your project.


Here is a card that I made using one of the finished flowers:


Thank you so much for stopping by today! I hope you enjoyed the tutorial. If you would like more information on tis stamp set, please visit my Etsy shop. You can purchase this stamp set there. You could also WIN this stamp set (or a stamp set of your choice) just by playing along with the Counterfeit Kit Challenge this month! See THIS POST on the CKCB for more details.

(*Note: This card also features a frame image from the Season of Joy stamp set and a sentiment from the Just Wanted to Say set, both available in my Etsy shop.)

My September Counterfeit Kit

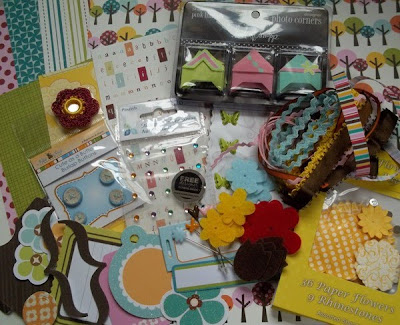
Today I get to share with you the kit that I made for this month's Counterfeit Kit Challenge. We are counterfeiting a beautiful kit from Sweet Peach Crop Shop this month. The inspiration kit featured the Indie Girl collection from Sassafras Lass. The blues and greens in that collection, along with the pretty florals, had a soft and feminine feel, so I chose to use lots of coordinating papers from Momenta's new Butterfly Garden collection:
I then went through my cardstock and picked out some solid cardstock colors that coordinated with my papers. My cardstock is from a mix of companies-mostly Bazzill and SEI. I also use a lot of white, ivory, and kraft cardstock on all of my projects, but I have special open shelves for that in my scraproom, so I just pull those sheets as needed.


I always find myself running short on alphas toward the end of the month, so I try to include a lot. I have pink, charcoal, and yellow alpha stickers from Basic Grey, as well as multi-colored mini alphas from Momenta. My element stickers are from Basic Grey-the journaling spots on this sheet really reminded me of those in the inspiration kit.


Finally, I added the "fun stuff". :) For embellies, I included some phrase stickers (also from Moment's Butterfly Garden collection), lots of ribbons and lace pieces, and some little ribbon flowers from the Walmart clearance bin. I had some of the Bella Blooms from the inspiration kit, so included those, too. They are a little bit bigger than what I usually use-not sure yet what I will do with them! I also loved the metal embellies from the inspiration kit, so I added a few of those, too: some large decorative brads, engraved charms and painted tab embellies.


I created some layered stamped flower embellies using some of my Ippity stamps and patterned papers-I will be back tomorrow with a tutorial for you. Be sure to check out all of the Master Forgers' kits HERE on the Counterfeit Kit Challenge Blog, and visit their personal blogs for details and to leave some love. :)


Thanks for stopping by today!

Thursday, May 26, 2011

Buddy Card with Faux Bingo Marker


Hello! I am super-excited to share that I am blogging over on the Momenta blog today! Over there I am sharing how I made my faux wooden bingo markers that I included in my May Counterfeit Kit. I used one of the star ones as an embellishment on this card. I love all of the textures and layers and happy colors here. :)


All of the supplies that I used on this card are from my May kit. I also used the fabric-covered brads that I made for this month's kit. Aren't they super-fun? If you're not familiar with the Counterfeit Kit Challenge, you are missing out! Go check out all of the fun at http://www.counterfeitkitchallenge.blogspot.com/. Don't forget to check out the Momenta blog for the tutorial, too!

Saturday, May 21, 2011

Card Set featuring new Momenta

Today I am sharing a sweet little card set that I made using the new Family Forever collection from Momenta. This collection has such beautiful colors and classic patterns. It is perfect not only for family scrapbook pages, but also all-occasion cards like these. These cards came together quickly because all of the papers and icon stickers coordinate perfectly, and the sentiments are all vellum quote stickers from Momenta.


Don't forget that Momenta is having a DT Call, too! Check out all of the details HERE on the Momenta blog.

Tuesday, May 10, 2011

Ocean Gift Bag Topper

Welcome back! I'm excited to share a photot tutorial for this sweet gift bag topper with you today. It is also the featured project on the Momenta blog today. If you haven't checked out the new blog yet, you should head over! (After you're done here, of course!)
1. Trim embossed cardstock to fit the width of the gift bag. (My gift bag measured 7.75" wide, so I trimmed my cardstock to 7.75" x 12". Make two score lines across width of cardstock to fold over the top of the gift bag.


2. Trace edge of die-cut cardstock along short sides of embossed cardstock. (You can use any die cut paper because you are just using it as a template. You can also leave the edge of the bag straight if you prefer or are short on time.)


3. Trim along traced lines.


4. Mark handle placement on back side of cardstock.

5. Use paper trimmer to cut "slices" from the cardstock to slide over the handles. My "slices" were about 1/4" wide.


6. This is what it should look like. Notice that I cut the "slices" from the top of the gift bag topper, not the sides. This will allow the topper to sit flat on top of the gift bag.


6. Sand cardstock. (This is a great way to show the contrasting core of your cardstock. Pre-embossed cardstock, such as Momenta's Hidden Hues, works great for this project!)


7. Fit topper over gift bag handles and embellish as desired. I used cardstock scraps and my Create a Critter cartridge (Cricut) to create a little ocean scene. This is such a fun project, and such a great idea for your scrap budget! Not only can you embellish using scraps and leftovers from other projects, but also the plain gift bags are 2/$1.00 at Dollar Tree! You can get my favorite, kraft, or fun colors like the teal one used in this project.

Thanks for stopping by today!


Wednesday, April 27, 2011

Counterfeit Kit Challenge Blog Hop

Welcome to your next stop on the Master Forgers' Blog Hop for the month of April! If you didn't start at the beginning, you will want to head over to the Counterfeit Kit Challenge blog so you start from the very beginning. You won't want to miss any of the beautiful projects created by (and inspired by) our amazing DT!


Our challenge this month was to surf the DT's personal blogs for inspiration. It was so hard to choose just one designer to scraplift! Finally, I chose a layout that I felt worked really well with my photo and the supplies remaining in my kit. I just loved this layout by Lisa:

Here is my layout:

I also have a fun giveaway for one lucky commenter! Master Forger Kim and I have made mini add-on kits inspired by this month's Counterfeit Kit Challenge-and we're giving them away! All you need to do is leave a comment here on my blog and you will automatically be entered. I will announce the random winner on Sunday night. Here's the mini kit up for grabs:


Your next stop on our fabulous blog hop is Kim's amazing blog, Love-Joy-Scrap. Thank you so much for visiting with me today!

Friday, April 15, 2011

New Lily Pad Cards Challenge!

It's Friday, so it's time for another fun challenge over at Lily Pad Cards! This week, we're hosting a Frames, Dies & Dimensions Challenge. To enter, simply create a new card that uses a frame or die-cut mat that uses pop dots (or something similar) to add dimension. The design team got to work with these fabulous frames and cards from our very generous sponsor, Globecraft Memories. I paired my card with fun new papers from Momenta and a sweet stamp set from Hero Arts. Check out the Lily Pad Cards blog for all of the DT's gorgeous creations-hope to see yours linked there soon!

Counterfeit Kit Challenge-Memorabilia

I am so excited to share my very first chipboard mini album with you! I had so much fun making this-I can't wait to add my photos and memorabilia! I can't yet because I made this album to document my upcoming weekend at CKC-Manchester with my scrappy friend, Lesa!

The page above has a fun pocket on the right-hand side. Recognize it? I "stole" a leftover pocket from my March kit! Then I dressed it up a bit with alpha stickers, a border sticker and some gems. This pocket will hold my class stubs from Friday and any other items that I want. The pocket is 5" wide.
This page also includes a fun pocket to hold memorabilia, probably the stubs from my Copic classes. Can you spot it? It's my mini transparency! I need to tell you how I made this transparency on a budget! I recently transferred all of my Imaginisce Snag 'Em stamps to a Cropper Hopper folder. Each stamp had 2 square transparencies in the package-one printed with the design and one that was "plain". Being the frugal scrapper that I am, I had to save those plain ones! They were the perfect size for the heart stamp that I used for this kit. I stamped the image with black StazOn ink, then colored the back side with Bic Mark-It markers. Then I trimmed around the top of the heart to add a fun edge and stitched it to my paper. Cute little free pocket!

And did you see the zipper flower! It was SO easy! I made it using Becky Olsen's tutorial, but I used Glue Dots instead of the double-sided tape that she recommends. Worked great!

Thanks for stopping by to check out my mini! Don't forget to visit the Counterfeit Kit Challenge blog for the other designers' takes on this challenge!

Tuesday, March 29, 2011

Lily Pad Cards Blog Hop


Good morning, Hoppers! Welcome to your first stop on Day 2 of the Lily Pad Cards Blog Hop! Today's cardmakers are literally going to make you ribbit out loud! Each day, the hop will span 7 different blogs, then culminate on Friday, April 1, with the grand opening of Lily Pad Cards. Lily Pad Cards is a new challenge blog that will feature interviews, articles, videos, challenges, great prizes, and more!

Although Lily Pad doesn't officially bloom until April 1, 2011, you'll be able to see a new sneak peek every day until then. And you'll definitely want to drop by because there are three prize packages with a total retail value of over $800 (WOW!)-including $100 worth of gift certificates to a very popular online store! Go HERE for specific prize details and contest rules.

The theme of our hop is "welcome"-not only are we welcoming Lily Pad Cards to the neighborhood, but we're also welcoming all of you to come in and join in on the fun.


Thanks for being neighborly and hopping by my pad today! Your next stop on the hop is the incredibly talented Jill Foster: http://www.stampinginspiredby.blogspot.com/. If you hit a bad link, you can always hop back to the Lily Pad and click on the next link in the hop. We'd also appreciate it if you would report any bad links to webmaster@inlinkz.com.

Happy hopping!

Sunday, March 13, 2011

My Counterfeit Wildflowers Kit

With this kit, I once again started with one paper, inspired by the Studio Calico kit. I chose the butterfly print from Basic Grey, then found some coordinating papers similar to the inspiration kit. My lace paper has butterflies, which went perfectly with this kit! I printed the sign language and song cards from websites, and I was AMAZED to find the images identical to those in the inspiration kit! Glittery die-cut letters and vellum sentiment stickers from Momenta, and lots of fabric flowers from my stash complete this kit. I am hoping to try some fun things with Meridy and Bethany's flower tutorials, but I really want to use up these flowers, which have been in my stash for too long. :)
Be sure to stop back tomorrow, when I reveal my project for our Etsy-Inspired Challenge!

Thursday, March 10, 2011

My Counterfeit Mossy Knoll Kit

This is the most masculine portion of my March kit-lots of geometrics and neutral colors. For papers, I started with the stripe in the bottom right corner because I felt that would be the most challenging to match in my stash. Once I found this stripe from My Mind's Eye, I was able to build my papers around it. I'm not sure if I would use the papers from just this kit, but I think they will make interesting additions to projects made from my other kits.
A fun addition to this kit was the package of metal flower brads. I LOVED these and couldn't wait to make something similar! I was able to make my own for literally pennies, which made me very happy. Scroll down to my next post for the tutorial for my flowers, plus see a sneak peek of a project that I made using them!

Monday, March 7, 2011

Island Lunch


Today I'm sharing my first layout of the month from my March Counterfeit Kit. I used papers and embellies from both my main kit and my add-on kits. You can see the contents of my main kit in THIS post. I will be sharing my add-on kits all this week, so be sure to check back to see what goodies I've unearthed in my scrap room!

For this page, I kept the design pretty basic, but added some fun little accents. I had this lonely yellow flower in my stash, so I folded it in half and added a button to to top. Although it is meant to be a flower, it kind of reminds me of a little sunshine peeking up above the photos. I tucked a little journaling spot behind the flower, then added a sprinkling of buttons and bling brads.

I embellished my buttons by using some of the tiniest rub-ons from my kit. I think they add just the right amount of whimsy to this layout. I even made a few extras just to have ready in my kit. These would make great little accents for a card or tag, too. It helps those little rub-ons from getting lost on the project.

Hope you can stop in tomorrow for the reveal of my first add-on, my Counterfeit Babbling Brook kit. Lots of handmade papers and accents, and some tips for how you can "get the look."