Showing posts with label layout. Show all posts

Saturday, May 4, 2013

A Bonus Kit and a Layout!

It's no secret that I just love Bethany from the Counterfeit Kit Challenge Blog.  I keep trying to convince her to move to Maine, but that hasn't happened yet.  Maybe I will have to relocate to the Midwest. ;)

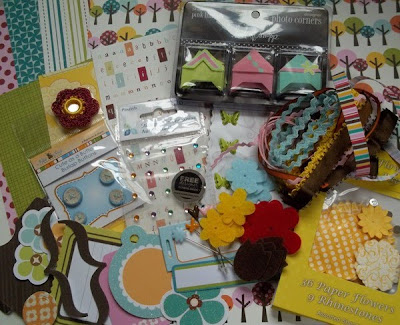
When she messaged me to do a bonus kit with her based on one of the challenges from CSI: Color Story Inspiration, I jumped at the chance.  I love to make my own kits, and sometimes I even use them, LOL!

This is the Case File that we were inspired by:
Here is the kit that I made:
I used a PageMaps sketch to create this layout:

Cloud/stitching detail:

I still have quite a bit left in my kit to create a couple of cards, too.  Those little owl stamps are just too cute not to use today!  (They were also a gift from Bethany, sweet girl!)  They are part of a Christmas stamp set, but as you can see, they aren't Christmas-y at all!  I think they will be adorable on cards. :)

Thanks for looking!  Happy NSD!


Thursday, September 15, 2011

Counterfeit Kit Challenge-Stamp Your Own Patterned Paper

The Counterfeit Kit Challenge (which I am sponsoring this month) issues 3 mini challenges each month to help you use up the supplies in your monthly kit. The first mini challenge for September is to create your own patterned paper using stamps. I usually use my Ippity stamps to make focal point embellishments for cards, so creating background paper was a great way to get me thinking outside of my comfort zone. I decided that I wanted to give myself an additional challenge to create a layout instead of a card.
There are quite a few stamped elements on this layout. Can you see them all? First, I created my background paper using a piece of ivory cardstock and Tattered Rose Distress Ink. I first stamped the cardstock with the Dots for Sure background stamp. I used my Stamp-a-ma-jig to line up the dots. I then wanted to give it a bit of a vintage look, so I then stamped the paper again (randomly) with the postmark stamp from Cherish Your Dreams.

Now on to the embellishments. I used up all of the flower embellies that I made in THIS tutorial. The flower, leaf, and butterfly stamps are all from Ippity's Now & Always stamp set. I also stamped the journaling spot where my title is with one of the frames from the Season of Joy set. I just love that frame! I distressed the edges of the frame with Tattered Rose Distress Ink to tie it in with my background paper.

I hope that you are playing along with us at the Counterfeit Kit Challenge this month. It's not too late to start playing! Remember, you could win your choice of Ippity stamps if you join in! Check out the details at the Counterfeit Kit Challenge Blog, along with all of the wonderful stamping projects from the Master Forgers. I know you will be inspired!

Saturday, August 27, 2011

Master Forgers' Blog Hop

Welcome to your next stop on the Counterfeit Kit Challenge's August blog hop! If you didn't start at the very beginning, please head over to the Counterfeit Kit Challenge. You won't want to miss any of the fabulous projects we have for you today!
We are so honored this month to have an amazing sponsor: Allison Davis of Sketch Support! Can you believe it? Allison created a 2-page layout sketch just for us! She is also sponsoring a fun giveaway for us-check out all of the details HERE.
I had these three photos of my dad, taken on his 80th birthday in May, and I knew that they would work perfectly with my birthday add-on kit this month. They were also the perfect fit for the right page of Allison's sketch. I decided to use just the right page and tweak the design to include my title instead of the two smaller photos.
Thanks so much for stopping by today! Your next stop on the hop is Kim's blog. Have a great weekend!


Wednesday, July 27, 2011

Christmas (in July) Layout

***Please note that this is my 2nd post for today. Please scroll down for the Master Forgers' Blog Hop post. Thank you! ***


I really wanted to use my 4th of July add-on kit from this month's Counterfeit Kit Challenge, but I didn't have any pictures from this past 4th of July. I did, however, have these photos of a trip that my son, Ryan, and I took way back in December of 2007. We went to Washington, D.C. as part of the Wreaths Across America convoy. On this trip, Ryan placed a Christmas wreath on a grave at Arlington, and he also visited the grave of a soldier he had learned about in his Enrichment Resources class. We also got to meet the soldier's wife and daughter. It was by far the most meaningful trip that either one of has ever taken.

Everything on this layout is from either my July main kit or the 4th of July add-on. I stamped the banners at the top using a photo corner stamp from {ippity}. I also used a Unity Christmas bough stamp to stamp the red strip at the bottom with watermark ink. I am entering this layout in the "My Unity Place" Banners challenge.

Sunday, July 17, 2011

Mother's Day Picnic

My last share for today is a 2-page layout that I made using my July Counterfeit Kit and the latest sketch (Two-Page Sketch #17) from Allison Davis at Sketch Support. As much as I love the look of large die-cut papers, I am VERY intimidated by them! So this was a huge step for me to use this paper. (I can't tell you how nervous I was to cut it right down the middle of that beautiful paper!) I changed the photo sizes on the left hand page slightly to work with my photos, but other than that, I stayed pretty true to the sketch. The butterfly garland was very fun to make, too. I got this idea from Pinterest, and it made a great substitution for the stars in the original sketch. Thanks for checking out the projects that I made over my scrappy weekend. I hope to be back tomorrow with another project or two!

Friday, July 1, 2011

June Kit Layouts

Our first challenge this month was to find inspiration in an ad. This was a tough one for me-until I saw this Keds ad in a magazine:
I loved the clean design of the layout and knew that it would work well with the photo that I wanted to scrap. I substituted some of my favorite papers and a journaling box for the extra photos in the ad. The background is embossed cardstock from Core'dinations. I lightly sanded it to show the texture. This photo is of my dad and some of his brothers and sisters (taken around 1937). My dad is the little blonde on the right, next to the pink flower. :)

Challenge #2 for the blog hop was to make an "I" page. I immediately though of my Pinterest boards, which I labeled like Apple products (like the iPod and iPhone.) My boards include iBake, iSew, iScrap, etc. I also lifted this design from a layout that I have "pinned" on my iScrap board. Notice the subtle background stamping on the gray background? I did that with my homemade chicken wire stamp! The metal clips were leftover from my May kit.

My last layout was for Challenge #3, "Get in Shape". The challenge was to use a shape as a design element on your page. I had included this large chipboard heart in my kit and knew that it would be perfect for this challenge. I inked it with Creamy Brown chalk ink and then stamped a small branch with heart-shaped leaves all over with brown ink. I also realized that I used all patterned paper for this layout-the only cardstock is my background, but you can't see it because it is covered with patterned paper strips! I can't remember ever making a project using only patterned paper. I really like the look-it reminds me of an old quilt. :) These photos are of me and my parents last summer.

Thanks so much for stopping by today. Today is my last "free" day before a very busy holiday weekend. I hope to get lots of scrapping done!

Friday, May 27, 2011

May Counterfeit Blog Hop


Welcome to your next stop on the Counterfeit Kit Challenge Blog Hop! If you didn't start at the very beginning, you will want to start HERE.

Our blog hop challenge was to be inspired by a project from a manufacturer's blog. This wasn't hard-although narrowing it down to just one inspiration project was a bit tricky! I immediately went to the Pink Paislee blog where I found THIS adorable layout by Caroline Ikeji. I have always loved Caroline's layouts-especially the way she mixes patterns and clusters embellishments. I tried the cluster technique on this layout. I think I have a new favorite technique!

I'm so glad you stopped by today. Your next stop on today's hop is the fabulous Kim's blog!

Thursday, May 26, 2011

Us.

***This is my second post for today. Please scroll down for my Momenta Faux Bingo Markers Project.***


When I look at this layout, it's hard to believe that I actually made it. First, it's a layout. And it's completed. Go me, lol! Second, it's a 12 x 12 layout. Usually I scrap 8.5 x 11, but the past few that I have done have been 12 x 12. I like it. :) Finally, I used eyelets. Amazing! I don't remember the last time I used an eyelet!

So, I finished a cute layout using one of my all-time favorite photos of Donny and the kids. I actually finished 2 layouts today, but you'll have to come back tomorrow for the second one. It's for the Counterfeit Kit Challenge Master Forgers' Blog Hop tomorrow! You won't want to miss it!

Wednesday, April 27, 2011

Counterfeit Kit Challenge Blog Hop

Welcome to your next stop on the Master Forgers' Blog Hop for the month of April! If you didn't start at the beginning, you will want to head over to the Counterfeit Kit Challenge blog so you start from the very beginning. You won't want to miss any of the beautiful projects created by (and inspired by) our amazing DT!


Our challenge this month was to surf the DT's personal blogs for inspiration. It was so hard to choose just one designer to scraplift! Finally, I chose a layout that I felt worked really well with my photo and the supplies remaining in my kit. I just loved this layout by Lisa:

Here is my layout:

I also have a fun giveaway for one lucky commenter! Master Forger Kim and I have made mini add-on kits inspired by this month's Counterfeit Kit Challenge-and we're giving them away! All you need to do is leave a comment here on my blog and you will automatically be entered. I will announce the random winner on Sunday night. Here's the mini kit up for grabs:


Your next stop on our fabulous blog hop is Kim's amazing blog, Love-Joy-Scrap. Thank you so much for visiting with me today!

Friday, April 22, 2011

Counterfeit Kit Mini Challenge #3: Inspired by Food

Our mini challenge was to create a project inspired by our favorite foods. My favorite food is ice cream-hands down! I knew that I wanted to scrap these photos from our trip to the Ben & Jerry's factory last fall. As I looked through my kit, I noticed my cloud papers and chipboard shapes, the scalloped borders, and the blues and greens. My mind instantly thought of the B&J's containers. I thought it would be fun to recreate the background from the packaging. Although it's not exact, it's definitely inspired by the packaging. I am so proud of myself for getting these photos scrapped and on a 2-page spread, to boot! :)
We would love to see your take on this challenge! You can see the original post HERE on the Counterfeit Kit blog.

Wednesday, March 23, 2011

Counterfeit Kit Challenge-Frames


I have admitted many times that I have a seemingly endless supply of chipboard. It was one of those supplies that I bought a TON of when it first became popular, but didn't use very often. I just WANTED it. Now I am trying to use it more often-tyring to make a dent in that stash!

For our "Frames" mini challenge, I turned to my stash of chipboard. Many of you may consider this to be cheating, since the chipboard is not technically part of my kit. I keep my chipboard in the original 12x12 packaging, so it would be difficult to fit in with my kit. Also, I figure ANYTHING that will help me to use up my stash should be legal, lol! So I keep my chipboard sheets hanging in my scraproom closet, readily accessible.

Although I loved this scalloped chipboard frame, it was a little overwhelming for my 8.5x11" layout, especially since I wanted to include at least two photos. So, (gasp!) I CUT one side off of that pretty chipboard frame. Of course, I couldn't bear to throw it away-I tucked it into my kit to use on another project later this month. :)

This was a naked chipboard frame, so I first painted it with acrylic paint, then used Versamark ink and iridescent embossing powder to give it some shine and sparkle. I finished my frame by adhering a little aqua gem in the hole of each scallop.

How will you include a frame on your project? I can't wait to see your takes on this challenge!

Monday, March 7, 2011

Island Lunch


Today I'm sharing my first layout of the month from my March Counterfeit Kit. I used papers and embellies from both my main kit and my add-on kits. You can see the contents of my main kit in THIS post. I will be sharing my add-on kits all this week, so be sure to check back to see what goodies I've unearthed in my scrap room!

For this page, I kept the design pretty basic, but added some fun little accents. I had this lonely yellow flower in my stash, so I folded it in half and added a button to to top. Although it is meant to be a flower, it kind of reminds me of a little sunshine peeking up above the photos. I tucked a little journaling spot behind the flower, then added a sprinkling of buttons and bling brads.

I embellished my buttons by using some of the tiniest rub-ons from my kit. I think they add just the right amount of whimsy to this layout. I even made a few extras just to have ready in my kit. These would make great little accents for a card or tag, too. It helps those little rub-ons from getting lost on the project.

Hope you can stop in tomorrow for the reveal of my first add-on, my Counterfeit Babbling Brook kit. Lots of handmade papers and accents, and some tips for how you can "get the look."

Monday, February 28, 2011

Counterfeit Kit Blog Hop

Welcome to your next stop on February's Counterfeit Kit Blog Hop! You should have arrived here from Melissa's fabulous blog. If not, make sure that you start the hop right at the Counterfeit Kit Challenge blog so you don't miss any of the amazing projects!


This month's inspiration kit was from Scraps of Darkness. You can see photos of the inspiration kit HERE, and you can also check out my blog post HERE that shows the contents of (and the logic behind) my counterfeit kit. Here are a couple of projects that I've made with my kit.

Here is the sketch from Scraps of Darkness:

And here is my layout:


It's hard to see in the photo, but I finally used my Perfect Pearls mists! I sprayed the background and the brown chipboard flourish with Interference Red mist. So pretty when the light hits it!

I also made a couple of cards (of course!) The first uses supplies from my kit plus a cute little button card stamp from Unity Stamp Co. I'm embarrassed to say that I've had this stamp for a few months and didn't know what it was, lol. I just saw a new set from PTI that had a similar stamp and realized what it was! Now it is one of my favorites. :)

The next card was actually the first project that I made using my kit, back at the beginning of the month. The card base is made from the postage stamp die cuts (from the Create a Critter Cricut cartridge). The flower and sentiment stamps are from Ippity. If you would like these stamp sets, I happen to know a *fabulous* Ippity chick. ;) Plus, I think I finally achieved the vintage look with these two cards!
I am so very glad that you had a chance to hop along with us today. I'd love it if you left me a comment, too! Your next stop on the hop is the amazingly talented Marianne!

Wednesday, February 23, 2011

My first layouts of 2011!


It's been months since I've made scrapbook layouts. I was inspired by the Counterfeit Kit Challenge blog to finally make a page. Guess what? I made 2! I will share one here today which uses mostly Jillibean Soup and Pebbles, Inc. products. I also used a PageMaps sketch that was shared in the Scrapbook Daisies forum. The other page (made with my Counterfeit Kit) will be shared here on Monday as part of the Counterfeit Kit Challenge blog's monthly blog hop.

Just a quick share today. Many of you know that this has been a very traumatic and hectic week for my family, as my older sister passed away Sunday from complications of pneumonia and leukemia. Trying to keep things as normal as possible, but it's tough. There have been some really rough moments over the past week. Thanks to all of you for sharing loving thoughts and hugs over the past few days. Hugs to you all. xoxo

Wednesday, July 29, 2009

A button layout to share...


I was just browsing around in my Flickr photostream and came across this layout that I did a couple of years ago. It just made me smile-for those of you who have been reading my blog, that is my daughter on the left. You know, the one who just went to the prom?! Wow, how time flies. That is my son on the right-he's going to be starting middle school in the fall. Doesn't he look stylin' in those Blue's Clues sneakers?

Anyway, before I get all teary, here is an idea for using button borders on your layouts as well as your cards. As you can see, this variation doesn't require a ton of buttons. You can add doodling in between (the bee's trail in this case.) Also, mix it up a bit by using mostly one color buttons, but include 3 of a contrasting color. Remember your "rule of three's"? The three white buttons help the layout feel balanced.
I also used some tiny buttons to dress up the frog's spots (frog and bees cut from Basic Grey's Color Me Silly paper.)

Thanks for looking!

Thursday, July 9, 2009

New from Pebbles Inc.


Pebbles, Inc. has been one of my favorite companies for many years. We carry several of their lines at A Time to Remember. This is a layout that I made using one of Pebbles Inc.'s brand new lines, Lil' Miss. I was fortunate enough to receive this entire line as a gift from Pebbles after winning it on their blog.


These pictures are of Jordan on our trip to Walt Disney World. I just loved these ones of her getting stage makeup at MGM Studios. She chose a butterfly design-so pretty. It was amazing to watch these makeup artists from start to finish-so talented.


This layout was made using a sketch from http://www.mysketchworld.blogspot.com/. I rotated the sketch to better suit my photos, and I substituted three photos for the two shown in the original sketch.


Thanks for checking it out! I'll be back later with a sneak peek of my next card class at A Time to Remember, called "Cricut Die-Cut Cards." We will be making six shaped cards, which are some of my favorite kinds of cards-so personalized. Off now to enjoy the weather-NO RAIN! :)

Monday, June 22, 2009

A Sneak Peek...


at Tuesday night's paper-piecing class at A Time to Remember. Our theme is "Summer in Maine" and we have a variety of projects planned. This sneak peek is an oversized die-cut tag in the popular label holder shape. The front of the tag is embossed with Swiss Dots and features three lupine flowers, a familiar sight here in Maine. This tag can be used on a scrapbook page or as a wallhanging (simply back it with chipboard for extra stability) or you can do what I did and turn it into a die-cut card. I'll be sharing this technique in class, too.
Our other two projects are 12 X 12 scrapbook pages. One is of the Maine coast, featuring a lighthouse, whale, and possibly the cutest lobster I've ever seen (if I do say so myself!) Our second layout has an amusement park theme, making it perfect for your pages about Funtown or one of the local fairs.
We still have four spots available for this class, so if you're interested, please call A Time to Remember at 474-2380 or email us at atimetoremember@rocketmail.com to reserve your space. See you tomorrow night!

Friday, May 29, 2009

Where does the time go?


I just came across this layout that I did a while ago. These photos were taken on Halloween in 2001. Look how little Jordan and Ryan were! It's hard to believe that they are 12 and almost-14 now.

On a side note, this layout is also my one little "toot". It was featured on the Simple Scrapbooks blog, back when there was a Simple Scrapbooks blog. I still check out the Simple Gals on their own blogs but it's just not the same, you know? Angie still cracks me up-she is a hoot. Check out her blog HERE.

Just a random post-missing those cute little Halloween costumes and angelic faces...