Showing posts with label punch. Show all posts

Saturday, April 21, 2012

Lovin' Hexagons!

One of the April challenges from the MME blog was to use hexagons prominently on a project.  I have been saving just bits and pieces from this older MME collection called "Love Me Do" just because I loved the colors and prints so much.  Punched hexagons were the perfect way to use up these scraps to make a cute card!

I added a stamped sentiment from Hero Arts, a couple of heart die-cuts from the same MME collection, and a bit of stitching to frame my background.  I think it came out quite cute. :)

Thanks for stopping by, and if you come back later I will have a few more cards from my April Counterfeit Kit to share!

Friday, July 29, 2011

Cuppy Cakes

I made this cute little cupcake card using the "Cuppy Cakes" stamp set from {ippity} and papers from Basic Grey's Lemonade collection. These cupcakes were so fun to paper-piece! I can't wait to make more. I am entering this card in 2 challenges. The first is the {ippity} paper-piecing challenge. Although {ippity} chicks can't win, many of us play along just to share some fun ideas for how to use the stamp set. You, however, could win a $20 gift certificate to your favorite {ippity} chick! If you play along and win, I'd love to have you shop with me! :) You can find the details for the challenge HERE.
I am also entering this card in the Mojo Monday sketch challenge. This is my first time entering this challenge, although my friend Lesa has been playing along for quite a while. I am a bit intimidated by the numbers-there are already 148 cards entered in the challenge! WOW! The great thing about that, however, is that there are a ton of great ideas to peruse through the linky.
Thanks for visiting today-I will be back a little later with a couple more challenge cards to share!

Wednesday, July 27, 2011

Christmas (in July) Layout

***Please note that this is my 2nd post for today. Please scroll down for the Master Forgers' Blog Hop post. Thank you! ***


I really wanted to use my 4th of July add-on kit from this month's Counterfeit Kit Challenge, but I didn't have any pictures from this past 4th of July. I did, however, have these photos of a trip that my son, Ryan, and I took way back in December of 2007. We went to Washington, D.C. as part of the Wreaths Across America convoy. On this trip, Ryan placed a Christmas wreath on a grave at Arlington, and he also visited the grave of a soldier he had learned about in his Enrichment Resources class. We also got to meet the soldier's wife and daughter. It was by far the most meaningful trip that either one of has ever taken.

Everything on this layout is from either my July main kit or the 4th of July add-on. I stamped the banners at the top using a photo corner stamp from {ippity}. I also used a Unity Christmas bough stamp to stamp the red strip at the bottom with watermark ink. I am entering this layout in the "My Unity Place" Banners challenge.

Master Forgers' Blog Hop

Welcome to our blog hop for the month of July! If you didn't start at the beginning of the hop, please head over to the Counterfeit Kit Challenge Blog so that you don't miss ANY of the fabulous projects that we have to share with you today!
Our challenge for this hop was to create a flower for our project. I made my flower by punching 6 circles from patterned paper. I folded each of the circles into a petal shape, then adhered them to a circular base. The center of my flower is a 1" circle punched from yellow paper, edges snipped and crumpled slightly. To finish my flower, I then used a 1/2" x 6" strip of coral patterned paper, fringed one edge, then coiled it and "puffed out" the snipped edge. The result is a fun pom-pom center for my flower.
The rest of my card is very simple, with layers of punched borders and a sentiment cut from patterned paper and handstitched to add a bit of interest. I also used my very last piece of coral seam binding (sniff, sniff!) I LOVE this color-thank you so much, Meridy, for sending it to me! It was the perfect pop of color for this card!
Your next stop on today's hop is Kim. I KNOW she has an amazing project to share with you. Thanks for hopping along with us today!

Sunday, July 17, 2011

Mother's Day Picnic

My last share for today is a 2-page layout that I made using my July Counterfeit Kit and the latest sketch (Two-Page Sketch #17) from Allison Davis at Sketch Support. As much as I love the look of large die-cut papers, I am VERY intimidated by them! So this was a huge step for me to use this paper. (I can't tell you how nervous I was to cut it right down the middle of that beautiful paper!) I changed the photo sizes on the left hand page slightly to work with my photos, but other than that, I stayed pretty true to the sketch. The butterfly garland was very fun to make, too. I got this idea from Pinterest, and it made a great substitution for the stars in the original sketch. Thanks for checking out the projects that I made over my scrappy weekend. I hope to be back tomorrow with another project or two!

Friday, July 15, 2011

Patriotic Thank You

Today I get to share with you my creation for the Counterfeit Kit Challenge's first challenge for July. It is all about embossing-you can dry emboss or heat emboss. I chose to dry emboss, but with a twist. I wanted to emboss a coordinating border for my card. Since I wanted to make my card using leftovers from my 4th of July Add-On, I thought stars would be a fun accent. My only problem: I don't have a star embossing folder. So, I decided to make my own embossing plate.
First, I found a thin piece of chipboard (this piece came in a package of Stampin' Up patterned paper.) I trimmed the chipboard to be slightly larger than my card front. Then I used a star punch to punch 6 stars from the leftover chipboard. I arranged 3 of the stars on my chipboard base, then adhered them down. Because the chipboard was so thin, I stacked another star on top of each on the base and adhered them so that I could get a deeper impression.
Then it was time to emboss. It took a little trial-and-error to come up with the right "sandwich" for my embossing plate, but here is what worked for the thickness of chipboard that I used. You may need to adjust your "sandwich" if your chipboard or cardstock is heavier than mine. I started with Tab 1, one clear cutting pad,and the homemade embossing plate. (Make sure the star punches are facing UP.)

Next, I stacked my kraft cardstock on top of the embossing plate, making sure that the edges were placed slightly inside the edge of the embossing plate.

The next layer is the black silicone pad that I use with my Sizzix embossing plates.

The final layer is the hard black plastic pad, also used with the Sizzix embossing plates.

Carefully run all layers through your die cut machine. Here is what the finished cardstock will look like:

To highlight the embossing, I rubbed a Creamy Brown chalk ink pad over the tops of the stars and also around all of the edges of the kraft cardstock. I attached the embossed panel to the front of my card base, then embellished the card with rub-on letters and a handmade bunting embellie.

I love the Americana look, and the tri-color bunting looks slightly vintage. I can't wait to try this embellie using softer colored papers from my main kit. Thanks for stopping by!

Monday, June 6, 2011

June Counterfeit Add-on Kits

I admit that I got a bit carried away this month while I was creating my add-ons for the Counterfeit Kit Challenge. I created a small add-on kit based on the add-on from Burlap & Buttercups, which I shared yesterday with my main kit. When I was looking through some of the other kit clubs, however, I found that I really loved the Studio Calico Star Dust Add-on. After I assembled my main kit, I realized that I could counterfeit the Star Dust Add-on and have it coordinate with my main kit. So this month I have a mix of two kit clubs. Here is my counterfeit Star Dust Add-On:Everything was pulled from my stash or handmade. I really wanted to include a chicken wire background stamp, but didn't have any stamps in my stash that would work. My solution: an onion bag (thanks, Lesa!) I created a frame from a scrap of chipboard, then adhered a piece of the onion bag over the center of the frame. To use this, I applied ink to one side, placed it ink-side-down on my paper, then rolled a brayer over the top. It worked great! Can't wait to try this on a project!


Here are my counterfeit tin pins. I had one package of buttons to cover leftover from last month's kit, so I decided to cover them with paper to make my version of the tin pins. I used a cloth to slightly dampen my paper, then covered the buttons. I then applied a layer of Glossy Accents, and they look very similar to October Afternoon's tin pins!
These are the tapes that I made in place of the Smash Tape. I used some old first aid tape, and stamped the checked background with teal and red ink. I then used some different stamps from my stash to add words, phrases, and numbers. I'm not quite sure what I will use these for yet, but they were fun to make! Note to self: need more first aid tape. :)

Finally, I counterfeited the Kitch brads from the inspiration kit. I simply cut or punched circles from patterned paper scraps and placed them inside the rim of these buttons. I then covered the paper with Glossy Accents. Super easy, and no one will ever know that they are buttons, not brads, once they are on my projects!

I also made a Summer Add-On so that I can play along with Kim's Summer challenge later this month. I have had my eye on Echo Park's Splash collection for a while, but I simply couldn't justify buying it when I still have lots of last summer's paper in my stash! So I decided to counterfeit the Splash collection (instead of a kit) as my Summer Add-On. I had so much fun making the journaling blocks and the ticket embellies. You can see the "real" Splash collection from Echo Park HERE. Here is my counterfeit Splash kit:
I'm excited to use my kits to make some projects! If you haven't played along with the Counterfeit Kit Challenge, you are missing out! Check it out HERE. I know you'll be inspired!

Monday, March 14, 2011

Mini Challenge: Etsy Inspiration


This week's Counterfeit Kit Challenge is to be inspired by a project from Etsy. HERE is the project that I chose. I have always loved the look of printer's trays, but finished ones tend to be a bit pricey. I knew I could make my own for a fraction of the price. To save even more money, I found a small shadowbox at Goodwill to alter. The price was definitely right: 45 cents!


Here is a before photo:

Pretty outdated and dusty, huh?
Here's what it looks like now:
Here are the details:
Top left: I cut this butterfly from my lace paper, but the color just didn't "pop" like I wanted it too. So, I covered the butterfly with Versamark ink and heat embossed it twice with silver embossing powder. Two bling brads form the body.
Top right: I stamped the sewing machine on a piece of clear packaging (from the Bella Blvd. fabric flowers.) I then paper pieced just the body of the machine and added an epoxy brad and some stickle-y thread. For the "fabric", I cut a little slit in the transparency and threaded a scrap of rickrack through.
Middle left: Just a rub-on and gems on a Spellbinders die-cut.
Middle right: I cut a Spellbinders die-cut in half, then distressed the edge so it looks like a tiny notebook edge. Studio G stamp and butterfly punches, plus a little doily that I created with an EK Success border punch.
Bottom left: My favorite! I stamped the dressform on the same clear packaging from the flowers and paper pieced the dress. The text flowers are just two punched flowers, adhered together with a foam square and topped with a button and gems. The little metal flowers are my soda can flowers. :)
Bottom right: I trimmed a corner off the stamped doily from my kit, then topped it with a butterfly rub-on on white cardstock. I popped the butterfly up with foam squares. I love this punched flower, too. I layered three Martha Stewart flower punches, attached an epoxy brad, then "squished" the petals up to give it some dimension. The tiny stamp is from an old (uninked!) Studio G set.
Thanks so much for stopping in today! I hope you can join us for this challenge this week! Check out the details at the Counterfeit Challenge blog!

Wednesday, March 9, 2011

Metal Flower Tutorial

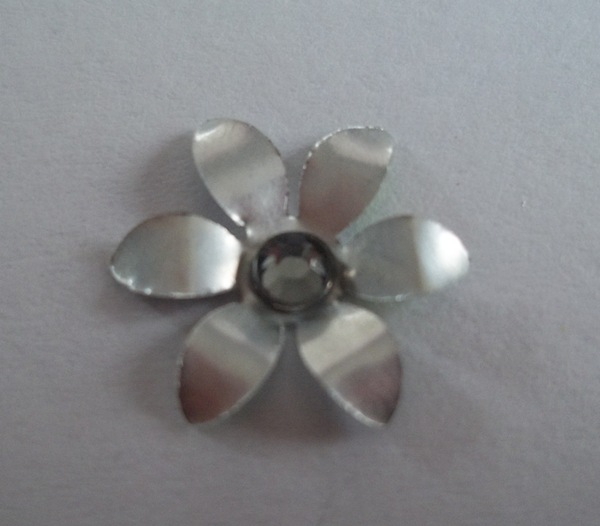
Today I'm going to share with you how I made the metal flower embellishments in my Counterfeit Mossy Knoll Add-On Kit. They are really easy to make and you can make a couple of dozen from one recycled soda can. That's great for my scrap budget!

First, gather your materials: a clean, empty soda can, utility scissors, a small flower punch, small gems or bling brads, and a paper piercer (if you're using brads.)


Carefully cut off the top and bottom of the soda can. Cut a slit up the entire side of the can. Be very careful, as the sides of the can are very sharp!


Smooth out the sheet of metal enough to slide it into the punch.


Punch flowers from metal sheet.


For each flower, bend each petal up slightly. The center of the flower should sit flat on your work surface, and each of the petals should stand up just a bit.


Now curl each of the petals by gently pulling on them. Shape as desired-the metal is very pliable.


Add a small gem or bling brad to the center of each flower (use your paper piercer to poke a hole if using a brad.) I used a smoky gray gem to the center of each-I thought it looked great against the metal.

Here's a sneak of a project that I made using these flowers:

This is my project for our first mini challenge-make sure to check back on the 13th for all of the details and to see my project in full!


Tuesday, March 8, 2011

"Get the Look"-Cosmo Cricket's Cocktail

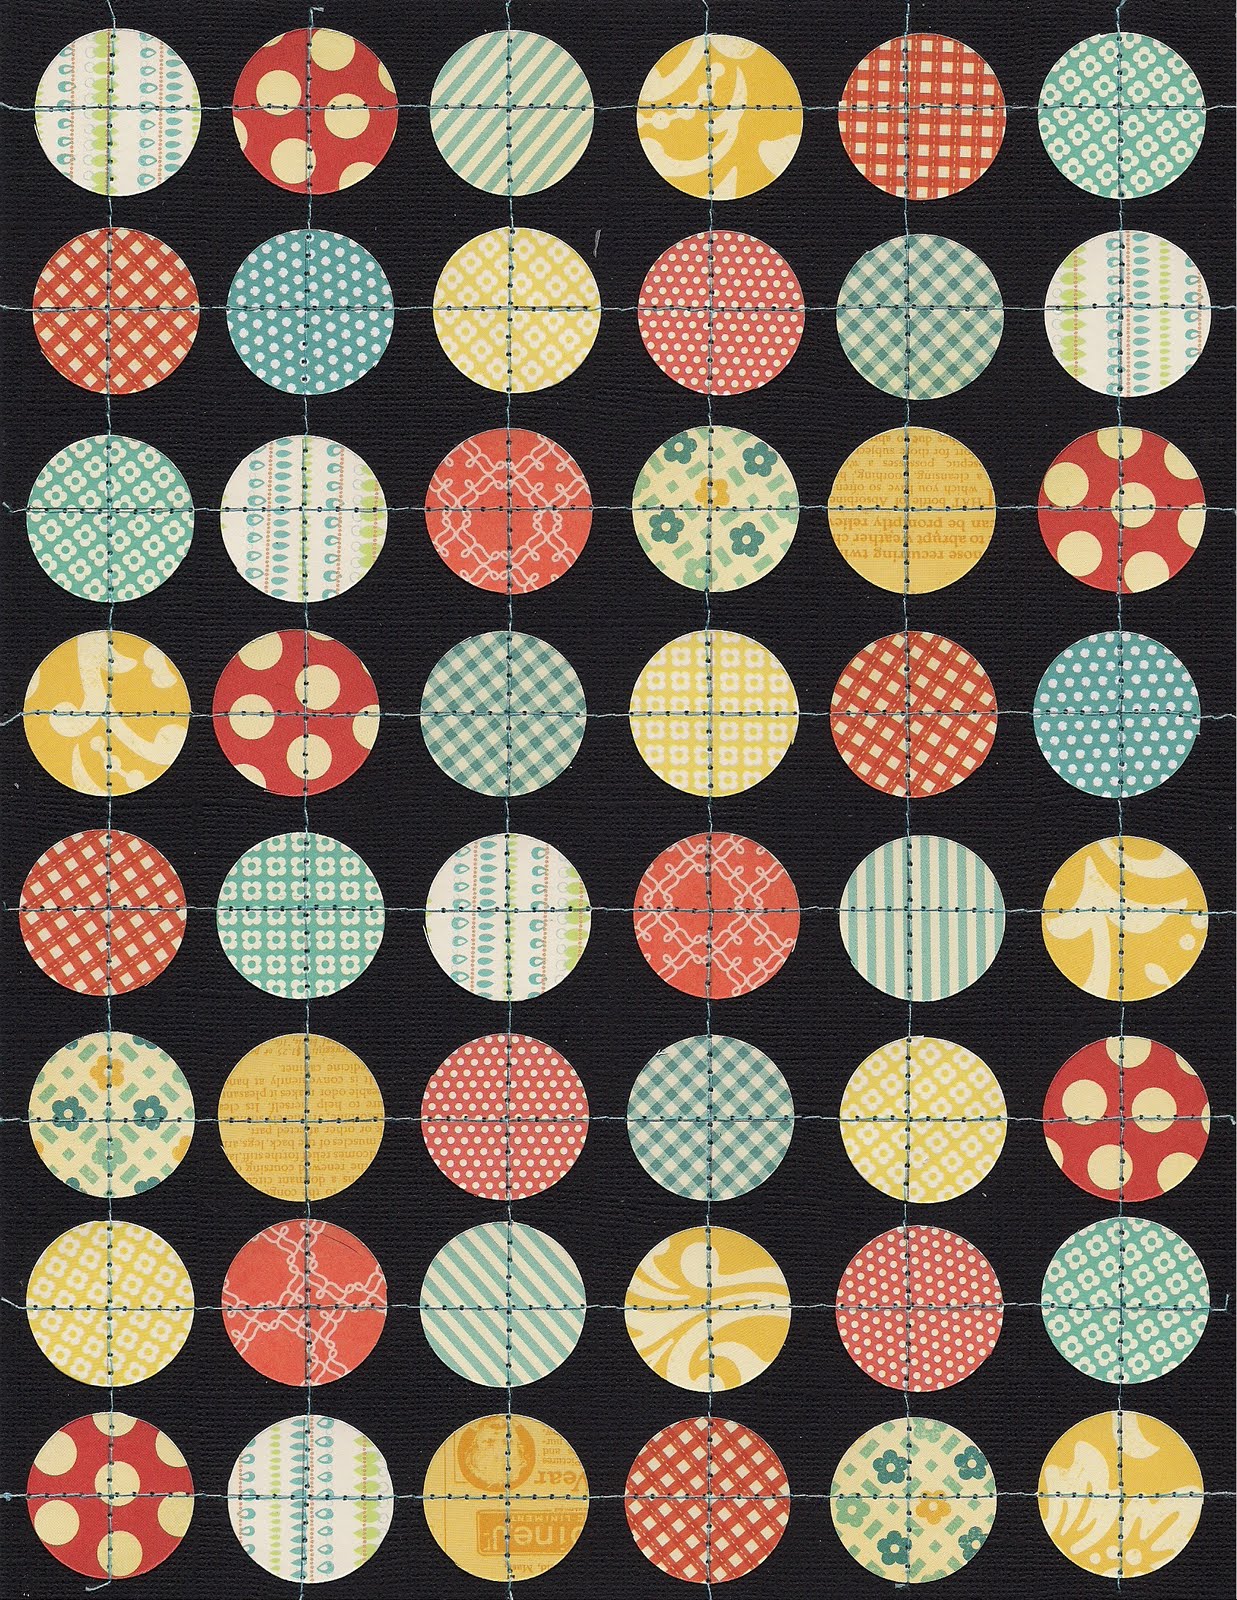
My first example of how to "get the look" of Cocktail, one of Cosmo Cricket's fun new Social Club papers, is very similar to what Bethany shows you in her tutorial HERE on the Counterfeit Kit blog. I simply machine-stitched over each row of circles, using a contrasting thread. Fun look, don't you think? Try this with other shaped punches, too-think butterflies, hearts, flowers...


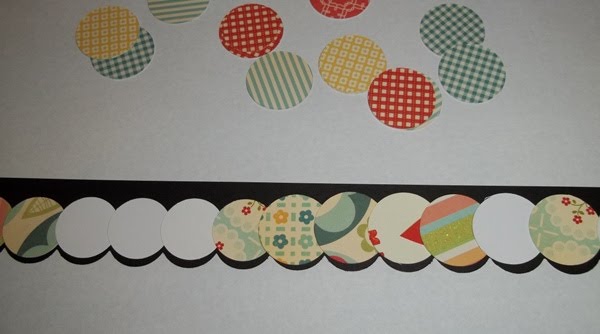
The next way to "get the look", but on a smaller scale, is to punch a solid cardstock border using a large scalloped border punch (mine is from EK Success.) I also punched lots of 1" circles from scraps.

Next, flip your cardstock border over and apply adhesive adross the entire border. I put my border on scrap paper and just ran a tape runner over the entire strip, right over the punched holes. You can see the shine of the adhesive in the photo.
Now you're just going to layer the circles over the back of the border. I overlapped each circle so you can only see one pattern through each punched hole.


Here is the finished border:


I love those pops of color! And because this was made from the materials from my kit, I'm going to use this border on a project this month, too! Thanks for stopping by!


Wednesday, February 23, 2011

My first layouts of 2011!


It's been months since I've made scrapbook layouts. I was inspired by the Counterfeit Kit Challenge blog to finally make a page. Guess what? I made 2! I will share one here today which uses mostly Jillibean Soup and Pebbles, Inc. products. I also used a PageMaps sketch that was shared in the Scrapbook Daisies forum. The other page (made with my Counterfeit Kit) will be shared here on Monday as part of the Counterfeit Kit Challenge blog's monthly blog hop.

Just a quick share today. Many of you know that this has been a very traumatic and hectic week for my family, as my older sister passed away Sunday from complications of pneumonia and leukemia. Trying to keep things as normal as possible, but it's tough. There have been some really rough moments over the past week. Thanks to all of you for sharing loving thoughts and hugs over the past few days. Hugs to you all. xoxo

Friday, January 7, 2011

Mini Valentines


I made lots of cards today, including this set of mini Valentines. Each of these cards is 4"x4", so I was able to get four cards from a 12"x12" sheet of cardstock. Each of the images is stamped and paper-pieced using scraps, so these Valentines are perfect for stretching your scrapping budget! Each of the images is highlighted somewhere with Glossy Accents to give it a little bit of shine.

I pulled out my Marvy scalloped heart punch, too. I don't use this very often, but it was perfect for these CAS cards. It provided a nice base for my paper-pieced images. The stamps are all from Unity's "Mix-Up of Cuteness". So cute!

This set of cards is my entry for the Paper Play Challenge-Clean and Simple.

Thursday, September 2, 2010

DeNami Design Color Challenge


We're bringing our color challenge to you a little early this month-so you will have the long weekend to play along! Our colors were selected by DT member Michele. These colors look fabulous together! I always admire cards that feature black and white with a splash of color, but I have to admit that I struggle to use just one color! Most of my cards feature lots of colors because I love patterned paper and images that you can color or paper-piece. So this "Challenge" was definitely a challenge for me! If I can do it, though, so can you!
While I love patterned paper, I didn't have any that used just the featured colors. So, I made my own! I stamped black polka dots on hot pink cardstock using DeNami's Polka Dot Background. Then I stamped my focal point image-one of my favorite DeNami stamps-the Cupcake Tower. I colored the image with markers and added some Crystal stickles to the frosting. Although this didn't add any color, it added some sparkle and a little bit of texture., which I love. The final touch was to stamp Happy Birthday and add a touch of bling. Easy design, but a fun result.
I hope that you can play along with our Color Challenge! You can see the details of the challenge, along with the Design Team's beautiful cards, over on the DeNami Design blog. Thanks for stopping by today!

Sunday, August 15, 2010

Welcome to the Polka Dot Blog Hop!


Today is going to be so much fun-I love blog hops! Even more, I love participating in blog hops and giving away prizes! If you are just joining the blog hop, please make sure that you start at the beginning HERE on the DeNami Design blog. You will want to visit all of the blogs on the hop for chances to win some fabulous prizes from DeNami and to see all of the Design Team members' cards. We also have three special guest designers for the hop, as well!

I got to play with some of DeNami's newest releases for this card. I started with the new Polka Dot Background. This is a Polka Dot Blog Hop, after all! I paired this background with punched circle embellishments-kind of like "over-sized polka dots", heehee. Each circle is stamped with a two-step stamping technique. I used the apples from the Apples and Pears Stamp Set. First, I stamped the solid apples using red and lime green chalk ink. Then I stamped over these with the apple outline stamp using black ink. You can use a stamp positioner to line them up perfectly, or you can stamp them randomly (like I did) for a more whimsical look. A little touch of polka dot ribbon finishes it off.

There is one more stop on the Polka Dot Blog Hop. You are now off to visit the lovely and fabulous:


Thanks for joining us today! Remember to leave some love on each of the blogs for your chance to win some yummy DeNami goodies! Enjoy!

Friday, August 6, 2010

Little Scarecrow


Just a quick share tonight-a last minute entry for the Card Patterns #75 Sketch Challenge. For this card, I used DeNami's Scarecrow from the new releases. Isn't he just too cute?

I am also entering this in the Papertrey Paper Dolls Challenge #14. The challenge there has two parts: 1) use a color you don't normally use, and 2) use a technique that you haven't used for a while. The color that I chose to use was yellow-I never use yellow! It was only after choosing the yellow cardstock that I decided what the theme of my card would be. The technique that I haven't used for a while was to use the negative part of a punch. I actually used the negative of the pumpkin punch to dry emboss the orange border. I then shaded the pumpkins with orange and brown colored pencils to make them show up a bit more.

Another technique that I tried on this card was to make a watermark background using Versamark ink and DeNami's new Polka Dot Background. Because the cardstock was slightly coated, it didn't absorb the ink much. I wanted to see the polka dots a little more, so I shaded each polka dot slightly with a colored pencil. Not too carefully-I wanted it to look a little distressed.
And last but not least, it fits in with the color scheme for Color Throwdown #104. although my cardstocks were from Momenta, they are similar to the Color Throwdown colors of Tangerine Tango, Daffodil Delight, and Old Olive.

Thanks for stopping by again today-three posts in one day is a record for me! I just have so many projects accumulating and I need to share them, lol!

Wednesday, July 21, 2010

DeNami Feature Product: Owls!


I think my owl stamps are slowly taking over my craft room. They are just so cute I can't help but buy them all! :) These little cuties from DeNami Design are no exception, plus they are the perfect size for creating fun scenes. The Owls Stamp Set is this week's Featured Product over on the DeNami Design blog.

For this card, I started with several tree images from DeNami. I used the Small Leafy Topiary, Round Leafy Tree, and Small Narrow Leafy Tree. Then I stamped one of the little owls (there are four in the set) on the middle tree. After coloring these images, I embossed this piece using the Swiss Dots embossing folder. I then stamped my little owl on a scrap of cardstock and layered her using a pop dot. This just made her stand out a bit more. I "need" dimension on my cards! :)

I finished my card with the "love you" sentiment from the Assorted Greetings Stamp Set, some American Crafts valentine ribbon and orchid pearls by Queen & Co.

Thanks so much for stopping by my blog today. Please be sure to check out the adorable cards made by the other DeNami DT members using these cute little owls! Just head over to the DeNami blog to see everyone's creations.

Tuesday, July 13, 2010

Ippity Class


This weekend I held my first class featuring Ippity's "Fall for You" stamp set and papers by My Mind's Eye. The class had a great turn-out...the house was a bit crowded and hot but I think (hope!) everyone had fun. My favorite part was seeing my scrappy friends. We just don't get together enough!

For those of you that would like to order a kit for this class (includes stamp set and all papers/embellishments) the cost is $25. I am currently sold out of this stamp kit, but I will be placing another order next week.

For those of you that attended but would like typed instructions, I will be emailing them to you soon. Thanks again for coming!

Friday, June 25, 2010

Playful Puppies


Just a note: this is my second blog post of the day. Please make sure you scroll down to see this week's Get Sketchy challenge!

For these two projects, I got to play with some adorable new stamps from DeNami Design. It is called Playful Puppies, and it is a Petit Four set which means you get four adorable little stamps to mix and match on your projects!

For my first project, I made a brightly colored card featuring a little hound from the set. These stamps coordinate so perfectly with DeNami's other stamps. For this card, I paired it with the Dog House. (oops-there's another sneak peek for you!) I also stamped Happy Birthday from the All-Occasions Sentiment set. I finished my card off with some fun details: a punched border from EK Success, striped ribbon from American Crafts, and an oversized button from DeNami Design.

On to my second project: a tiny gift bag with tons of style! This project features the little poodle from the Playful Puppies set. I was inspired to create a super-girly look for this. I paired the image with a computer-generated sentiment ("Pamper yourself!") and a rhinestone-studded collar/ribbon. These stamps also look great with DeNami's current stamps, such as the Paw Print. I personalized the tissue paper by randomly stamping the paw print. It was the finishing touch for this little bag! Can't you just picture this as the perfect gift bag to hold some sparkly nail polish or a spa gift card? Gift bag template, cardstock, ribbon, and button by DeNami Design, patterned paper by SEI, gems by Creative Charms, border punch by EK Success.

Be sure to check out the DeNami blog today. My friends and fellow designers Jenny and Rebeka have some adorable projects to share with you, also featuring the Playful Puppies set! And stop back here tomorrow for another project using more new DeNami stamps-I promise it'll be a "hoot"! (*wink, wink*)


Sunday, May 16, 2010

Happy 40th Anniversary, Mom & Dad!


May 14th is always a big day in our family because we celebrate two things on that day. First of all, it is my dad's birthday. He turned 79 this year! His health has deteriorated greatly over the past few months, so this birthday is especially important to us. We also celebrated my parents' 40th wedding anniversary.

This is the card that I made for their anniversary. First, I made my card base using magenta cardstock. Nest, I stamped the Spring Flower Block on white cardstock, trimmed it, and accented it with Sparklets Glitter. I mounted the image on black cardstock using foam squares. The white block is punched with the Deco Scallop edger punch and corner punch from EK Success. For my sentiment, I chose the Small Congratulations Stamp and stamped one of the flowers from the Elegant Spring Flowers set. (This set is one of my favorites!) I finished off my card with a knotted black ribbon and pearls. All products (except the pearls) are by DeNami Design.

The design of this card is from the Repeat Impressions blog.