Showing posts with label Cosmo Cricket. Show all posts

Sunday, July 31, 2011

Counterfeit Kit Cards

Today is the last day of the month, so I am TRYING to use up as much of my July Counterfeit Kit as I can. I have three layouts in mind that I want to make, but I have to print some photos. I decided to make some cards using the smaller pieces of paper and some of my embellies. The lighting on these is a little wonky...not sure WHAT'S going on with that! Someday I'll learn how to use all of the features on my camera and photo software. :)I love the coral and teal color combo, so I made this card using scraps of each and some of the Basic Grey Hopscotch stickers. I reddened the pink sticker a bit with chalk to make it match my paper, and the butterflies are stickers from the same sheet.

(Sorry-these cards are now both out for publication!)

This one's kind of corny, but hey-that's me. :) I hadn't planned on using the "boombox "paper with this kit (the reverse is my "clothesline" print), but it was cute and I thought it would stretch my kit a bit to make a boy card. I think that all of the neutrals balance out the teal and orange. I used my chalks again to recolor the white letter stickers a teal color. Those chalks have been a great resource for me this month! I also "raided" my June kit for the tiny black alphas and black cardstock scraps.


Yep-another corny sentiment. :) I saw a stamp set once that had a camera and "Oh, snap!" as the sentiment. The idea was cute and stuck with me. I knew when I made my kit that I wanted to pair that sentiment with the camera paper. I attached a ribbon camera strap to the camera that I cut from patterned paper. I wrote "I missed your birthday!" on the inside of the card using those same black tiny alphas from my June kit.

Wednesday, July 27, 2011

Master Forgers' Blog Hop

Welcome to our blog hop for the month of July! If you didn't start at the beginning of the hop, please head over to the Counterfeit Kit Challenge Blog so that you don't miss ANY of the fabulous projects that we have to share with you today!
Our challenge for this hop was to create a flower for our project. I made my flower by punching 6 circles from patterned paper. I folded each of the circles into a petal shape, then adhered them to a circular base. The center of my flower is a 1" circle punched from yellow paper, edges snipped and crumpled slightly. To finish my flower, I then used a 1/2" x 6" strip of coral patterned paper, fringed one edge, then coiled it and "puffed out" the snipped edge. The result is a fun pom-pom center for my flower.
The rest of my card is very simple, with layers of punched borders and a sentiment cut from patterned paper and handstitched to add a bit of interest. I also used my very last piece of coral seam binding (sniff, sniff!) I LOVE this color-thank you so much, Meridy, for sending it to me! It was the perfect pop of color for this card!
Your next stop on today's hop is Kim. I KNOW she has an amazing project to share with you. Thanks for hopping along with us today!

Sunday, July 24, 2011

Counterfeit Kit Challenge #3 and a Giveaway!


Challenge #3 for this month from the Counterfeit Kit Challenge is a fun one, with lots of room to make it your own. The "Gallery Standout Challenge" is to look through your favorite online gallery (such as 2Peas, Scrapbook.com, Splitcoast Stampers-ANY gallery of your choice) and find a project that inspires you. Then create your own project based on the one you love!
For my card above, I chose THIS card by Davinie Fiero, which I found on 2Peas. I switched things up just a little bit, using a little hand-cut house that I crimped and inked in place of the stamped house, but basically I lifted all of the design elements from Davinie's card. I hope that you will all play along with this challenge-don't forget to link up HERE!
Now for the giveaway! This month, we chose to counterfeit a kit from Polkadot Whimsy. One of the add-ons was the adorable Liberty Sparks kit. Guess what? Sweet Michelle Hill, the owner of Polkadot Whimsy, has sponsored a giveaway-you could win the ORIGINAL Liberty Sparks Kit! How awesome is that? Just check out THIS POST on the Counterfeit Kit Challenge blog to enter. Thanks, Michelle!


(Original Liberty Sparks Add-On Kit)

Sunday, July 17, 2011

Mother's Day Picnic

My last share for today is a 2-page layout that I made using my July Counterfeit Kit and the latest sketch (Two-Page Sketch #17) from Allison Davis at Sketch Support. As much as I love the look of large die-cut papers, I am VERY intimidated by them! So this was a huge step for me to use this paper. (I can't tell you how nervous I was to cut it right down the middle of that beautiful paper!) I changed the photo sizes on the left hand page slightly to work with my photos, but other than that, I stayed pretty true to the sketch. The butterfly garland was very fun to make, too. I got this idea from Pinterest, and it made a great substitution for the stars in the original sketch. Thanks for checking out the projects that I made over my scrappy weekend. I hope to be back tomorrow with another project or two!

Hang in There


Just another quick share-not for any challenges, just for a friend who needs to cheering up. I made this card from my July Counterfeit Kit. I changed up the chipboard letters a bit by chalking them with teal chalk. This color made them pop a little bit more on the green patterned paper. I also added the two pewter brads and the two mini clothespins. These were the last two pewter brads in my stash, and the clothespins have been clipped to my memo board for years! So even though these items weren't part of my original kit, I feel good about using them up. Oh, and the socks were hand-cut from the scrap of felt I had included in my kit. Thanks for checking out my card!

Along for the Ride

Cards for guys are tough, especially anniversary cards! While I was playing with my July kit for the Counterfeit Kit Challenge, I noticed that the back of one of the papers had a cute retro car and camper. My husband was just saying that he would love to find a teardrop camper and restore it to match our '55 Chevy Belair. I thought it would be cute to make an anniversary card for him using that paper. I couldn't believe it when I looked through my stamps and saw this cute little sentiment from Unity-uninked! It was the perfect message for this card. I added some twine and buttons to my arrow sticker and paper pieced the little details on the stamped image. I am entering this in the All Things Unity Challenge #35: Wrap it Up. I haven't participated in many challenges lately-it feels so good to be creative again! Thanks for stopping by!

Monday, March 28, 2011

Counterfeit Kit Blog Hop


Welcome to your next stop on the Counterfeit Kit challenge Blog Hop for the month of March! If you didn't start at the very beginning, you will want to head on over to the Counterfeit Kit Challenge Blog. We have lots of great scrappers participating this month-you won't want to miss a single hop!

Our mini challenge for the blog hop was to scraplift ourselves. I don't do this very often, so this was a fun challenge for me. I knew right away that I wanted to scraplift this gift bag that I made for my mom's birthday back in January:


I really loved this project-the stamps, the label shape of the bag topper, and the fact that it was a fun way to give a gift. I tried to think of a way to make the bag differently. I was a little stuck, but I was quickly inspired when I saw the cute little boxes that Backyard Farms uses for their tomatoes:

I loved the die-cut fence on the front and the fact that it was made from kraft cardstock. Being the frugal girl that I am, I decided to take the elements that I loved from my gift bag and use them to create a gift box. Here is what I came up with (my sweet daughter even baked some Double Chocolate Chunk cookies so my box wouldn't be empty for the hop!)

Everything (except the box and the cookies) came from my March Counterfeit Kit. I hope that you like the project and are inspired to upcycle your produce packaging, too! Your next stop on the hop is with the fabulous Karen Williams. Don't forget to leave some love along the way!

Friday, March 11, 2011

My Counterfeit Sunny Clearing Kit

I love this little kit. The colors, the patterns...and how easy it was for my to pull together. :)
All of the papers are from Cosmo Cricket's Material Girl 6x6 paper pad. I also pulled a few Cosmo Cricket Elements from another line, some cute little chipboard flower buttons from Dollar Tree, and a set of Studio G number/alpha border stamps. I decided that instead of the large scalloped calendar from the inspiration kit, I would use my Hero Arts doily stamp. I really love this stamp, and I think it works well with the rest of the kit. I stamped it on Crushed curry cardstock with Versamark ink, then heat embossed it with white embossing powder.
My sweet mom crocheted me some tiny doilies, too, but I didn't have them when I took this photo. I also made a couple of embellished paper clips using buttons and oversized epoxy brads. You will see them both on a project or two very soon. :)
Don't forget to stop by the Counterfeit Kit challenge blog to see Meridy's kit and Bethany's kit, along with some fun links to freebies for your own kits.

Tuesday, March 8, 2011

"Get the Look"-Cosmo Cricket's Cocktail

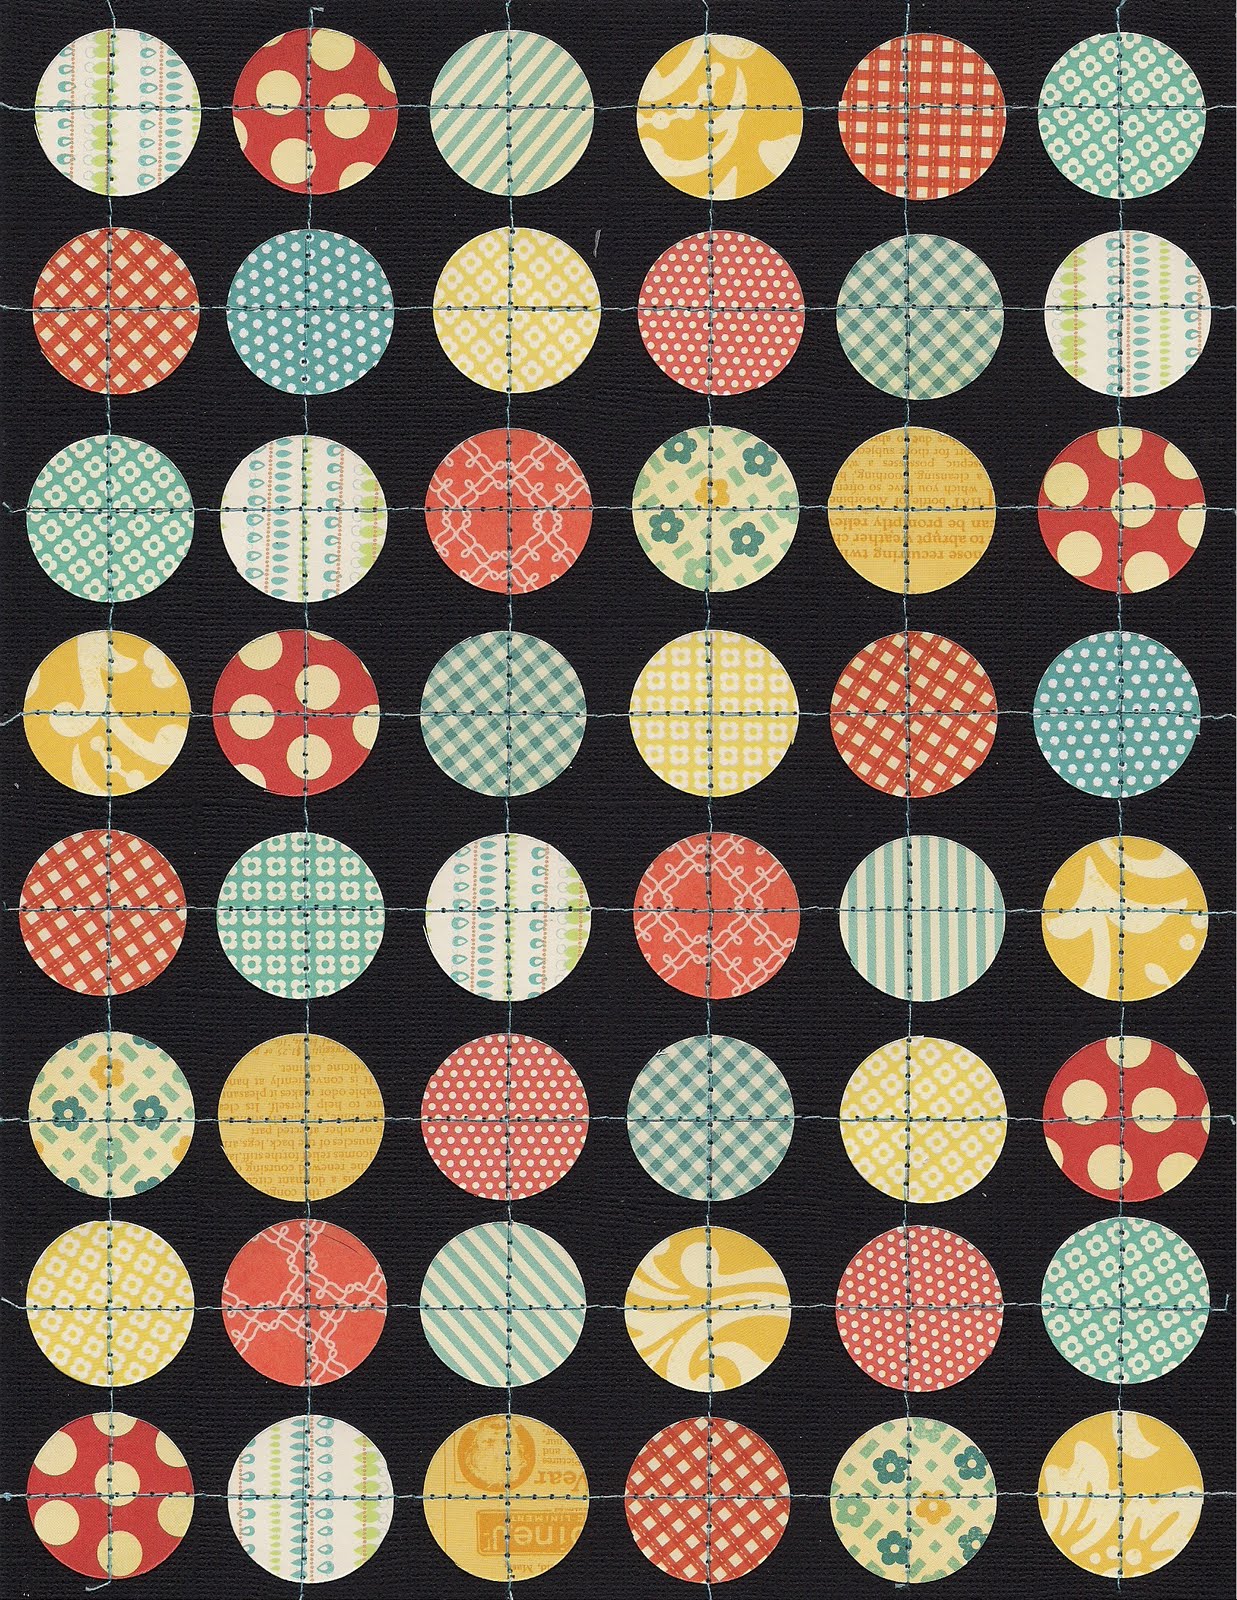
My first example of how to "get the look" of Cocktail, one of Cosmo Cricket's fun new Social Club papers, is very similar to what Bethany shows you in her tutorial HERE on the Counterfeit Kit blog. I simply machine-stitched over each row of circles, using a contrasting thread. Fun look, don't you think? Try this with other shaped punches, too-think butterflies, hearts, flowers...


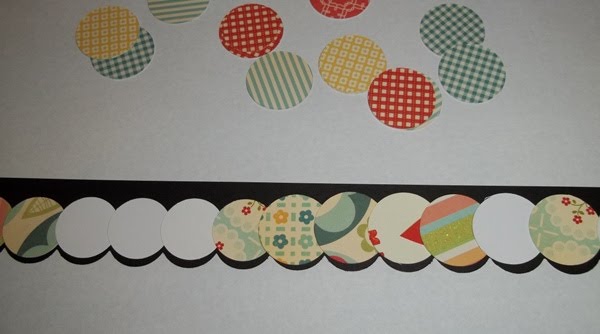
The next way to "get the look", but on a smaller scale, is to punch a solid cardstock border using a large scalloped border punch (mine is from EK Success.) I also punched lots of 1" circles from scraps.

Next, flip your cardstock border over and apply adhesive adross the entire border. I put my border on scrap paper and just ran a tape runner over the entire strip, right over the punched holes. You can see the shine of the adhesive in the photo.
Now you're just going to layer the circles over the back of the border. I overlapped each circle so you can only see one pattern through each punched hole.


Here is the finished border:


I love those pops of color! And because this was made from the materials from my kit, I'm going to use this border on a project this month, too! Thanks for stopping by!


Sunday, March 6, 2011

March Counterfeit Kit Challenge

I'm so excited to be the Guest Designer this month at the Counterfeit Kit Challenge Blog! This month's inspiration kits are from Studio Calico. That's right-I said kits, with an "s"! Not only are Meridy, Bethany and I counterfeiting the main kit, but we also are each making the FOUR add-on kits! Lots of scrappy goodness, I tell you!
Today, we are each sharing our main kits on the Counterfeit Kit Challenge blog, and I am sharing mine here with you. Here is the main inspiration kit from Studio Calico:


And here is my kit:

With this kit, I was able to match almost all of the papers very closely. The only exception was the Woodland paper (top, second from the left.) I chose a repeating aqua pattern from Basic Grey. The colors in this pattern worked well with the other papers in my kit. My cardstocks are Lagoon, Watermelon, Crushed Curry, Kraft, White, Ivory and Black. I have also included a couple of small scraps of green that matched one of my add-on kits perfectly.

When it came to the embellishments, however, I had to make some substitutions. I started with the bee stamp. I don't have a bee stamp, but I saw this pretty butterfly stamp that a friend recently gave me. I added that to my kit, and that inspired me to add the chipboard butterflies. My label stickers are from Martha Stewart, and the colors go well with my papers. Finally, instead of the larger letter stickers and title die-cut, I included a rub-on alphabet and a package of Basic Grey rub-ons. The rub-ons have lots of icons (including some bees) and sentiments which would work well for either cards or layouts.

I will also add buttons as I make my projects. I discovered in January with my first kit that it is much more practical for me to keep my buttons in their original jars and just take what I want as I go.

Thank so much for stopping by today! I can't wait to show you my add-on kits, plus I am itching to start making some projects to share! Don't forget to take photos of your kits and share them on the blog or on the Counterfeit Kit Facebook Page-we'd love to see how you're inspired by the kits!


Wednesday, February 16, 2011

My Counterfeit Kit for February

I have to admit that this month's Counterfeit Kit Challenge was a huge challenge for me. While I loved the color swatches that Bethany and Meridy posted before the kit reveal, I was very intimidated when I saw the actual inspiration kit. It was totally not my style-not the colors, the patterns, embellies, anything. But I really wanted to play along, so I thought a lot about how I could use the inspiration kit.
I decided to make a list of kit contents, but in a very general way. First, I started with the papers. Rather than try to match the papers in the inspiration kit exactly (which would have been impossible from my stash), I wrote down what the inspiration kit contained: a distressed solid, a flourish/heart pattern, a polka dot, a basic geometric pattern, and three all-over patterns. Now this was a list I could work with! I started with the flourish/heart pattern. I looked through my patterned paper and found this beautiful heart flourish paper from the Bittersweet collection from Basic Grey. This is the paper that I built my entire kit around. I had the matching stripe, so that took care of my basic geometric. I was then able to pull other papers that coordinated. I added a distressed pink solid from Basic Grey (a different line, but still matched), a kraft/cream polka dot, and three all-over patterns: the heart woodgrain (Imaginisce), cream flower (My Mind's Eye) and little fruits (an old Basic Grey line-Recess.) I added one other patterned paper-the numbers-which remind me of the bingo card in the inspiration kit. I didn't end up using the bingo cards from my January kit, so I substituted patterned paper. I think that I am more likely to use this paper than the actual bingo cards.

For embellishments, I found some great printable postcards, tags, and vintage images on Flickr. I also fell in love with the printable doily tags, which I believe were linked on Write. Click. Scrapbook. I also threw in some journaling boxes which were leftover from an SEI album kit.
I found that I didn't include enough letter stickers in my January kit, so I really loaded this kit up with some fun stickers and rub-ons. More mini alphas from Making Memories, a sheet of Basic Grey stickers that have sat untouched in my stash for 3 years (since my very first CKC class!), two different sets of rub-ons from Imaginisce and Cosmo Cricket (thank you, Eryn Hagen!), some pearl flourishes and Momenta Bubbles & Bling. The Bubbles & Bling will work great in place of the mirrored embellies in the inspiration kit, which really weren't my style.

For 3D embellies, I included some chipboard pieces from Colorbok (flourishes) and Fancy Pants, large postage stamp die-cuts which I plan to use for a card base, tiny pearl ribbon slides, and assorted trims. I am anxious to make some of the faux Prima flowers, but I will do that as I make my projects. I also plan on using buttons on my projects, but I found it was just as easy to add the buttons to my kit as I go along. My buttons are all sorted by colors in individual jars, so I can easily just pick what I want. :)

Finally, I added two sets of seriously neglected clear stamps. The smaller set is The Language of Love by Technique Tuesday. The flourishes are from Gel-a-Tins. These stamp sets will work really well with my papers, and I hope that by including them in my kit I will remember to use them!

Thanks for stopping by today. I know this was a long post. Hopefully I have inspired you to think outside of the box a little bit when it comes to finding inspiration in other kits or projects. Can't wait to start creating with my Counterfeit Kit!

Sunday, January 16, 2011

Do you like Cosmo Cricket, Copics, and Some Odd Girl? *GIVEAWAY*

Some Odd Girl is celebrating their anniversary with some great giveaways all week long! You can check it out HERE. If you leave a comment, please add that I sent you-I'd appreciate it!

Here is the "run-down" of the week's events:

Sunday, 1/16: Kick Off and Run-Down (with a little question)
Monday, 1/17: 1 Digi, 3 Ways Challenge
Tuesday, 1/18: An Odd History and Mini Blog Hop
Wednesday, 1/19: Some Odd Girls Color Challenge
Thursday, 1/20: Kids Coloring Challenge
Friday, 1/21: Some Odd Elements Challenge
Saturday, 1/22: Mini Card Challenge

Each daily challenge has its own prize, plus there are some BIG prizes, too! Hope you can play along!

Sunday, December 26, 2010

Sew Sweet Thank You Card


We are all recovering from the busy holiday, and in Maine we are gearing up for our first big snow of the season. I love snow, so this makes me very happy. :)

Our family is also taking today to play with our "toys". With 2 teenagers, this means lots of electonics, lol. My husband is enjoying the fact that he is in control of the TV today, and I am playing with lots of stamps, ink, and other crafty things. I am also happy that this is a vacation week for me, so I will get to play along with some of the online challenges that I have missed so much this past semester!

Today's card is based on two challenges: the Skipping Stones Design Sketch #56 and the Curtain Call Color Challenge: Act 62. Check out the links to these challenges and play along! For this card, I used stamps from Lawn Fawn and Unity Stamp Co., and papers from Cosmo Cricket and Momenta.

Friday, August 6, 2010

Get Sketchy #50


Last night, I freaked out because I didn't realize it was Thursday-being home every day has seriously messed with my concept of time! This morning, though, I am so happy it's Friday. they don't say TGIF for nothing! :)

I have a cute little card to share for this week's Get Sketchy challenge. Our sponsor this week was EAD Designs. This cute Little Ree Riding Hood and sentiment are from them. So cute! I wanted to use the whole set-a wolf, Granny, house-but there's only so much room on a card, lol! So I might have to make a coordinating card set, lol!

Hope you like today's card-hope you can join us and play along! You can see this week's sketch and all of the DT's cards right HERE. This week's cards are some of my favorites-those EAD stickers are just adorable!

Please join me again at 10 AM EST for my first ever "Friends with Flair" blog hop for Unity Stamp Co!

OH-I HAVE A WINNER! Wednesday's blog candy winner is: VERA YATES! This selection was made very scientifically...I drew her name out of the hat, lol! Vera, I will email you for you addy. Congrats, and have fun with your new Momenta goodies!

Friday, June 25, 2010

Get Sketchy #44


Good morning! Just a quick note: there will be two posts today, one for the Get Sketchy challenge and one for the DeNami new stamp collection. Make sure that you check out both posts for lots of inspiration! :)

First up today is the latest Get Sketchy sketch challenge. I remember when I first saw this sketch-I loved it! I think I was drawn to the large bracket-shaped design. There are just so many possibilities. You could create a flap like I did, or you could use die cut paper or a large chipboard bracket.

I used retro-style papers and die-cuts from Cosmo Cricket, cardstock by DeNami design and Momenta, and buttons by DeNami Design.

Please check out the Get Sketchy blog for this week's sketch and fabulous cards from the entire design team. Hope you can play along!

Friday, April 23, 2010

It's Get Sketchy Time!


It's Friday, so that means it's time for a new sketch and challenge over at Get Sketchy! This week's sponsor is Hot Off the Press. You may receive their catalog, Paper Wishes, in the mail like I do. I had seen the new Dazzles stickers in the catalog and thought it would be fun to try them. This week, I got that chance!

This week's sketch featured a half-circle with a scalloped border. At first glance, I imagined a frilly, feminine card. Then I saw that the bonus challenge was to make a masculine card. Hmm...I started turning the sketch and thinking about variations that would work with these stickers. After turning the sketch on its side, I pictured a campsite under the moon. After struggling with a moon, I realized that a sunrise would be the more logical choice, and I could substitute the sun rays for the scallops! And that's how this card was born.

First, I covered my card base with patterned paper from the Mr. Campy line by Cosmo Cricket and added a green cardstock strip to the bottom for grass. Next, I cut an oval and "rays" from yellow cardstock. I inked all of the edges, then assembled my sun. The tree border worked perfectly, as it allows the sunlight to peek through, just like a real camping sunrise. The tent is made from one of the Dazzles stickers on rust cardstock. I trimmed around the edge of the sticker and adhered it to my card front with foam squares. Finally, I added a sentiment-which I trimmed from the edge of the Mr. Campy paper! I love it when companies put cute sayings or designs on the edges!

I have been making a lot of cards lately for various challenges and design team assignments. I hope to be able to show them all to you soon! Just be patient... :)

Thanks for stopping by today, and I hope you get a chance to play along with us this week at Get Sketchy!

Friday, April 2, 2010

Get Sketchy #32-Thanks a Bunch


Have you noticed that there are flowers everywhere in papercrafting? Not just flower stickers or die-cuts, but some REALLY creative handmade flowers? I love the layered look, so the flowers made by layering lots of crinkly, distressed paper circles really caught my eye. I had seen directions for making them in several magazines, but couldn't get the look I wanted. Finally, after a little trial-and-error, I came up with a technique that I really like, which I used on the card above.

First, I cut several circles out of patterned paper scraps. It really doesn't matter what the patterns are, as long as the colors coordinate. I cut five different sizes of circles from Cosmo Cricket's Girl Friday collection. Then, using the edge of my scissors, I distressed the edges of the circles. To bend them into the shape that I wanted, I took each circle and "smushed" it over the tip of my finger. I did this a couple of times with each circle, until it was all nice and crinkly-looking. Finally, I layered the circles all together, used my paper piercer to poke a hole down through all of the layers, and inserted a big brad. I then used a Glue Dot to adhere the whole flower to the front of my card. The soft fuzzy leaves are actually ribbon from May Arts, one of this week's sponsors over at Get Sketchy.

I hope you will all play along with us this week! You can see the challenge and all of the team's beautiful cards HERE.

Tuesday, March 9, 2010

Glittery Thank You card


One more thank you card to share. This one uses the Girl Friday paper collection by Cosmo Cricket. To mimic the butterfly shape in the paper, I trimmed the point off a chipboard heart from Technique Tuesday to house my sentiment. I then painted it with cream acrylic paint and sprinkled it with loose iridescent glitter. I popped some of the letter stickers (from Basic Grey) up with foam squares and added some Fruit Punch stickles to the ones that were popped. Adding the stickles helped to define the letters and make it easier to read, since they overlapped. I finished the card with pink iridescent ribbon from American Crafts. I was really pleased with the result! It's fun and feminine.

Happy Easter card


I got an amazing deal on the Cosmo Cricket Girl Friday collection and I have been dying to make some cards with the new papers. They are perfect for spring! Here is an easter card that I made, combining the new papers with a little chickie image from Imaginisce. The sentiment is by Hero Arts. The image is paper-pieced, and I fussy-cut some butterflies from the paper to add here and there. My favorite part of this card, however, are the buttons. I raided my stash of buttons and used them behind the chick image. Because only half of the buttons are showing, they look like a 3D scalloped border. It was just the bit of "oomph" that the card needed.
Only 3 more days until the new Design Teams cards are featured at Get Sketchy! Be sure to check them out, along with the new sketch challenge, this Friday.

Friday, January 22, 2010

An elegant birthday card


I made this birthday card for my mother-in-law. At first, I didn't think this was my usual style. After all, it doesn't feature any cute little critters! But looking at each of the details, I can definitely see where it's got my own little touches.

For example, it features a mix of patterned papers. If you're not confident about mixing patterns, go with coordinating papers from the same manufacturer/line. That's what I did here. I've used three different patterned papers, all from Cosmo Cricket. They work well together because one has a bold print (the cream floral on the bottom) while the other two have more subtle, tone-on-tone prints. These subtle patterns work as solids, but with a little "oomph." Love the "oomph".

Next, it features some 3D elements. The chipboard label is from Technique Tuesday, and it makes a great accent when inked and stamped. The gray border is also 3D, as it is pleated and stand just slightly above the rest of the card. Very easy to make-just start with a 12" long piece of patterned paper, then score and fold at regular intervals for a polished, formal look. Or, for a fun look, fold at random intervals.

Finally, it has ribbon, sewing and stickles, three things that I find I use constantly on my projects. The ribbon is stitched along the front of the card using little loops of orange thread, which worked well with the coral patterned paper. Kind of spiced it up a bit, I think, but in an elegant way. I left the ribbon extending beyond the edge of the card. I've been doing that a lot lately-adds a little personality. And of course I added stickles! My collection of colors keeps growing. They're the perfect touch for cards-they add sparkle and personality without bulk.

Hope you enjoyed this card. I've got lots more to share soon!