Showing posts with label Imaginisce. Show all posts

Saturday, August 27, 2011

Master Forgers' Blog Hop

Welcome to your next stop on the Counterfeit Kit Challenge's August blog hop! If you didn't start at the very beginning, please head over to the Counterfeit Kit Challenge. You won't want to miss any of the fabulous projects we have for you today!
We are so honored this month to have an amazing sponsor: Allison Davis of Sketch Support! Can you believe it? Allison created a 2-page layout sketch just for us! She is also sponsoring a fun giveaway for us-check out all of the details HERE.
I had these three photos of my dad, taken on his 80th birthday in May, and I knew that they would work perfectly with my birthday add-on kit this month. They were also the perfect fit for the right page of Allison's sketch. I decided to use just the right page and tweak the design to include my title instead of the two smaller photos.
Thanks so much for stopping by today! Your next stop on the hop is Kim's blog. Have a great weekend!


Friday, July 1, 2011

June Kit Layouts

Our first challenge this month was to find inspiration in an ad. This was a tough one for me-until I saw this Keds ad in a magazine:
I loved the clean design of the layout and knew that it would work well with the photo that I wanted to scrap. I substituted some of my favorite papers and a journaling box for the extra photos in the ad. The background is embossed cardstock from Core'dinations. I lightly sanded it to show the texture. This photo is of my dad and some of his brothers and sisters (taken around 1937). My dad is the little blonde on the right, next to the pink flower. :)

Challenge #2 for the blog hop was to make an "I" page. I immediately though of my Pinterest boards, which I labeled like Apple products (like the iPod and iPhone.) My boards include iBake, iSew, iScrap, etc. I also lifted this design from a layout that I have "pinned" on my iScrap board. Notice the subtle background stamping on the gray background? I did that with my homemade chicken wire stamp! The metal clips were leftover from my May kit.

My last layout was for Challenge #3, "Get in Shape". The challenge was to use a shape as a design element on your page. I had included this large chipboard heart in my kit and knew that it would be perfect for this challenge. I inked it with Creamy Brown chalk ink and then stamped a small branch with heart-shaped leaves all over with brown ink. I also realized that I used all patterned paper for this layout-the only cardstock is my background, but you can't see it because it is covered with patterned paper strips! I can't remember ever making a project using only patterned paper. I really like the look-it reminds me of an old quilt. :) These photos are of me and my parents last summer.

Thanks so much for stopping by today. Today is my last "free" day before a very busy holiday weekend. I hope to get lots of scrapping done!

Monday, June 6, 2011

June Counterfeit Add-on Kits

I admit that I got a bit carried away this month while I was creating my add-ons for the Counterfeit Kit Challenge. I created a small add-on kit based on the add-on from Burlap & Buttercups, which I shared yesterday with my main kit. When I was looking through some of the other kit clubs, however, I found that I really loved the Studio Calico Star Dust Add-on. After I assembled my main kit, I realized that I could counterfeit the Star Dust Add-on and have it coordinate with my main kit. So this month I have a mix of two kit clubs. Here is my counterfeit Star Dust Add-On:Everything was pulled from my stash or handmade. I really wanted to include a chicken wire background stamp, but didn't have any stamps in my stash that would work. My solution: an onion bag (thanks, Lesa!) I created a frame from a scrap of chipboard, then adhered a piece of the onion bag over the center of the frame. To use this, I applied ink to one side, placed it ink-side-down on my paper, then rolled a brayer over the top. It worked great! Can't wait to try this on a project!


Here are my counterfeit tin pins. I had one package of buttons to cover leftover from last month's kit, so I decided to cover them with paper to make my version of the tin pins. I used a cloth to slightly dampen my paper, then covered the buttons. I then applied a layer of Glossy Accents, and they look very similar to October Afternoon's tin pins!
These are the tapes that I made in place of the Smash Tape. I used some old first aid tape, and stamped the checked background with teal and red ink. I then used some different stamps from my stash to add words, phrases, and numbers. I'm not quite sure what I will use these for yet, but they were fun to make! Note to self: need more first aid tape. :)

Finally, I counterfeited the Kitch brads from the inspiration kit. I simply cut or punched circles from patterned paper scraps and placed them inside the rim of these buttons. I then covered the paper with Glossy Accents. Super easy, and no one will ever know that they are buttons, not brads, once they are on my projects!

I also made a Summer Add-On so that I can play along with Kim's Summer challenge later this month. I have had my eye on Echo Park's Splash collection for a while, but I simply couldn't justify buying it when I still have lots of last summer's paper in my stash! So I decided to counterfeit the Splash collection (instead of a kit) as my Summer Add-On. I had so much fun making the journaling blocks and the ticket embellies. You can see the "real" Splash collection from Echo Park HERE. Here is my counterfeit Splash kit:
I'm excited to use my kits to make some projects! If you haven't played along with the Counterfeit Kit Challenge, you are missing out! Check it out HERE. I know you'll be inspired!

Friday, April 15, 2011

Counterfeit Kit Challenge-Memorabilia

I am so excited to share my very first chipboard mini album with you! I had so much fun making this-I can't wait to add my photos and memorabilia! I can't yet because I made this album to document my upcoming weekend at CKC-Manchester with my scrappy friend, Lesa!

The page above has a fun pocket on the right-hand side. Recognize it? I "stole" a leftover pocket from my March kit! Then I dressed it up a bit with alpha stickers, a border sticker and some gems. This pocket will hold my class stubs from Friday and any other items that I want. The pocket is 5" wide.
This page also includes a fun pocket to hold memorabilia, probably the stubs from my Copic classes. Can you spot it? It's my mini transparency! I need to tell you how I made this transparency on a budget! I recently transferred all of my Imaginisce Snag 'Em stamps to a Cropper Hopper folder. Each stamp had 2 square transparencies in the package-one printed with the design and one that was "plain". Being the frugal scrapper that I am, I had to save those plain ones! They were the perfect size for the heart stamp that I used for this kit. I stamped the image with black StazOn ink, then colored the back side with Bic Mark-It markers. Then I trimmed around the top of the heart to add a fun edge and stitched it to my paper. Cute little free pocket!

And did you see the zipper flower! It was SO easy! I made it using Becky Olsen's tutorial, but I used Glue Dots instead of the double-sided tape that she recommends. Worked great!

Thanks for stopping by to check out my mini! Don't forget to visit the Counterfeit Kit Challenge blog for the other designers' takes on this challenge!

Tuesday, March 29, 2011

Lily Pad Cards Blog Hop


Good morning, Hoppers! Welcome to your first stop on Day 2 of the Lily Pad Cards Blog Hop! Today's cardmakers are literally going to make you ribbit out loud! Each day, the hop will span 7 different blogs, then culminate on Friday, April 1, with the grand opening of Lily Pad Cards. Lily Pad Cards is a new challenge blog that will feature interviews, articles, videos, challenges, great prizes, and more!

Although Lily Pad doesn't officially bloom until April 1, 2011, you'll be able to see a new sneak peek every day until then. And you'll definitely want to drop by because there are three prize packages with a total retail value of over $800 (WOW!)-including $100 worth of gift certificates to a very popular online store! Go HERE for specific prize details and contest rules.

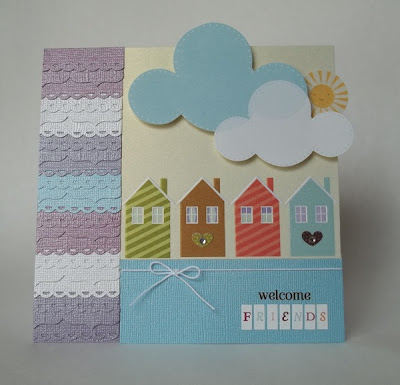
The theme of our hop is "welcome"-not only are we welcoming Lily Pad Cards to the neighborhood, but we're also welcoming all of you to come in and join in on the fun.


Thanks for being neighborly and hopping by my pad today! Your next stop on the hop is the incredibly talented Jill Foster: http://www.stampinginspiredby.blogspot.com/. If you hit a bad link, you can always hop back to the Lily Pad and click on the next link in the hop. We'd also appreciate it if you would report any bad links to webmaster@inlinkz.com.

Happy hopping!

Wednesday, February 16, 2011

My Counterfeit Kit for February

I have to admit that this month's Counterfeit Kit Challenge was a huge challenge for me. While I loved the color swatches that Bethany and Meridy posted before the kit reveal, I was very intimidated when I saw the actual inspiration kit. It was totally not my style-not the colors, the patterns, embellies, anything. But I really wanted to play along, so I thought a lot about how I could use the inspiration kit.
I decided to make a list of kit contents, but in a very general way. First, I started with the papers. Rather than try to match the papers in the inspiration kit exactly (which would have been impossible from my stash), I wrote down what the inspiration kit contained: a distressed solid, a flourish/heart pattern, a polka dot, a basic geometric pattern, and three all-over patterns. Now this was a list I could work with! I started with the flourish/heart pattern. I looked through my patterned paper and found this beautiful heart flourish paper from the Bittersweet collection from Basic Grey. This is the paper that I built my entire kit around. I had the matching stripe, so that took care of my basic geometric. I was then able to pull other papers that coordinated. I added a distressed pink solid from Basic Grey (a different line, but still matched), a kraft/cream polka dot, and three all-over patterns: the heart woodgrain (Imaginisce), cream flower (My Mind's Eye) and little fruits (an old Basic Grey line-Recess.) I added one other patterned paper-the numbers-which remind me of the bingo card in the inspiration kit. I didn't end up using the bingo cards from my January kit, so I substituted patterned paper. I think that I am more likely to use this paper than the actual bingo cards.

For embellishments, I found some great printable postcards, tags, and vintage images on Flickr. I also fell in love with the printable doily tags, which I believe were linked on Write. Click. Scrapbook. I also threw in some journaling boxes which were leftover from an SEI album kit.
I found that I didn't include enough letter stickers in my January kit, so I really loaded this kit up with some fun stickers and rub-ons. More mini alphas from Making Memories, a sheet of Basic Grey stickers that have sat untouched in my stash for 3 years (since my very first CKC class!), two different sets of rub-ons from Imaginisce and Cosmo Cricket (thank you, Eryn Hagen!), some pearl flourishes and Momenta Bubbles & Bling. The Bubbles & Bling will work great in place of the mirrored embellies in the inspiration kit, which really weren't my style.

For 3D embellies, I included some chipboard pieces from Colorbok (flourishes) and Fancy Pants, large postage stamp die-cuts which I plan to use for a card base, tiny pearl ribbon slides, and assorted trims. I am anxious to make some of the faux Prima flowers, but I will do that as I make my projects. I also plan on using buttons on my projects, but I found it was just as easy to add the buttons to my kit as I go along. My buttons are all sorted by colors in individual jars, so I can easily just pick what I want. :)

Finally, I added two sets of seriously neglected clear stamps. The smaller set is The Language of Love by Technique Tuesday. The flourishes are from Gel-a-Tins. These stamp sets will work really well with my papers, and I hope that by including them in my kit I will remember to use them!

Thanks for stopping by today. I know this was a long post. Hopefully I have inspired you to think outside of the box a little bit when it comes to finding inspiration in other kits or projects. Can't wait to start creating with my Counterfeit Kit!

Wednesday, January 12, 2011

Plum Birthday


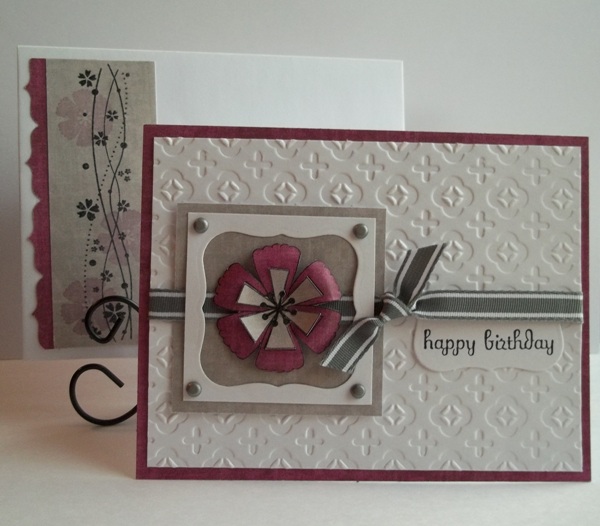
I made this elegant card for my mother-in-law's birthday. I started out with a very different design in mind, but ended with this simple design. I loved it! The embossed background was just what this card needed to make the white space as elegant as the image.

As you can see from the inspiration photo above, this card is made using the beautiful colors that Kim has selected for this week's Off the Wall Craftiness Challenge. The plum/burgandy and taupe cardstock are from SEI, and I think that the ribbon is from SEI, too. I'm not sure-I've had it in my stash forever! The paper, however, is brand-new. I just received it from CARDS magazine as a goody for being published in the September 2010 issue. :)
The design is based on this sketch from Create with Connie and Mary. The JUGS Challenge this week was to decorate and line a matching envelope for your card. It gave it such a finished look!

Tuesday, January 11, 2011

Delightful Winter Dressform


I just finished up my entry for the new Lawnscaping Challenge #1. The challenge was called "All About Snow" and entrants were encouraged to use Lawn Fawn stamps. I have 4 different sets of Lawn Fawn stamps, but none of them were winter-themed! I saw that Ashley Nguyen Newell, from the Lawnscaping DT, used a non-winter set with snowflake paper to create a cute birthday card. Great idea! I used my "Sew Lovely" dressform and the sentiment from "How Delightful". I paired these with snowy papers from Imaginisce, snowflake frames from Spellbinders, and a felt snowflake. The little ice skates were cut from patterned paper and hung over the corner of the frame. Doesn't everyone wear a little snowflake dress and matching skates when they go skating? :)
Also, remember my Peachy Birthday card? It made the Top 3 at CR84FN. Check out the new blinkie in the sidebar! :)

Sunday, January 2, 2011

Thank You and Birthday cards


First up is a different type of card than what I usually do. All black and white! This one is based on last Thursday's challenge at 365 cards. The challenge was to use a silhouette on your card, and the twist was that you could only use black and white. This was a hard one! I stamped one of my Mimi images (from DeNami Design) and just colored everything in with a black marker. I was quite pleased with the results! I then reached into my scraps and found a piece of black and white patterned paper from American Crafts. The sentiment is from Lawn Fawn. I stamped it with Versamark ink and then embossed it with white embossing powder. I thought it needed some "oomph", so I gave the girls a little bit of bling with Icicle Stickles.


I just love this next card, Peachy Birthday. This card was also made for the 365 card challenge blog. Last Wednesday's challenge was to "Keep It Simple" by only using one image, one sentiment, and one embellie. Another twist was that you could only use 1/3 of the card surface. Again, quite a struggle for me since I love embellies! I love the patterned paper cake layers, though-I think they are an embellishment in themselves. All of these papers are from an old DCWV stack-Nana's Nursery. The cake stamps are from Lawn fawn, and the sentiment is from imaginisce. The colors were inspired by Mona Pendleton's new challenge blog: CR84FN.


Finally, I have a birthday card for my Hero Arts friend, Marilyn. I missed her birthday the other day, but I still wanted to send her a pretty card. Plus, I owe her one! Marilyn sent me an adorable card last summer, so it's my turn. :) This card is based on Sketch #2 of sketch week by Lucy Abrams. I used another stamp (the dressform) from Lawn Fawn, and the same Imaginisce sentiment. I also embellished the tag a little bit with a Martha Stewart border punch. Making a dent in my stash, too-the red polka dot paper is AT LEAST 10 years old! It came in a Bitty Paper stack from Provo Craft which I got when I first started scrapbooking way back when. I loved the color and the print, though, so it never made it's way into the circular file. I love the combo of red and teal. They look great with the kraft and white, don't you think?


Friday, December 31, 2010

Garden Gnome Santa Set


I know it's early, but I am starting on Christmas cards for next year. Not because I am super-organized, but because I have tons of Christmas papers, I didn't have time to make as many cards this year, and because I found a new challenge site. :)
I am entering this set in the Christmas Cards All Year 'Round challenge for December. For this challenge, you need to make 5 Christmas cards using a Santa image or the word Santa. I chose this adorable little gnome Santa from Imaginisce.
Each of these cards will also be entered in other challenges, as well:


"Happy Holidays": The Cat's Pajamas TCP#139

Sunday, December 26, 2010

Snowbody Like You


Although I tried, I didn't finish all of my handmade Christmas cards before Christmas. I am sending out some handmade winter cards to those people who I didn't send cards to before Christmas. This is a great way to use some of my snowman stamps, such as this one from {ippity}. I paired the snowman with Imaginisce papers and felt snowflakes that I die-cut using Spellbinders dies.

This card is my entry for two challenges: Unity's Friends with Flair 57 and Critter Sketch Challenge #45.

Thanks for stopping by today!

Tuesday, December 21, 2010

Quick & Easy Ornament Cards


Yes, it's December 21st and I am still working on christmas cards. :)

These ornament cards came together in a flash this morning-just what Santa ordered! I made them in an assembly line by cutting 2.75" x 3.75" panels of white cardstock. Then, I applied glittery ornament rub-ons from Momenta. Using my paper piercer, I pierced a tiny hole thru the "hanger" of each ornament, then knotted white twine around the panel so it looks like the ornaments are hanging from the top of the panel. I added a "Happy Holidays" rub-on sentiment from Imaginisce and mounted the panels to red cards from DeNami Design. Super easy to create and relatively flat to mail!

Saturday, September 25, 2010

Two new cards to share...


from last week's challenges. I had scheduled two posts for last weekend when we were in Vermont, and I just realized that the posts have disappeared into thin air. Not quite sure what I did-I was so tired at the end of last week, who knows what happened!


I still wanted to share these cards with you. The first was my card for last week's Get Sketchy Challenge. I used papers, stacked stickers and a denim dino sticker from Imaginisce.


My second card is my "SOS" card for the Wee Memories Challenge. "SOS" stand for the card recipe in this challenge: Scallops, Orange, and String! I love the Apple Cider line from Imaginisce-the colors, the prints, and this cute little chipboard sticker. My card is very simple, but includes some fun little detials. Thanks for looking!

I hope you can come back today. Wee Memories is hosting a blog hop beginning this morning at 8 AM EST! You can start hopping on the Wee Memories blog.

Saturday, September 11, 2010

Yay-It's Scrappy Saturday!


Saturdays mean that it's time for a new Wee Memories Challenge! Our theme this week is: FALL! So appropriate, too, because it is starting to feel like fall here in Maine. The leaves are starting to change here at my house, we bought fresh apples yesterday, and I was in the mood to bake! I love this time of year. :)


Our sponsor this week is one of my favorite companies-SEI. I have a subscription to the Club SEI kit club, and let me tell you, I LOVE IT! Especially now that I am super-busy with school. It's so nice to have everything perfectly coordinated for you. Works great for layouts, cards, altered projects...you can use the instructions provided or just use the supplies for your own project (which is what I usually do.)


My project today features the fun new Apple Cider collection from Imaginisce (papers and chipboard sticker.) The ribbon and button are from DeNami Design. I love the colors in this collection. Don't you love fall as inspiration?


What kind of inspiration will you take from our photo above? My card features the colors and apples, but you can create anything that uses fall as your inspiration. Please head over to the Wee Memories blog to see the details of this challenge and to see all of the fabulous cards by our Design team Darlings!


Saturday, August 14, 2010

Wee Memories Challenge #18


Happy Saturday, everyone! I'm so glad it's the weekend. I have a busy day today because I am exhibiting at a craft fair in Augusta. Wish me luck-it's my first with my cards and my {ippity} stamps. Hoping to sell a few cards, a few stamp sets and make lots of new contacts!

I also get to share the newest challenge with you from Wee Memories. This week's challenge is to use BUTTONS, BRADS, AND BLING! (You can choose one or more of these.) We have a fabulous prize for you this week: a package of 10 Cuttlebug goodies! Our generous sponsor this week is Oh My Crafts! You can click on their logo below to see all of their yummy scrapping goodies.


For my card, I used Lawn Fawn's "Bake Me a Cake" stamp set and lots of patterned papers from Momenta. I was inspired to make this funky cake after seeing Ayana Posadas' Whimsical Cake card a few weeks ago. I added some bling (Stickles) to the candles and blingy brads (glitter brads from Imaginisce.) Is any card really complete without a little bling? :)

We'd love to have you join us this week over at the Wee Memories Challenge. You have until Friday at 11:59 PM PST to post your card. Can't wait to see what you create!

Saturday, July 24, 2010

Splash Dance Cards


Ever since I got my first Imaginisce papers and stamps years ago, I have loved making cards using those products. Their newest summer collection, Splash Dance, just makes me smile. I decided to use these stamps and papers to start making some cards for the Cards for Kids Drive happening on several different websites. I will have more info on that in a later post-something exciting will be happening soon, I promise!


I used the July sketch found on the Imaginisce blog as a starting point for these cards. I adhered pretty closely to the sketch, since it was perfect for cards. one thing that I loved about this sketch contest is that you could create either a layout or a card based on the sketch.


I paired the Imaginisce summer critters with little sentiments from Hero Arts and tried out my new Nestabilities Labels dies. Love this shape!


Thanks for stopping by today!


Friday, June 4, 2010

My new hybrid...


card, that is. I am NOT a digi girl by any means, but I really liked the digi products that the Get Sketchy DT got to work with this week. We got tons of different images to work with. My favorites were this bracket frame and the "cardboard" flowers.
I loved this week's sketch, and I knew that I wanted to have different colors shooting out from the focal point image. To do that, I widened each of the color swatches from the digi image. The swatches looked a lot like a paint sample, but when I widened them in my photo editing program I was able to get narrow strips which I printed on white cardstock and then trimmed with my paper trimmer.
The bracket and flower images were also easy to resize and print. I used my micro-tip scissors to cut each image out and adhere them to the front of my card. I mounted the doodled frame on pop dots to give it a little bit of dimension. The sentiment is actually three separate rub-ons that I applied before adhering to the card. (I'm sorry I don't know who the manufacturer is-I picked them up in the dollar bins at CKC Manchester last year.)
The final touch was to add a little bling-some rhinestones and gems from SEI, Imaginisce and Momenta.
I hope that you can play along with today's challenge over at Get Sketchy. The DT has some gorgeous cards for you to see!

Wednesday, May 26, 2010

You're a Tweetie!


I love this little stamp from DeNami Design-who could resist these cute little chickies and a fun sentiment? Even better, it is all one stamp (image + sentiment) so you don't have to stress about lining everything up. It's also versatile because it could be used for Valentine's Day or just as a little "thank you" to someone.
I am submitting this card to the Cards Blog challenge this week. The challenge was to make a card with "punny" sentiment. I am also hoping to make a card using the cute little sea creatures on my new "Create a Critter" cricut cartridge. (Try saying that one five times fast!) The Imaginisce blog asked readers to come up with some cute sayings to go along with their new line featuring sea creatures and the results were incredible! You crafty girls are so creative! You can see all of the ideas HERE.
All of the supplies used on this card are courtesy of DeNami Design.

Saturday, May 15, 2010

Teacher Thank You


This week's Get Sketchy challenge allowed me to play with a fun new product-Chalkboard Tag Stickers by DecoBugs! The stickers are black vinyl and made especially for chalk or even gel pens (like I used.) The best part: if you misspell a word or it's not straight, you can just wipe it off with a damp cloth and start again! (I did think I did this about four times with my sticker-I just couldn't seem to write in a straight line!)

When I saw the chalkboard stickers, I immediately thought about a school-themed card. I had some of this cute patterned paper from Imaginisce, so I used both sides to make a cute little thank you for a teacher. I also used a white gel pen to write my sentiment.

Hope you can join us for our challenge this week over at Get Sketchy! The prize is a fun Chalkboard Sticker prize pack from DecoBugs!