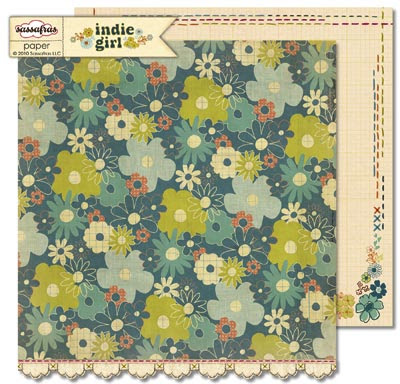
First I marked where I wanted my stitching to go. I made a straight line with a pencil 1/2" from the bottom of my patterned paper. I also made two rows of dots, 1/4" apart, over my straight line. The straight line marked where I wanted my row of straight stitches, while the rows of dots marked where I wanted my cross-stitches to go. After marking my design with a pencil, I used my paper piercer to pierce holes for stitching.
 I then used an emerald green embroidery floss to hand-stitch my design. (Please excuse the wonky colors in these photos-it has been rainy and overcast all day, and I just can't get good photos!)
 Here is my finished 12x12" paper. I repeated the design at the top so that the stitches will really frame my project. I am going to be using this paper later in the month for one of our challenge projects. Hmm...I wonder what that challenge could be? You'll have to check back to find out!
 This post is a fun one for me-it's my 300th blog post! I've shared a lot of projects over the past 2 years and met so many sweet papercrafters as a result of blogging. To celebrate, I'm going to give away a little blog candy: a Gurnsey Gingham background stamp from my Ippity shop on Etsy! Just leave a comment on this blog post by 11:59 PM EST on Sunday, and I will draw a random winner on Monday morning-it's that easy!
27 comments:
will you stitch some paper for me? LOL! looks good sweets!
See, you have so much more patience than I do. LOL No sewing for me (unless you include my fake stitches).
It looks awesome!
Bethany
Love your stitched paper you made.
OHHH! I need to stitch on some pages--LOVE it! TFS the tutorial:)
Oh Sherri...your stitching is so fun. I just love how it give dimension to the page. Thanks for the tutorial.
WOW 300 blog post! Congrats! What an fun giveaway for celebrating with your friends. I just love your creative and inspiring MOJO! Thanks for a chance.
I love your stitching - I'm not good at getting needle, thread and paper in the same room - maybe I should as I love the look!
Sew cute!!! 300?? Congrats!! Love the tutorial and my scrappy friend more!! Gonna have to give that stitching a go.... when I find my stuff..........
Brilliant! I love the stitching, and I might have to try that method myself.
Love the paper and the stitching adds a little extra to it. Thanks for the tutorial
Cute stitching - I just love that look on paper. Congrats on your 300th post.
Very cool idea. Thanks for sharing
love the stitching on the paper! I've been using my stamp to create but goign to try using thread... Congrats on your th posts..
michelesscrapycreations at yahoo dot com
Thanks for the easy step by step, this is a GREAT idea!
Wonderful tutorial - I love the whimsical bit of flair the hand stitching adds to the page!
Very nice stitching! I love the little added touch it gives. And congrats on the 300th post!
this looks great - you must be so patient! I rarely stitch but your tutorial has me inspired! Congrats on 300 posts and here's to the next 300!
great stitching
and congrats on your 300th post.
Great JOB!! Awesome stuff
I've stitched scallops but never this adorable cross pattern! Thanks for the inspiration and chance to win ippity!
Great idea! Perfect to add that extra touch to a "normal" paper.
I love the way this looks. It would be a great way to use up some of the floss we all have sitting around.
I love the cross stitch look too! Thanks for the encouragement to try this.
I love the way your stitching turned out, and I love where you put it on the paper. It really creates a great frame. Thanks for the tutorial and the giveaway!
great fun
Congratulations on your blogging milestone - great tutorial too - I'm too lazy though and just use my sewing machine ... who said it was for material not paper?!?!
I've always loved the look of stitching, but had never thought of doing real stitching on the pages!!! :D Amazing! And, congrats on 300 posts. As a beginning blogger, I am inspired! :)
Hi! Great tutorial, especially since I just tried out the sew easy.
My email is forsara at netzero dot net
Congrats on 300 posts!
Post a Comment