Tuesday, September 27, 2011

September Blog Hop

Welcome to your next stop on the Master Forgers' Blog Hop! If you didn't start at the Counterfeit Kit Challenge Blog, please click HERE so that you don't miss any of the fabulous projects along the way!
For our hop, our challenge was to try a new technique. I decided to use my patterned paper as inspiration and create an embellishment to match using my stamps. I combined a bird and leaf stamp from Ippity's "Sing a New Song" set to make my bird embellie. See the feathered tail? It's really leaves from the branch stamp! I also pieced the flower layers to match the flowers in the paper.
So, I'm not sure if this falls into the traditional category of "techniques", but it is a fun way to stretch your stamp collection! I actually used 5 different stamp sets on my card. The flower is from "Now & Always", the label is from "Season of Joy", the sentiment is from "Flowers+Friends=Priceless", the photo corners are from "Fall for You", and the bird and branch are from "Sing a New Song."
These sets are all available HERE in my Etsy shop-and remember, I'm giving one away as a prize at the CKCB! Just comment on tomorrow's blog hop and you will be entered!
Your next stop on our hop is the blog of the fabulous Kim!

Thursday, September 15, 2011

Counterfeit Kit Challenge-Stamp Your Own Patterned Paper

The Counterfeit Kit Challenge (which I am sponsoring this month) issues 3 mini challenges each month to help you use up the supplies in your monthly kit. The first mini challenge for September is to create your own patterned paper using stamps. I usually use my Ippity stamps to make focal point embellishments for cards, so creating background paper was a great way to get me thinking outside of my comfort zone. I decided that I wanted to give myself an additional challenge to create a layout instead of a card.
There are quite a few stamped elements on this layout. Can you see them all? First, I created my background paper using a piece of ivory cardstock and Tattered Rose Distress Ink. I first stamped the cardstock with the Dots for Sure background stamp. I used my Stamp-a-ma-jig to line up the dots. I then wanted to give it a bit of a vintage look, so I then stamped the paper again (randomly) with the postmark stamp from Cherish Your Dreams.

Now on to the embellishments. I used up all of the flower embellies that I made in THIS tutorial. The flower, leaf, and butterfly stamps are all from Ippity's Now & Always stamp set. I also stamped the journaling spot where my title is with one of the frames from the Season of Joy set. I just love that frame! I distressed the edges of the frame with Tattered Rose Distress Ink to tie it in with my background paper.

I hope that you are playing along with us at the Counterfeit Kit Challenge this month. It's not too late to start playing! Remember, you could win your choice of Ippity stamps if you join in! Check out the details at the Counterfeit Kit Challenge Blog, along with all of the wonderful stamping projects from the Master Forgers. I know you will be inspired!

Wednesday, September 14, 2011

Momenta Blog

I am blogging again over at Momenta today-go check it out! I have a budget-friendly, time-saving project for you! :)

Monday, September 12, 2011

Winner, Winner!

I used Random.org to choose a winner from the comments on my 300th post: Lucky #9!

Congrats, Dawn! You are the lucky winner of the Gurnsey Gingham stamp from Ippity! Please email your contact info to me at sharecropperskits@gmail.com and I will get your stamp right out to you!

Thank you to all of you for visiting my blog and leaving me sweet comments! :)

Saturday, September 10, 2011

Basket of Blooms Card

I'm blogging over on the Momenta blog today! Check it out HERE!

Wednesday, September 7, 2011

Stitched Paper Tutorial and a GIVEAWAY!

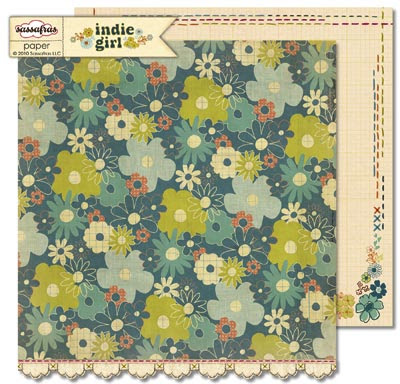
One of my favorite papers in this month's inspiration kit for the Counterfeit Kit Challenge was this paper from Sassafras Lass' "Indie Girl" collection. I have never been a fan of border prints, but I love the faux stitching on the reverse side of this paper! I love dimension on my projects, though, and I thought that actual hand-stitching would add just the right amount of detail to one of my kit papers.

First I marked where I wanted my stitching to go. I made a straight line with a pencil 1/2" from the bottom of my patterned paper. I also made two rows of dots, 1/4" apart, over my straight line. The straight line marked where I wanted my row of straight stitches, while the rows of dots marked where I wanted my cross-stitches to go. After marking my design with a pencil, I used my paper piercer to pierce holes for stitching.
I then used an emerald green embroidery floss to hand-stitch my design. (Please excuse the wonky colors in these photos-it has been rainy and overcast all day, and I just can't get good photos!)

Here is my finished 12x12" paper. I repeated the design at the top so that the stitches will really frame my project. I am going to be using this paper later in the month for one of our challenge projects. Hmm...I wonder what that challenge could be? You'll have to check back to find out!

This post is a fun one for me-it's my 300th blog post! I've shared a lot of projects over the past 2 years and met so many sweet papercrafters as a result of blogging. To celebrate, I'm going to give away a little blog candy: a Gurnsey Gingham background stamp from my Ippity shop on Etsy! Just leave a comment on this blog post by 11:59 PM EST on Sunday, and I will draw a random winner on Monday morning-it's that easy!

Tuesday, September 6, 2011

Layered Stamped Flower Tutorial

Good morning! Today I am going to show you how I made the layered, stamped flower embellies in my September Counterfeit kit. These two stamps are some of my very favorite Ippity stamps-they are from the Now & Always set (get yours HERE.)


First, gather all of your supplies: 3x3 squares of patterned paper and a 2x3 scrap of green cardstock, stamps, acrylic blocks, and black dye ink. You may also want to add pearls or gems to the finished flower. (I used 3 different patterned papers, but I have also made this flower using the same patterned paper for all three layers and it was absolutely beautiful!)


Stamp the flower on each of the patterned papers. Stamp 2 leaves on the green cardstock.


Trim the flowers and the leaves as shown. This flower stamp is perfect for layering-simply cut around the smallest flower petals for the first layer, etc.


Gently curl the flower petals with your fingers, rolling them back slightly. (This step is optional, but I like the way it gives the flowers a bit of dimension.)


Adhere the layers together by using a glue dot or glue stick just in the center of each layer. (Don't put adhesive on the petals.) Finish your flower by adding a gem or pearl to the center. Here, I've done one of each so you can see how the type and size of the gem can change the look of the flower.
You don't have to use all three layers to make your flowers, either. Here, I've made a flower using just the two smaller layers, and also a single flower using just the smallest layer. This is a great technique is you want to create a cluster of flower embellies for your project.


Here is a card that I made using one of the finished flowers:


Thank you so much for stopping by today! I hope you enjoyed the tutorial. If you would like more information on tis stamp set, please visit my Etsy shop. You can purchase this stamp set there. You could also WIN this stamp set (or a stamp set of your choice) just by playing along with the Counterfeit Kit Challenge this month! See THIS POST on the CKCB for more details.

(*Note: This card also features a frame image from the Season of Joy stamp set and a sentiment from the Just Wanted to Say set, both available in my Etsy shop.)