Showing posts with label design team. Show all posts

Monday, October 8, 2012

Tree Trio

Yup-more Christmas cards!  It's my day off from school and I am celebrating by wearing my pajamas and getting inky! LOL
 
Here's what I'm sharing over on the I Heart {ippity} blog today:
 
I created one basic card design (on the right), then "stepped it up" by using slightly different stamping techniques on the other two cards.  I also caved and cut into a piece of embossed cardstock that I have had since 2007!  I LOVED this Love, Elsie paper so much that I have been saving it, LOL!  But I caved today because it matched my olive chalk ink so beautifully, and the embossed trees looked fabby with my {ippity} tree stamps. :)
 
Thanks for popping by today!  I am working on the World Cardmaking Day challenges posted over on the Unity blog-hopefully I will have more shares later!

Monday, October 1, 2012

Naughty or Nice?

I know that there are still a couple of months until Christmas, but crafters tend to think about holidays well in advance. If you're like me and stamp all of your holiday cards, chances are it takes you several months just to build up your stash!
Today I'm sharing a Christmas card that I created for the I Heart {ippity} blog.  It comes with a built-in gift card holder on the front:
I used the adorable new holiday set from {ippity} called "Naughty. Nice. Not Sure." Seriously, how CUTE is this little Santa? I colored Santa with Copics, and paper-pieced the list with some vintage text paper from My Mind's Eye. A punched border along the top of the kraft bag adds a fun touch and lets the gift card peek out.
This design would also work great for lottery scratch tickets! The guys (and kids!) in our family LOVE scratch tickets in their stockings-what a fun way to dress them up, holiday-style!
Thanks for stopping by today!

Sunday, September 30, 2012

Some Halloweeen {ippity}...

Just a quick post today to share two Halloween projects that I created recently for the I Heart {ippity} blog.  Heather Flaherty is my {ippity} chick-and she would love to be yours, too!  Just click on her lovely photo on the Unity Stamp Co. website and shop away!
 
First up is a colorful little card:
Next is a tag perfect for attaching to a bag of Pumpkin Spice coffee:


Both projects use {ippity}'s new Halloween Itty Bitty, "Halloween Greetings".  I just love that little witch!
 
Thanks for stopping by today!  Check back in the morning for another {ippity} project-this one has a Christmas theme!


Monday, August 20, 2012

Welcome Wallhanging

Here is a sneak of my project that I'm sharing today over on the I Heart {ippity} blog:


Please hop on over and check out the full project-and leave me some love! :)

Monday, August 13, 2012

Little Birdie Sneak Peek

I am blogging today over at I Heart {ippity}-hope you will head over and check it out!  Here is a little sneak of my project:


Check it out right HERE!

Saturday, August 4, 2012

I Heart {ippity} Blog Hop!

Welcome to the I Heart {ippity} Design Team Blog Hop!

Here's the scoop on {ippity} stamps:  {ippity} is a line of rubber stamps manufactured by the Unity Stamp Co.  The {ippity} line is separate from the Unity line, but it has the same wonderful quality, and is marketed though Unity Endorsed {ippity} Chicks (reps for {ippity}).  The awesome Heather Flaherty is an {ippity} CHICK and would love to be yours!  To order {ippity}, just go to the Unity Website and on the left hand side click {ippity} - Pick a CHICK & Order.  That will take you to the {ippity} chick page where you can pick Heather Flaherty as your {ippity} Chick
If you have just happened along, please start at the beginning of our hop at www.iheartippity.com. Our AMAZING design team has lots of inspiration for you, so you can get your hands inky and have fun with {ippity} and Unity Stamps!


For my project, I started with one of my latest "Goodwill treasures".  Here is what it looked like when I bought it at Goodwill for $3.59 (blah, ick!):

And here it is now!  I removed the wooden snowflake, flipped the heart over, moved the can, and took off the icky lace and fabric.  Fresh, summer colors make it nice and cheery!


{ippity} stamp sets used: Life's Little Moments, Now & Always, and Fall for You.

And because all great blog hops need a prize, Heather is giving away a fabby prize to one person who comments on all of the DT blogs!  What are you waiting for?  Get commenting! LOL  Please also enter your info in the Rafflecopter link below so we can contact you!

 Here is the lineup in case you get lost:

                                    Sherri --->YOU ARE HERE

Also, check out the I Heart {ippity} fan page on Facebook and like us there.  Thanks for stopping by today!

Facebook Fan Page Link - www.facebook.com/PCAHeather
Pick a CHICK & Order Link -   http://unitystampco.com/ippity-chicks/default.aspx

Click HERE to complete your entry with Rafflecopter!

Sunday, July 1, 2012

I Heart {ippity} Sneak Peek...


Here is just a peek at my project for I Heart {ippity}.  The full project will post tomorrow on the I Heart {ippity} blog!  Hope you will visit!

Tuesday, September 27, 2011

September Blog Hop

Welcome to your next stop on the Master Forgers' Blog Hop! If you didn't start at the Counterfeit Kit Challenge Blog, please click HERE so that you don't miss any of the fabulous projects along the way!
For our hop, our challenge was to try a new technique. I decided to use my patterned paper as inspiration and create an embellishment to match using my stamps. I combined a bird and leaf stamp from Ippity's "Sing a New Song" set to make my bird embellie. See the feathered tail? It's really leaves from the branch stamp! I also pieced the flower layers to match the flowers in the paper.
So, I'm not sure if this falls into the traditional category of "techniques", but it is a fun way to stretch your stamp collection! I actually used 5 different stamp sets on my card. The flower is from "Now & Always", the label is from "Season of Joy", the sentiment is from "Flowers+Friends=Priceless", the photo corners are from "Fall for You", and the bird and branch are from "Sing a New Song."
These sets are all available HERE in my Etsy shop-and remember, I'm giving one away as a prize at the CKCB! Just comment on tomorrow's blog hop and you will be entered!
Your next stop on our hop is the blog of the fabulous Kim!

Thursday, September 15, 2011

Counterfeit Kit Challenge-Stamp Your Own Patterned Paper

The Counterfeit Kit Challenge (which I am sponsoring this month) issues 3 mini challenges each month to help you use up the supplies in your monthly kit. The first mini challenge for September is to create your own patterned paper using stamps. I usually use my Ippity stamps to make focal point embellishments for cards, so creating background paper was a great way to get me thinking outside of my comfort zone. I decided that I wanted to give myself an additional challenge to create a layout instead of a card.
There are quite a few stamped elements on this layout. Can you see them all? First, I created my background paper using a piece of ivory cardstock and Tattered Rose Distress Ink. I first stamped the cardstock with the Dots for Sure background stamp. I used my Stamp-a-ma-jig to line up the dots. I then wanted to give it a bit of a vintage look, so I then stamped the paper again (randomly) with the postmark stamp from Cherish Your Dreams.

Now on to the embellishments. I used up all of the flower embellies that I made in THIS tutorial. The flower, leaf, and butterfly stamps are all from Ippity's Now & Always stamp set. I also stamped the journaling spot where my title is with one of the frames from the Season of Joy set. I just love that frame! I distressed the edges of the frame with Tattered Rose Distress Ink to tie it in with my background paper.

I hope that you are playing along with us at the Counterfeit Kit Challenge this month. It's not too late to start playing! Remember, you could win your choice of Ippity stamps if you join in! Check out the details at the Counterfeit Kit Challenge Blog, along with all of the wonderful stamping projects from the Master Forgers. I know you will be inspired!

Saturday, September 10, 2011

Basket of Blooms Card

I'm blogging over on the Momenta blog today! Check it out HERE!

Wednesday, September 7, 2011

Stitched Paper Tutorial and a GIVEAWAY!

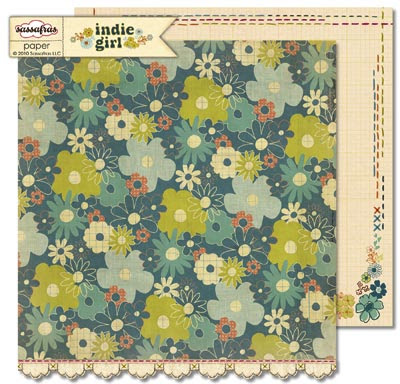
One of my favorite papers in this month's inspiration kit for the Counterfeit Kit Challenge was this paper from Sassafras Lass' "Indie Girl" collection. I have never been a fan of border prints, but I love the faux stitching on the reverse side of this paper! I love dimension on my projects, though, and I thought that actual hand-stitching would add just the right amount of detail to one of my kit papers.

First I marked where I wanted my stitching to go. I made a straight line with a pencil 1/2" from the bottom of my patterned paper. I also made two rows of dots, 1/4" apart, over my straight line. The straight line marked where I wanted my row of straight stitches, while the rows of dots marked where I wanted my cross-stitches to go. After marking my design with a pencil, I used my paper piercer to pierce holes for stitching.
I then used an emerald green embroidery floss to hand-stitch my design. (Please excuse the wonky colors in these photos-it has been rainy and overcast all day, and I just can't get good photos!)

Here is my finished 12x12" paper. I repeated the design at the top so that the stitches will really frame my project. I am going to be using this paper later in the month for one of our challenge projects. Hmm...I wonder what that challenge could be? You'll have to check back to find out!

This post is a fun one for me-it's my 300th blog post! I've shared a lot of projects over the past 2 years and met so many sweet papercrafters as a result of blogging. To celebrate, I'm going to give away a little blog candy: a Gurnsey Gingham background stamp from my Ippity shop on Etsy! Just leave a comment on this blog post by 11:59 PM EST on Sunday, and I will draw a random winner on Monday morning-it's that easy!

Tuesday, September 6, 2011

Layered Stamped Flower Tutorial

Good morning! Today I am going to show you how I made the layered, stamped flower embellies in my September Counterfeit kit. These two stamps are some of my very favorite Ippity stamps-they are from the Now & Always set (get yours HERE.)


First, gather all of your supplies: 3x3 squares of patterned paper and a 2x3 scrap of green cardstock, stamps, acrylic blocks, and black dye ink. You may also want to add pearls or gems to the finished flower. (I used 3 different patterned papers, but I have also made this flower using the same patterned paper for all three layers and it was absolutely beautiful!)


Stamp the flower on each of the patterned papers. Stamp 2 leaves on the green cardstock.


Trim the flowers and the leaves as shown. This flower stamp is perfect for layering-simply cut around the smallest flower petals for the first layer, etc.


Gently curl the flower petals with your fingers, rolling them back slightly. (This step is optional, but I like the way it gives the flowers a bit of dimension.)


Adhere the layers together by using a glue dot or glue stick just in the center of each layer. (Don't put adhesive on the petals.) Finish your flower by adding a gem or pearl to the center. Here, I've done one of each so you can see how the type and size of the gem can change the look of the flower.
You don't have to use all three layers to make your flowers, either. Here, I've made a flower using just the two smaller layers, and also a single flower using just the smallest layer. This is a great technique is you want to create a cluster of flower embellies for your project.


Here is a card that I made using one of the finished flowers:


Thank you so much for stopping by today! I hope you enjoyed the tutorial. If you would like more information on tis stamp set, please visit my Etsy shop. You can purchase this stamp set there. You could also WIN this stamp set (or a stamp set of your choice) just by playing along with the Counterfeit Kit Challenge this month! See THIS POST on the CKCB for more details.

(*Note: This card also features a frame image from the Season of Joy stamp set and a sentiment from the Just Wanted to Say set, both available in my Etsy shop.)

My September Counterfeit Kit

Today I get to share with you the kit that I made for this month's Counterfeit Kit Challenge. We are counterfeiting a beautiful kit from Sweet Peach Crop Shop this month. The inspiration kit featured the Indie Girl collection from Sassafras Lass. The blues and greens in that collection, along with the pretty florals, had a soft and feminine feel, so I chose to use lots of coordinating papers from Momenta's new Butterfly Garden collection:
I then went through my cardstock and picked out some solid cardstock colors that coordinated with my papers. My cardstock is from a mix of companies-mostly Bazzill and SEI. I also use a lot of white, ivory, and kraft cardstock on all of my projects, but I have special open shelves for that in my scraproom, so I just pull those sheets as needed.


I always find myself running short on alphas toward the end of the month, so I try to include a lot. I have pink, charcoal, and yellow alpha stickers from Basic Grey, as well as multi-colored mini alphas from Momenta. My element stickers are from Basic Grey-the journaling spots on this sheet really reminded me of those in the inspiration kit.


Finally, I added the "fun stuff". :) For embellies, I included some phrase stickers (also from Moment's Butterfly Garden collection), lots of ribbons and lace pieces, and some little ribbon flowers from the Walmart clearance bin. I had some of the Bella Blooms from the inspiration kit, so included those, too. They are a little bit bigger than what I usually use-not sure yet what I will do with them! I also loved the metal embellies from the inspiration kit, so I added a few of those, too: some large decorative brads, engraved charms and painted tab embellies.


I created some layered stamped flower embellies using some of my Ippity stamps and patterned papers-I will be back tomorrow with a tutorial for you. Be sure to check out all of the Master Forgers' kits HERE on the Counterfeit Kit Challenge Blog, and visit their personal blogs for details and to leave some love. :)


Thanks for stopping by today!

Saturday, August 27, 2011

Master Forgers' Blog Hop

Welcome to your next stop on the Counterfeit Kit Challenge's August blog hop! If you didn't start at the very beginning, please head over to the Counterfeit Kit Challenge. You won't want to miss any of the fabulous projects we have for you today!
We are so honored this month to have an amazing sponsor: Allison Davis of Sketch Support! Can you believe it? Allison created a 2-page layout sketch just for us! She is also sponsoring a fun giveaway for us-check out all of the details HERE.
I had these three photos of my dad, taken on his 80th birthday in May, and I knew that they would work perfectly with my birthday add-on kit this month. They were also the perfect fit for the right page of Allison's sketch. I decided to use just the right page and tweak the design to include my title instead of the two smaller photos.
Thanks so much for stopping by today! Your next stop on the hop is Kim's blog. Have a great weekend!


Sunday, July 31, 2011

CAS Lanterns

I am lovin' my new Copics! This card is really the first time that I have really used them since taking my class in April. I'm still learning how to shade and blend, but I was so happy with the way these lantern came out! The challenge for this card, believe it or not, was the size: 4"x9". This was the requirement for this week's CAS-ual Friday Challenge.
I used cardstock and stamps from this month's Counterfeit Kit. I can't believe the number of projects that I have made so far with this kit-more than all of the others combined, I think! So far, I have made 2 single-page layouts, a double-page layout, and 11 cards! Plus, I have 4 more layouts in mind-just need to get my photos printed! Hopefully I can get those done before the August kit is revealed!

Counterfeit Kit Cards

Today is the last day of the month, so I am TRYING to use up as much of my July Counterfeit Kit as I can. I have three layouts in mind that I want to make, but I have to print some photos. I decided to make some cards using the smaller pieces of paper and some of my embellies. The lighting on these is a little wonky...not sure WHAT'S going on with that! Someday I'll learn how to use all of the features on my camera and photo software. :)I love the coral and teal color combo, so I made this card using scraps of each and some of the Basic Grey Hopscotch stickers. I reddened the pink sticker a bit with chalk to make it match my paper, and the butterflies are stickers from the same sheet.

(Sorry-these cards are now both out for publication!)

This one's kind of corny, but hey-that's me. :) I hadn't planned on using the "boombox "paper with this kit (the reverse is my "clothesline" print), but it was cute and I thought it would stretch my kit a bit to make a boy card. I think that all of the neutrals balance out the teal and orange. I used my chalks again to recolor the white letter stickers a teal color. Those chalks have been a great resource for me this month! I also "raided" my June kit for the tiny black alphas and black cardstock scraps.


Yep-another corny sentiment. :) I saw a stamp set once that had a camera and "Oh, snap!" as the sentiment. The idea was cute and stuck with me. I knew when I made my kit that I wanted to pair that sentiment with the camera paper. I attached a ribbon camera strap to the camera that I cut from patterned paper. I wrote "I missed your birthday!" on the inside of the card using those same black tiny alphas from my June kit.

Wednesday, July 27, 2011

Christmas (in July) Layout

***Please note that this is my 2nd post for today. Please scroll down for the Master Forgers' Blog Hop post. Thank you! ***


I really wanted to use my 4th of July add-on kit from this month's Counterfeit Kit Challenge, but I didn't have any pictures from this past 4th of July. I did, however, have these photos of a trip that my son, Ryan, and I took way back in December of 2007. We went to Washington, D.C. as part of the Wreaths Across America convoy. On this trip, Ryan placed a Christmas wreath on a grave at Arlington, and he also visited the grave of a soldier he had learned about in his Enrichment Resources class. We also got to meet the soldier's wife and daughter. It was by far the most meaningful trip that either one of has ever taken.

Everything on this layout is from either my July main kit or the 4th of July add-on. I stamped the banners at the top using a photo corner stamp from {ippity}. I also used a Unity Christmas bough stamp to stamp the red strip at the bottom with watermark ink. I am entering this layout in the "My Unity Place" Banners challenge.

Master Forgers' Blog Hop

Welcome to our blog hop for the month of July! If you didn't start at the beginning of the hop, please head over to the Counterfeit Kit Challenge Blog so that you don't miss ANY of the fabulous projects that we have to share with you today!
Our challenge for this hop was to create a flower for our project. I made my flower by punching 6 circles from patterned paper. I folded each of the circles into a petal shape, then adhered them to a circular base. The center of my flower is a 1" circle punched from yellow paper, edges snipped and crumpled slightly. To finish my flower, I then used a 1/2" x 6" strip of coral patterned paper, fringed one edge, then coiled it and "puffed out" the snipped edge. The result is a fun pom-pom center for my flower.
The rest of my card is very simple, with layers of punched borders and a sentiment cut from patterned paper and handstitched to add a bit of interest. I also used my very last piece of coral seam binding (sniff, sniff!) I LOVE this color-thank you so much, Meridy, for sending it to me! It was the perfect pop of color for this card!
Your next stop on today's hop is Kim. I KNOW she has an amazing project to share with you. Thanks for hopping along with us today!

Sunday, July 24, 2011

Counterfeit Kit Challenge #3 and a Giveaway!


Challenge #3 for this month from the Counterfeit Kit Challenge is a fun one, with lots of room to make it your own. The "Gallery Standout Challenge" is to look through your favorite online gallery (such as 2Peas, Scrapbook.com, Splitcoast Stampers-ANY gallery of your choice) and find a project that inspires you. Then create your own project based on the one you love!
For my card above, I chose THIS card by Davinie Fiero, which I found on 2Peas. I switched things up just a little bit, using a little hand-cut house that I crimped and inked in place of the stamped house, but basically I lifted all of the design elements from Davinie's card. I hope that you will all play along with this challenge-don't forget to link up HERE!
Now for the giveaway! This month, we chose to counterfeit a kit from Polkadot Whimsy. One of the add-ons was the adorable Liberty Sparks kit. Guess what? Sweet Michelle Hill, the owner of Polkadot Whimsy, has sponsored a giveaway-you could win the ORIGINAL Liberty Sparks Kit! How awesome is that? Just check out THIS POST on the Counterfeit Kit Challenge blog to enter. Thanks, Michelle!


(Original Liberty Sparks Add-On Kit)

Friday, July 15, 2011

Patriotic Thank You

Today I get to share with you my creation for the Counterfeit Kit Challenge's first challenge for July. It is all about embossing-you can dry emboss or heat emboss. I chose to dry emboss, but with a twist. I wanted to emboss a coordinating border for my card. Since I wanted to make my card using leftovers from my 4th of July Add-On, I thought stars would be a fun accent. My only problem: I don't have a star embossing folder. So, I decided to make my own embossing plate.
First, I found a thin piece of chipboard (this piece came in a package of Stampin' Up patterned paper.) I trimmed the chipboard to be slightly larger than my card front. Then I used a star punch to punch 6 stars from the leftover chipboard. I arranged 3 of the stars on my chipboard base, then adhered them down. Because the chipboard was so thin, I stacked another star on top of each on the base and adhered them so that I could get a deeper impression.
Then it was time to emboss. It took a little trial-and-error to come up with the right "sandwich" for my embossing plate, but here is what worked for the thickness of chipboard that I used. You may need to adjust your "sandwich" if your chipboard or cardstock is heavier than mine. I started with Tab 1, one clear cutting pad,and the homemade embossing plate. (Make sure the star punches are facing UP.)

Next, I stacked my kraft cardstock on top of the embossing plate, making sure that the edges were placed slightly inside the edge of the embossing plate.

The next layer is the black silicone pad that I use with my Sizzix embossing plates.

The final layer is the hard black plastic pad, also used with the Sizzix embossing plates.

Carefully run all layers through your die cut machine. Here is what the finished cardstock will look like:

To highlight the embossing, I rubbed a Creamy Brown chalk ink pad over the tops of the stars and also around all of the edges of the kraft cardstock. I attached the embossed panel to the front of my card base, then embellished the card with rub-on letters and a handmade bunting embellie.

I love the Americana look, and the tri-color bunting looks slightly vintage. I can't wait to try this embellie using softer colored papers from my main kit. Thanks for stopping by!